Module Installation
Module Configuration
From the back-end of your Joomla site (administration) select Extensions->Module Manger, then click on module named JA Slideshow Lite to go to configuration panel
1. Basic Settings
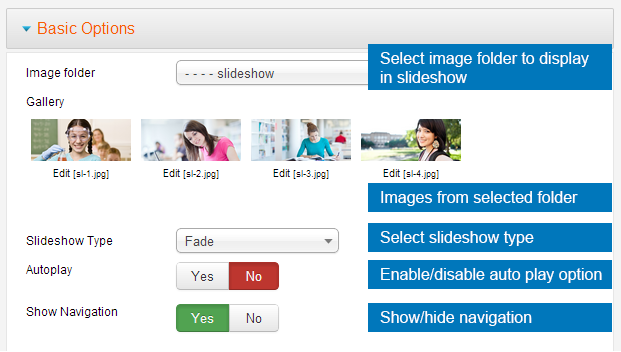
Parameter Explanation
- Image folder: select the folder that contain images you want to display in your slideshow.
- Gallery: list the images from selected image folder.
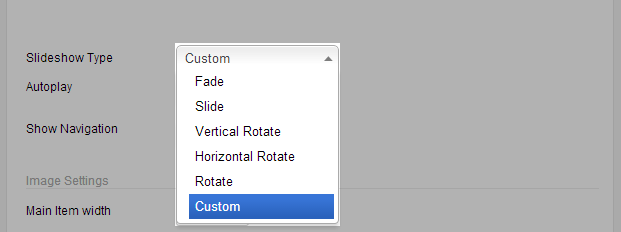
- Slideshow Type: select slideshow type: Fade, Slide, Vertical Rotate, Horizontal Rotate, Rotate and Custom. For slideshow type: Custom, it has different settings and also different front-page.
- Autoplay: you can enable or disable the auto play option for slideshow.
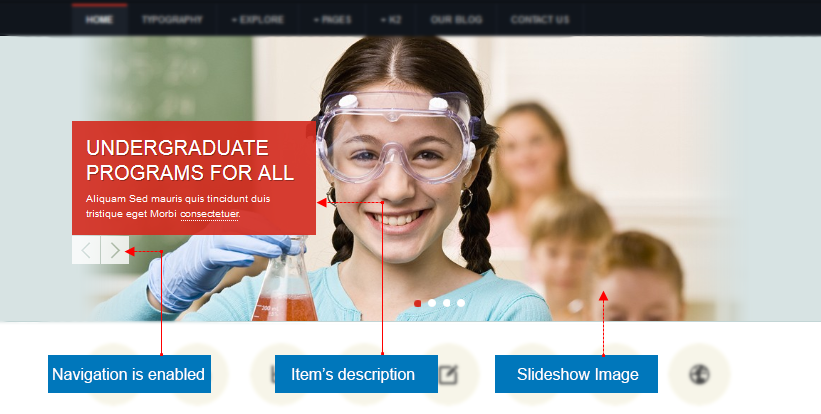
- Show Navigation: you can show or hide the navigation that allows user to move to next item or move back previous item.
Add description for slideshow item
To add description for items, click on the image in the Gallery. Then add link, description, in the popup. Use HTML Tag to style for the slideshow description.

Image folder for slideshow

2. Image Settings
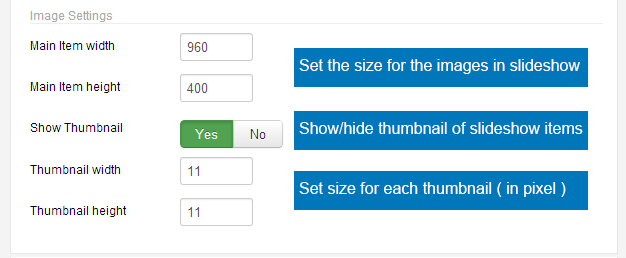
Parameter Explanation
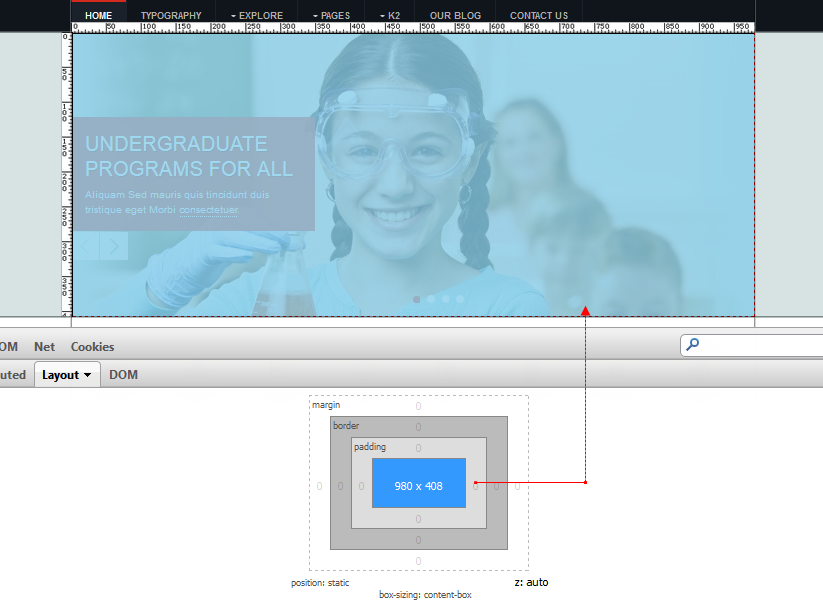
- Main Item width: set width size for main item (in pixel).
- Main Item height: set height size for main item (in pixel).
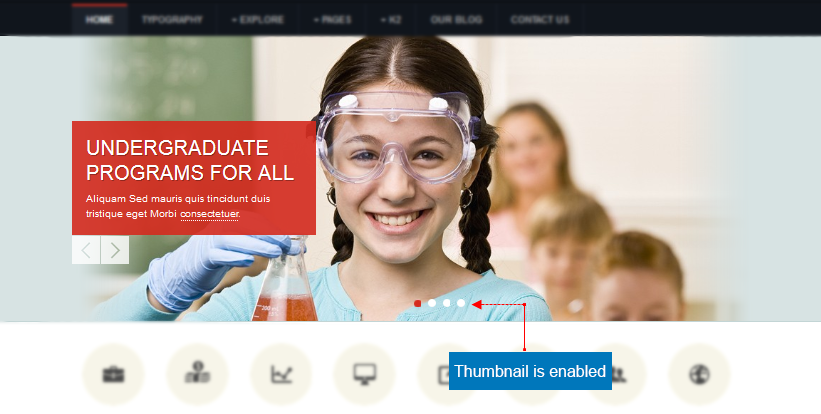
- Show Thumbnail: you can show or hide thumbnails that allows user to navigate to any item thay want.
- Thumbnail width: set the width size of thumbnail (in pixel).
- Thumbnail height: set the height size of thumbnail (in pixel).
- Slideshow with thumbnail enabled
- Slideshow size as configured
Custom Slideshow
You have seen our slideshow in JA Zite Demo, it uses JA Slideshow Lite with Slideshow Type is Custom. In this part, we will use JA Zite as a sample to show you how to configure JA Slideshow Lite when you want to use slideshow type is Custom.
JA Slideshow Lite module - Custom type with cool effects
This video shows you how JA Slideshow Lite works when its slideshow type is Custom.
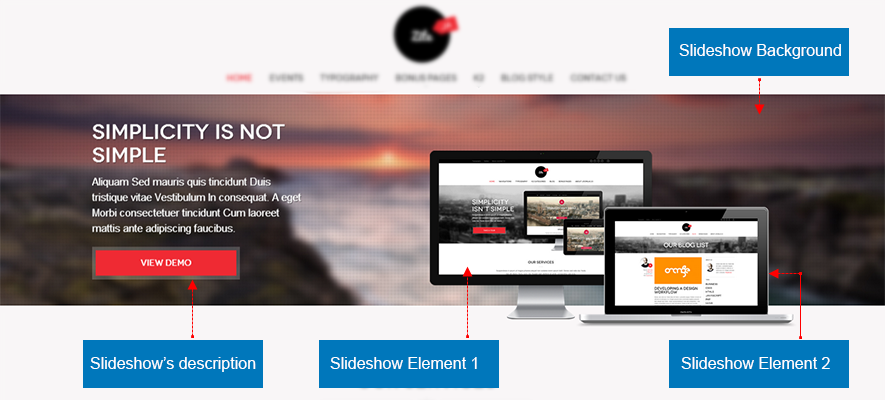
3.1 Elements in a Slideshow
- item's description
- slideshow element 1
- slideshow element 2
- slideshow background
3.2 Add description and Class for each slideshow
To add description for items, click on the image in the Gallery. In the popup, add class, link and description for each slideshow item.
- leftright
- leftleft
- rightright
- updown
- downdown
- rupdown
- rupup
The class is to define the effect for each slideshow, it is the effect for slideshow elements when they are in and out/

<h3>Simplicity is not simple</h3><p>Aliquam Sed mauris quis tincidunt Duis tristique vitae Vestibulum In consequat. A eget Morbi consectetuer tincidunt Cum laoreet mattis ante adipiscing faucibus.</p><a class="btn-action" href="http://www.joomlart.com/"><span>View demo</span></a>
3.3 Images in a slideshow
There are 3 images in a slideshow item, we call it: background image, slideshow element 1 and slideshow element 2. All the images are stored in the folder that is defined in the back-end of the module.

3.4 How to name slideshow images:
You have to name the images with right format so that the module can get right images to display in each slideshow item. We suggest you to name images as we do in the demo site (in the image below).
For the slideshow 1, the image: sl1-bg.jpg is the main image, sl1-first.png is the slideshow element 1, sl1-second.png is the slideshow element 2.

Note:
In case you don't see the module displaying in front-page, you need to check:
- Is the selected folder has images ?
- Is the module published ?
- Is the module assigned to a visible module position ?
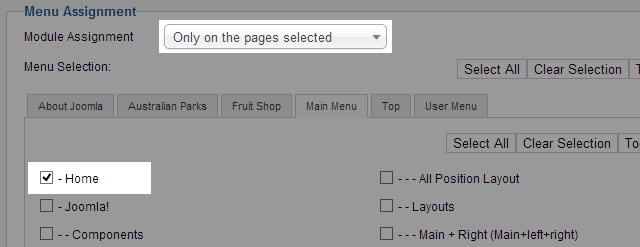
- Is the module assigned to a menu ?
JA Slideshow Lite only supports to display images from a folder, so you have to add images you want to dispaly in the module in the selected folder.

Please make sure that the module is published.

There can be many module positions listed for you to select, but make sure that the module position you select is visible in front-page.

When you want to display a module on specific menus, you need to assign it to the menus.
