I: Installation
You follow simple steps below:
1. Install the plugin via Joomla Installer
Then, the plugin is instantly available in your front-end. If you are new to this stuff, follow detailed guideline below:
—-How to install Joomla plugin
II: Configuration
1. Content Settings
Parameters Explanation:
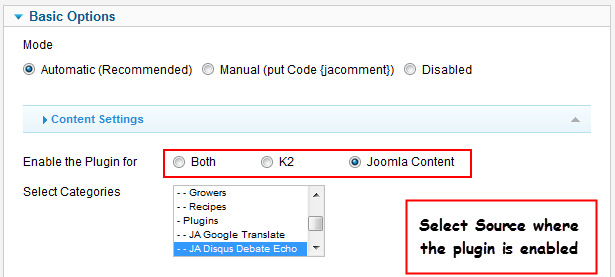
- Mode: select mode of the plugin. If selecting Automatic, the plugin will be auto enabled in the selected source. If selecting Manual (put Code {jacomment}), the plugin will be enabled in articles in the selected source and have code {jacomment} contained in the body part. And if selecting Disabled, the plugin is disabled.
- Enable the Plugin for: the plugin support 2 source type: from Joomla Content and K2. Select one from the 3 options where the articles from the source will have the plugin enabled.
- Select Categories: select categories where the items in the categories will have the plugin enabled
2. Account Settings
- Comment Provider: Select the Commenting Provider you expect and declare parameters respectively. The available comment providers include: IntenseDebate, Disqus and JS-Kit
- Intensdebate Account: (when Comment Provider = IntenseDebate) Enter Your IntenseDebate Account.
- Disqus Subdomain: (when Comment Provider = Disqus) Set the subdomain to what you registered with Disqus.
- Disqus Developer Mode: (when Comment Provider = Disqus) Enable this if you are testing behind a firewall or proxy and not yet in your live site.
- JS-Kit Domain: (when Comment Provider = JS-Kit) Set the subdomain to what you registered with JS-Kit (example: http://www.yoursite.com).
3. Comment Count Settings
Parameters Explanation:
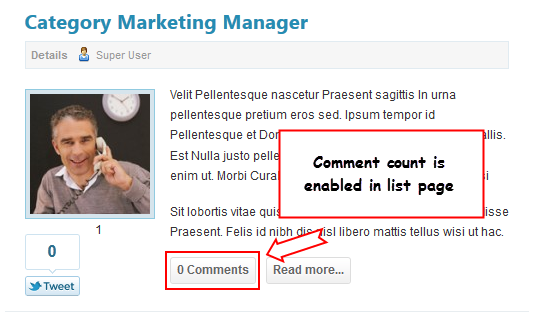
- Display Comment Count: Show comment statistic if the Comment Provider supports comment count
- Display on list pages: Display the button on the list pages.
- Display on Featured Articles Page: Display the button on the Featured Articles page (home)
Front-end Appearance
Hung Dinh 13 years, 10 months ago.


