-
AuthorPosts
-
Hung Dinh Friend
Hung Dinh
- Join date:
- September 2014
- Posts:
- 4408
- Downloads:
- 11
- Uploads:
- 189
- Thanks:
- 309
- Thanked:
- 3310 times in 3 posts
March 21, 2011 at 4:39 am #161710Userguide – JA Kyanite Template for Joomla 1.5I. Get to Know Your Template
- Everyone should read the Template’s Overview Article! This is a quick and complete overview of the template, from the colours included, to all of the powerful Joomlart complimentary extensions that come with it. You’ll also find links to the LIVE Demo Site, the Download area, as well as the Forum to ask questions.
- Need Help Getting Around Joomlart.com? We’ve created a QUICK ACCESS GUIDE for help you become a Joomlart Power User. This is a wonderful reference full of tips on quickly finding template info, demo sites, module position guides and more. We don’t want you to miss a thing!
II. Download Template and Extensions :
Check download folder for the Quickstart, Template zip and other complimentary extensions zip files.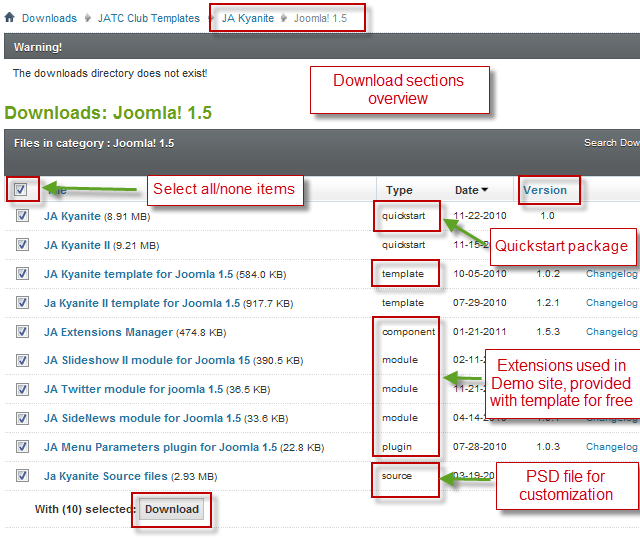
Plan your site Development.
- Making a New Site ? – If you are planning to make a new site, then use our Quickstart package to clone the demo site and replace the demo content with yours. Check How to install Quickstart Package.
- Installing on your live site ? – If you are planning to use this template on your already live site. Then you should follow How to make your site look like demo site guide first to know about the steps involved. Then you can follow up the userguide below.
The user guide covers the following aspects :
- Installing Template on your Joomla
- Installing T3 V1 Framework (JA menu parameters)
- Installing complimentary / included extensions.
- Custom HTML Modules.
- Mega Menu configs
Hung Dinh Friend
Hung Dinh
- Join date:
- September 2014
- Posts:
- 4408
- Downloads:
- 11
- Uploads:
- 189
- Thanks:
- 309
- Thanked:
- 3310 times in 3 posts
March 21, 2011 at 4:43 am #3824161. Installing Template on your Joomla
- Browse and Download : Go To Download Folder of JA Kyanite for J15 and download the Template zip file. Refer this screenshot for overview of download folder.
- Install the Template : Now install the Template to your Joomla 1.5 . Follow This Guide if you are new.
Template Configuration :
JA Kyanite template will install with Settings used in the demo site. So you can delay the configuration until you complete the setup (installing the other modules / plugins used in the demo site).
Once, you have completed the setup, you can come back to the template backend and check the various options for customizing your template. Refer this Template Config Guide for options to customize your installed template.
Links to resources on T3 Framework plugin for J1.5.x and advance configs :- Overview
- Developer Guides
- Customization FAQs
- Mega Menu – A missing menu system for Joomla!
- Video Tutorials (works for Joomla 1.5 also)
2. Installing T3 Framework Plugin for Joomla 1.5.x (T3 system plugin)
Download the JA Menu Parameters Plugin (aka T3 System plugin), install and enable it.
If you are new, then follow This Guide to learn to install plugins in Joomla.
Hung Dinh Friend
Hung Dinh
- Join date:
- September 2014
- Posts:
- 4408
- Downloads:
- 11
- Uploads:
- 189
- Thanks:
- 309
- Thanked:
- 3310 times in 3 posts
March 21, 2011 at 4:46 am #3824173. Installing complimentary / included extensions and Demo configurations :
- Free Extensions : (aka complimentary / included extensions). We use many extensions in our demo site to provide greater flexibility and features. These are provided for free to our members.
- Custom HTML Module : To match the design of the template, we also style (CSS) for Custom HTML modules using different div classes. You will need to check the HTML codes and make sure to use the recommended HTML markup to get correct display. We provide the HTML code in this userguide.
Know your Module Positions :
- View Module Position Image (used positions only).
- Use Module Position Overlay in Template (used & empty module positions).
TIP : Read more about Checking and Finding Module Positions in Templates.
Installing and Configuring Included Extensions :
List of extensions used in JA Zeolite II Template Demo :
- JA Slideshow II module
- JA Twitter module
- JA SideNews module
- JA Menu Parameters plugin
- JA Extensions Manager
IMPORTANT : We provide settings screenshot from the demo site. Make sure you configure your modules / plugins with the same configs to achieve demo site alike style / functions.
Hung Dinh Friend
Hung Dinh
- Join date:
- September 2014
- Posts:
- 4408
- Downloads:
- 11
- Uploads:
- 189
- Thanks:
- 309
- Thanked:
- 3310 times in 3 posts
March 21, 2011 at 5:05 am #382420Configurations for Modules / Plugins as used in Demo Site.
1. JA Slideshow II module.
Module Position : top

Module Suffix : NOT USED
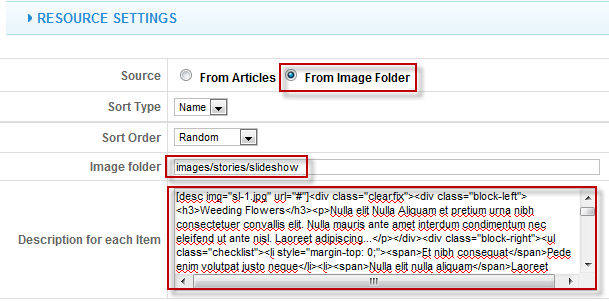
Backend settings for this module as in Demo site
Note: As you see in the image above, the slideshow’s source is From Image Folder, taken from the images/stories/slideshow folder
Slideshow images should be in 970×340 pixels
Step 1: Create slideshow image directory
Go to: yoursiteimagesstories, create the slideshow directory then copy images that will be used for the slide show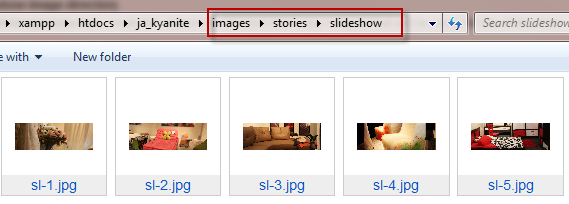
Step 2: Enter descriptions for each image if you want.
You enter descriptions for each image with format as below:
<div class=”clearfix”><div class=”block-left”><h3>your heading</h3><p>your description</p>
Example
<div class=”clearfix”><div class=”block-left”><h3>Weeding Flowers</h3><p>Nulla elit Nulla Aliquam et pretium urna nibh consectetuer convallis elit. Nulla mauris ante amet interdum condimentum nec eleifend ut ante nisl. Laoreet adipiscing…</p>
Front-end appearance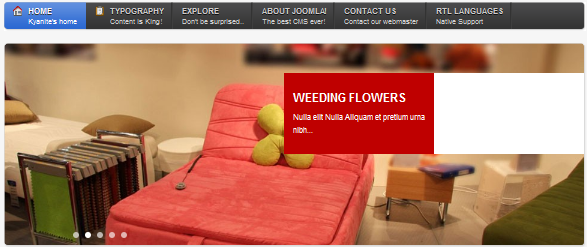
2. JA Twitter module
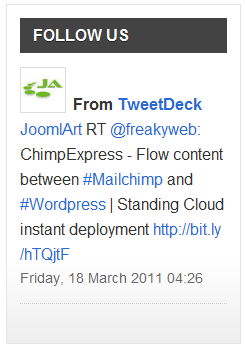
In the Demo site, this module is named: Follow usModule Position : right
Module Suffix : NOT USEDBackend settings for this module as in Demo site
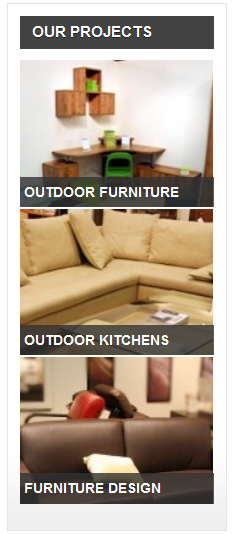
3. JA SideNews moduleIn the Demo site, this module is named: Our projects
Module Position : right

Module Suffix : NOT USED
Backend settings for this module as in Demo site
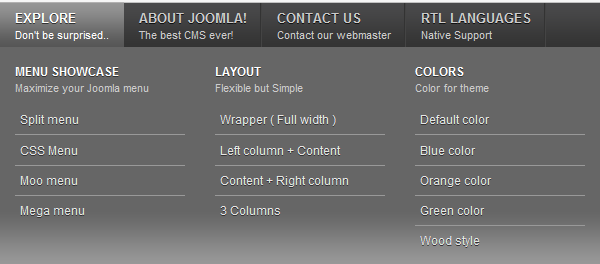
4. JA Menu Parameters plugin
Backend settings for this plugin as in Demo site
Hung Dinh Friend
Hung Dinh
- Join date:
- September 2014
- Posts:
- 4408
- Downloads:
- 11
- Uploads:
- 189
- Thanks:
- 309
- Thanked:
- 3310 times in 3 posts
March 21, 2011 at 10:07 am #3824914. Custom HTML Module
1. About us
Module Position : right

Module Suffix :NOT USED
<p><img src=”images/stories/demo/sam-17.jpg” border=”0″ alt=”Welcome” /></p>
<p><a href=”#” title=”Sample link”>Nonummy sed</a> the ipsum laoreet maecenas nibh justo at tortor pulvinar.</p>
<p><a class=”readon” href=”#” title=”Sample link”>Read more…</a></p>
Backend settings for this module as in Demo site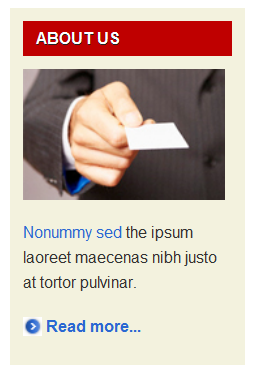
2. Best sofa
Module Position : user1

Module Suffix :NOT USED
<p><img src=”images/stories/demo/img-13.png” border=”0″ alt=”Sofa” /></p>
Backend settings for this module as in Demo site
3. Bedroom
Module Position : user2

Module Suffix :NOT USED
<p><img src=”images/stories/demo/img-14.png” border=”0″ alt=”Sofa” /></p>
Backend settings for this module as in Demo site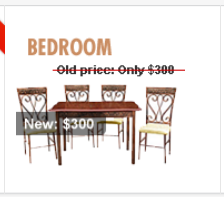
4. Bathroom
Module Position : user3

Module Suffix :NOT USED
<p><img src=”images/stories/demo/img-15.png” border=”0″ alt=”Sofa” /></p>
Backend settings for this module as in Demo site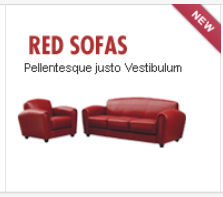
4. Kitchen room
Module Position : user4

Module Suffix :NOT USED
<p><img src=”images/stories/demo/img-16.png” border=”0″ alt=”Sofa” /></p>
Backend settings for this module as in Demo site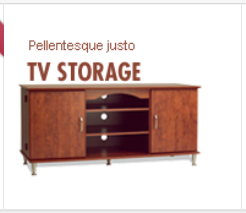
5. User 5
Module Position : user5

Module Suffix :NOT USED
<p><img src=”images/stories/demo/img-17.png” border=”0″ alt=”Sofa” /></p>
Backend settings for this module as in Demo site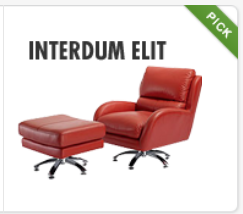
6. Contact us
Module Position : user9

Module Suffix :NOT USED
<h4 style=”margin: 5px 0;”>J.O.O.M SOLUTIONS CO., Ltd</h4>
<ul>
<li><strong>Address: </strong>Suite 3005 – T34 Building – Trung Hoa – Nhan Chinh Hanoi</li>
<li><strong>Telephone: </strong>(84 4) 2212820</li>
<li><strong>Fax: </strong>(84 4) 2212821</li>
<li><strong>Hot line: </strong>+84(0)904131419</li>
<li><strong>Email: </strong>info@joomlart.com</li>
</ul>
Backend settings for this module as in Demo site
Hung Dinh Friend
Hung Dinh
- Join date:
- September 2014
- Posts:
- 4408
- Downloads:
- 11
- Uploads:
- 189
- Thanks:
- 309
- Thanked:
- 3310 times in 3 posts
March 21, 2011 at 10:11 am #382493Typography Styles – Supported in JA Kyanite Template :
JA Kyanite template comes with multiple typography styles for headings, content, tables, buttons, quotes, lists and so on…
You can view the Typography Page in the Demo site: Typography page
And this is HTML code:11912
You can use the above HTML code for making similar page in your site and refer to the codes for using Typography.
IMPORTANT : These typography styles are specific to JA Kyanite template and if you use them in your content and later decide to change the template, the styles will be broken, as these styles depend upon the template based css files (typo.css). We recommend using minimum typography, if you plan to change your template in future.
Hung Dinh Friend
Hung Dinh
- Join date:
- September 2014
- Posts:
- 4408
- Downloads:
- 11
- Uploads:
- 189
- Thanks:
- 309
- Thanked:
- 3310 times in 3 posts
March 21, 2011 at 10:33 am #3825025. Mega Menu Configs
JA Kyanite Demo site uses Mega Menu. Follow the guide below to create dropdown menu as in Demo site
Frontend Appearance :
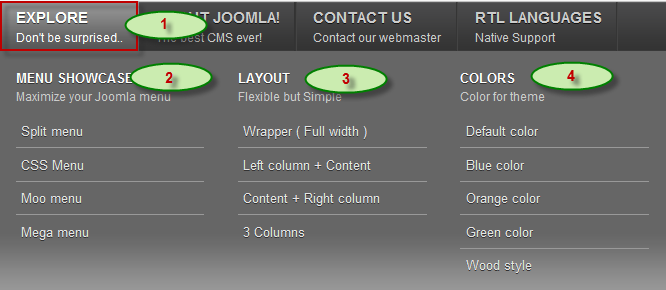
Backend Settings :
Main Menu Items (parent & child)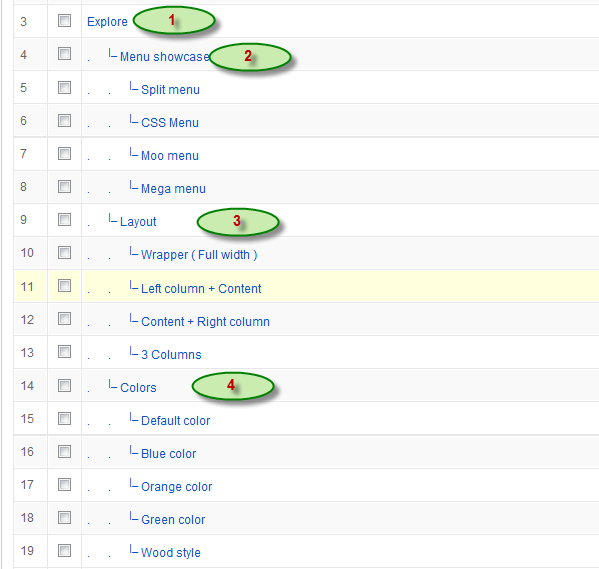
- Item 1: Explore – Menu Backend Settings
- Item 2: Menu showcase – Menu Backend Settings
- Item 3: Layout – Menu Backend Settings
- Item 4: Colors – Menu Backend Settings
Frontend Appearance :
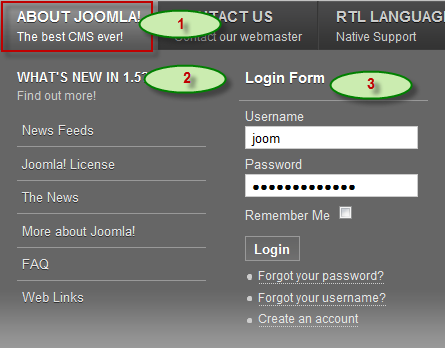
Backend Settings :
Main Menu Items (parent & child)
- Item 1: About Joomla! – Menu Backend Settings
- Item 2: What’s New in 1.5? – Menu Backend Settings
- Item 3: Mod Login – Menu Backend Settings
Hung Dinh Friend
Hung Dinh
- Join date:
- September 2014
- Posts:
- 4408
- Downloads:
- 11
- Uploads:
- 189
- Thanks:
- 309
- Thanked:
- 3310 times in 3 posts
March 21, 2011 at 10:36 am #382503Aticle Configuration
We use some special tags to set image border and caption in our articles, example:

If you want to have a image border like the articles shown in our Demo site, please add this code below into your article:
<img class=”caption” src=”your image source” border=”0″ alt=”your image title” title=”your image title” align=”left” />Example:
<img class=”caption” src=”images/stories/demo/sam-12.jpg” border=”0″ alt=”Sample image” title=”Sample image” align=”left” />Hung Dinh Friend
Hung Dinh
- Join date:
- September 2014
- Posts:
- 4408
- Downloads:
- 11
- Uploads:
- 189
- Thanks:
- 309
- Thanked:
- 3310 times in 3 posts
March 21, 2011 at 10:37 am #382504The above userguide should help one in replicating the Demo site settings for the template and extension on their site.
Recommended :
If you are new or are confused. We recommend installing Quickstart on your localhost and use it as reference for configs. This is the best way to work with any template.
Links to all the resources are provided above, you should carefully read them to take the maximum advantage of our products.Support :
Please raise your support queries in the forum and make sure you follow the support guidelines. We spend more time in getting the information from user incase the support guidelines are not followed.
If you have any questions regarding this userguide, please ask in the forum. This thread is locked.
-
AuthorPosts
This topic contains 9 replies, has 1 voice, and was last updated by Hung Dinh 13 years, 9 months ago.
We moved to new unified forum. Please post all new support queries in our New Forum

