-
AuthorPosts
-
Hung Dinh Friend
Hung Dinh
- Join date:
- September 2014
- Posts:
- 4408
- Downloads:
- 11
- Uploads:
- 189
- Thanks:
- 309
- Thanked:
- 3310 times in 3 posts
April 28, 2011 at 7:36 am #163319Joomla 1.5 Userguide – JA Minisite for J151. Get to Know Your Template
- Need Help Getting Around Joomlart.com? We’ve created a QUICK ACCESS GUIDE for helping you to become a Joomlart Power User. This is a wonderful reference, full of tips on how to quickly find the template info, demo sites, module position guides and more. We don’t want you to miss a thing!
2. Plan your website Development.
- Making a New Website? – If you are planning to make a new website, then use our Quickstart package to clone the demo site and replace the demo content with yours. Check How to install Quickstart Package.
- Installing on your live website? – If you are planning to use this template on your already live website, you should follow How to make your site look like demo site guide first to learn about the steps involved. Then you can follow the userguide below.
The user guide covers the following aspects:
- Installing Template on your Joomla system
- Installing T3 Framework 2 Plugin
- Installing complimentary / included extensions
- Custom HTML Modules
- Using Template Typography
- K2 Modules setup
- Mega Menu configs
- K2 Installation / configuration
Hung Dinh Friend
Hung Dinh
- Join date:
- September 2014
- Posts:
- 4408
- Downloads:
- 11
- Uploads:
- 189
- Thanks:
- 309
- Thanked:
- 3310 times in 3 posts
April 28, 2011 at 7:41 am #3887431. Installing the Template on your Joomla system
- Install the Template:Install the Template on your Joomla 1.5 system. Follow This Guide if you are not familiar with the installation procedure.
Template Configuration:
JA Minisite template will install with Settings used on the demo website, so you can postpone the configuration until you complete the setup (install other modules / plugins used in the demo website).
Once, you have completed the setup, you can come back to the template backend and check the various options for customizing your template. Refer to this Universal T3 V2 Backend Config Guide for options on how to customize your installed template.
Please Note: T3 V2 template configurations are same in Joomla 1.5 and Joomla 1.6, so the above guide link is valid for both.
Links to resources on T3 V2 Framework templates and advanced configurations :- Overview
- Developer Guides
- Customization FAQs
- Mega Menu – A missing menu system for Joomla!
- Video Tutorials (valid for Joomla 1.5 and 1.6)
2. Installing T3 Framework 2 Plugin (T3 system plugin)
Download and install T3 Framework 2 Plugin (aka T3 System plugin). Follow this guide if you are not familiar with the installation procedure. After the plugin is installed, enable it as described in the same guide.
Hung Dinh Friend
Hung Dinh
- Join date:
- September 2014
- Posts:
- 4408
- Downloads:
- 11
- Uploads:
- 189
- Thanks:
- 309
- Thanked:
- 3310 times in 3 posts
April 28, 2011 at 7:46 am #3887473. Installing complimentary / included extensions and Demo configurations :
- Free Extensions: (aka complimentary / included extensions). We use many extensions on our demo site to provide greater flexibility and features. These are provided for free to our members.
- Custom HTML Module: To match the design of the template, we also style (CSS) for Custom HTML modules using different div classes. You will need to check the HTML codes and make sure to use the recommended HTML markup to get correct display. We provide the HTML code in this userguide.
- 3rd Party Extensions: This template uses custom styles for K2 Component. You will need to download K2 from the developers website and install it referring to the userguide below. JA Map plugin (part of JAEC Club) is also used on the Contact Us page. This plugin is available to Developer members and JAEC members only.
Know your Module Positions :
- View Module Position Image (used positions only).
TIP: Read more about Checking and Finding Module Positions in T3 Templates.
Installing and Configuring Included Extensions :
List of modules / plugins used in JA Minisite Template Demo :
- JA SlideShow II Module
- JA Content slider module
- JA Bulletin Module
- JA Sidenews Module
- JA Tabs Module
- JA T3 System plugin
- JA Tabs plugin
- JA Comment plugin
- JA jaommentoff plugin
- JA jacommenton plugin
- JA Extensions Manager component
- JA Comment component
IMPORTANT: We provide the screenshot of the settings used on our demo website. Make sure you configure your modules / plugins in the same manner to achieve demo site alike style / functions.
Hung Dinh Friend
Hung Dinh
- Join date:
- September 2014
- Posts:
- 4408
- Downloads:
- 11
- Uploads:
- 189
- Thanks:
- 309
- Thanked:
- 3310 times in 3 posts
April 28, 2011 at 8:55 am #388774Configurations for Modules / Plugins as used on our Demo Website.
1. JA SlideShow II Module.
Module Position: slideshow

Module Suffix: NOT USED
Backend Settings for Slideshow II Module as in demoNote: As you can see in the image below, the slideshow’s source is set to From Image Folder and images are retrieved from the images/stories/slideshow/banner folder
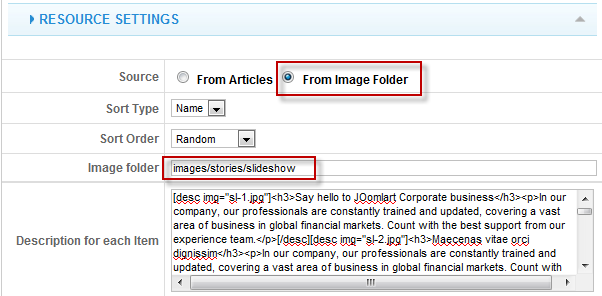
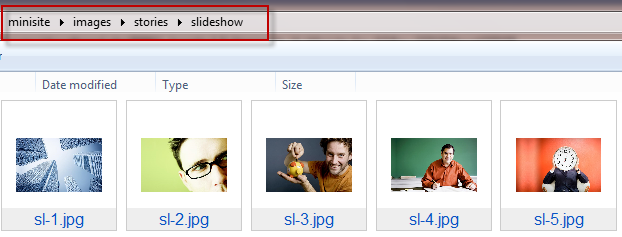
Create slideshow image directory
Go to: yoursite/images/stories, create the slideshow directory there and then copy images that will be used for the slideshowDimensions of the Slideshow images should be 640×400 pixels
Description for each Item
To insert a link to the description and image…replace url=”#” with your link (ex. url=”http://www.yourlink.com”)<h3>Say hello to JOomlart Corporate business</h3><p>In our company, our professionals are constantly trained and updated, covering a vast area of business in global financial markets. Count with the best support from our experience team.</p>
<h3>Maecenas vitae orci dignissim</h3><p>In our company, our professionals are constantly trained and updated, covering a vast area of business in global financial markets. Count with the best support from our experience team.</p>
<h3>Etiam interdum faucibus lacus</h3><p>In our company, our professionals are constantly trained and updated, covering a vast area of business in global financial markets. Count with the best support from our experience team.</p>
url=”#”<h3>Mauris et erat magna</h3><p>In our company, our professionals are constantly trained and updated, covering a vast area of business in global financial markets. Count with the best support from our experience team.</p>
<h3>Maecenas vitae orci dignissim</h3><p>In our company, our professionals are constantly trained and updated, covering a vast area of business in global financial markets. Count with the best support from our experience team.</p>
<h3>Etiam interdum faucibus lacus</h3><p>In our company, our professionals are constantly trained and updated, covering a vast area of business in global financial markets. Count with the best support from our experience team.</p>
<h3>Say hello to JOomlart Corporate business</h3><p>In our company, our professionals are constantly trained and updated, covering a vast area of business in global financial markets. Count with the best support from our experience team.</p>
<h3>Mauris et erat magna</h3><p>In our company, our professionals are constantly trained and updated, covering a vast area of business in global financial markets. Count with the best support from our experience team.</p>
Front-end appearance

2. JA Content Slider 2 Module
This module in demo site is named: Other Entries
Module Position: content-bottom

Module Suffix: NOT USED
Backend settings for this module as in Demo
Front-end Appearance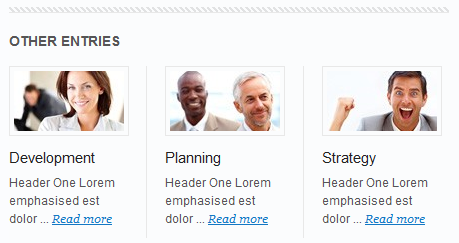
3. JA Bulletin Module.
There are 2 JA Bulletin modules used in demo site is named: Latest and Most Read3.1 Latest
Module Position: content-bottom

Module Suffix: NOT USED
Backend settings for this module as in Demo site
Front-end Appearance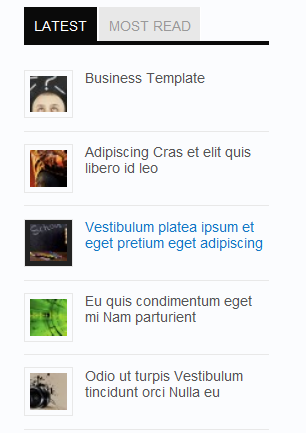
3.2 Most Read
Module Position: ja-tabs

Module Suffix: NOT USED
Backend settings for this module as in Demo site
Front-end Appearance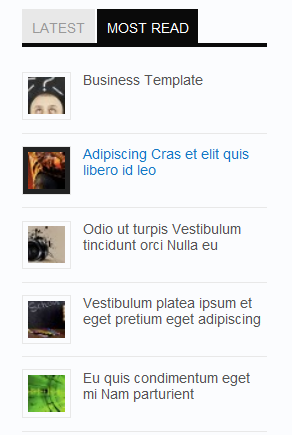
4. JA Side News Module.
Module Position: right

Module Suffix: _slidenews
Backend settings for this module as in Demo site
Front-end Appearance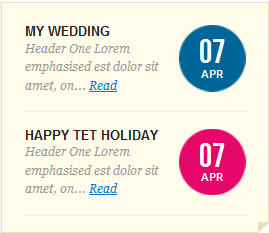
5. JA Tabs Module & JA Tabs Plugin
To display tabs in front-end, we need to configure both JA Tabs module and JA Tabs plugin
5.1 Enable JA Tabs plugin
Backend settings5.2 JA Tabs Module
Module Position: left

Module Suffix: _slidenews
Backend settings
Front-end Appearance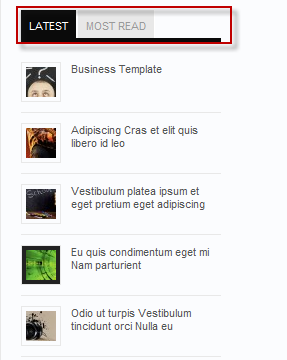
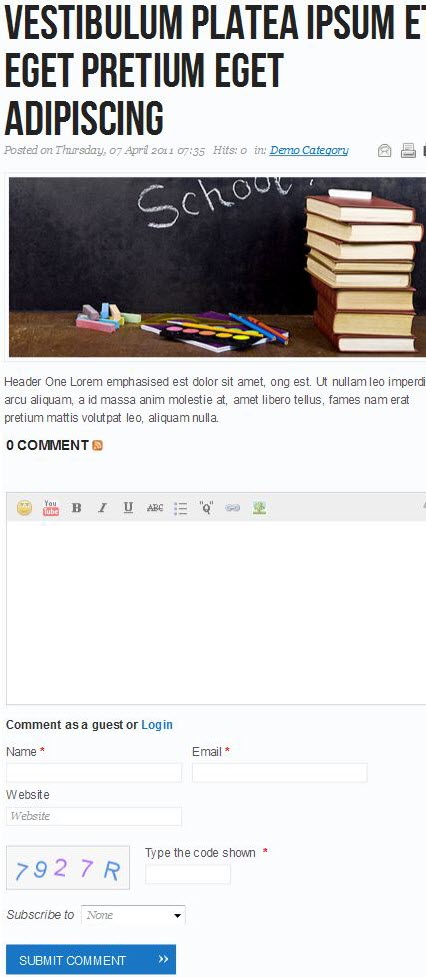
6. JA Comment Plugin
Front-end Appearance
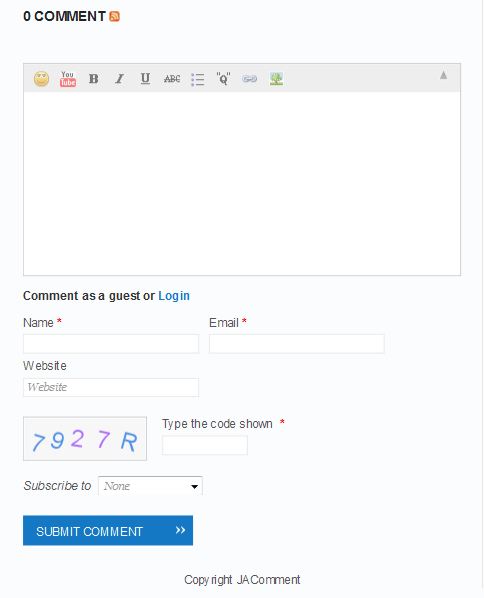
7. JA jacommentoff plugin
Disable comment on a specific article
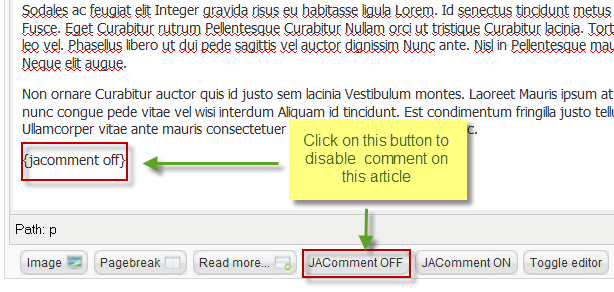
8. JA jacommenton plugin
Enable the plugin in a specific article
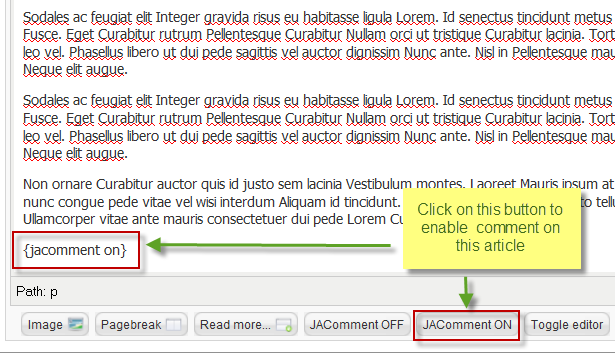
Front-end Appearance
Hung Dinh Friend
Hung Dinh
- Join date:
- September 2014
- Posts:
- 4408
- Downloads:
- 11
- Uploads:
- 189
- Thanks:
- 309
- Thanked:
- 3310 times in 3 posts
April 28, 2011 at 9:23 am #388784Custom HTML Modules
If you are not sure how to use Custom HTML Modules or accessing HTML Editor view. Read this Guide.
We will provide you with the HTML Code (markup) for reference below, you will need to replicate exactly and then change your content. Remember HTML code has special div classes, which are required for demo alike display.
1. Blockquote
Module position: user5

Module Suffix : NOT USED
<blockquote class=”blockquote-1″>Suspendisse potenti. Mauris in orci eget risus condimentum tristique. Vivamus egestas, neque ac posuere egestas, ante justo malesuada nunc, elementum pretium mi lacus sit amet turpis curabitur scelerisque sodales. Pellentesque non sapien quis ligula iaculis vestibulum.</blockquote>

2. Best Support
Module position: user4

Module Suffix : NOT USED
<p><img class=”left” src=”images/stories/demo/ico_04.png” border=”0″ alt=”Best Support” align=”left” />Header One Lorem emphasised est dolor sit amet, ong est…</p>
3. Advantages
Module position: user3

Module Suffix : NOT USED
<p><img class=”left” src=”images/stories/demo/ico_03.png” border=”0″ alt=”Advantages” align=”left” />Header One Lorem emphasised est dolor sit amet, ong est…</p>
4. How It Work?
Module position: user2

Module Suffix : NOT USED
<p><img class=”left” src=”images/stories/demo/ico_02.png” border=”0″ alt=”How It Work?” align=”left” />Header One Lorem emphasised est dolor sit amet, ong est…</p>
5. Why Choose Us?
Module position: user1

Module Suffix : NOT USED
<p><img class=”left” src=”images/stories/demo/ico_01.png” border=”0″ alt=”Why choose us?” align=”left” />Header One Lorem emphasised est dolor sit amet, ong est…</p>
6. Admin
Module position: user10

Module Suffix : NOT USED
<p><img class=”left img-border” src=”images/stories/demo/sample_11.jpg” border=”0″ alt=”Sample image” align=”left” />DZUC</p>
<p><a href=”#” title=”Codaautomotive”>Codaautomotive</a></p>
7. Toll-Free
Module position: tollfree

Module Suffix : NOT USED
<p>Call Toll-Free: <span>1-877-455</span> or <a href=”mailto:hello@minisite.com”>hello@minisite.com</a></p>
<p class=”liveConsulation”><a href=”#” title=”Live Consultation”>Live Consultation</a></p>
8. Our Clients
Module position: right

Module Suffix : _ourClients
<p><a href=”#” title=”Fedex”><img src=”images/stories/demo/logo_fedex.gif” border=”0″ alt=”Fedex” /></a></p>
<p><a href=”#” title=”CocaCola”><img src=”images/stories/demo/logo_cocacola.gif” border=”0″ alt=”CocaCola” /></a></p>
<p><a href=”#” title=”Harley Davidson”><img src=”images/stories/demo/logo_harley_davidson.gif” border=”0″ alt=”Harley Davidson” /></a></p>
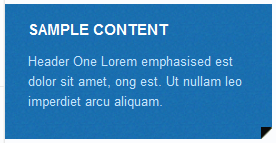
9. Sample content
Module position: right

Module Suffix : _type
<p>Header One Lorem emphasised est dolor sit amet, ong est. Ut nullam leo imperdiet arcu aliquam.</p>
10. Sample content
Module position: right

Module Suffix : _black
<p>Designers are constantly striving to create eye…</p>
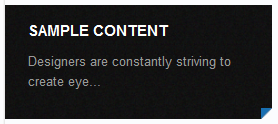
11. Sample content
Module position: right

Module Suffix : _white
<p>Header One Lorem emphasised est dolor sit amet, ong est. Ut nullam leo imperdiet arcu aliquam.</p>
<p><span class=”corner corner-4″> </span></p>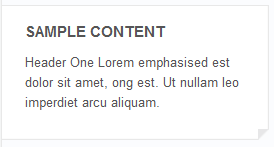
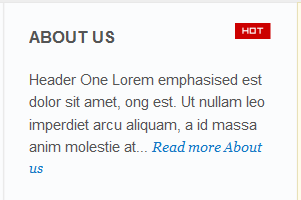
12. About Us
Module position: left

Module Suffix :  badge-hot
<p>Header One Lorem emphasised est dolor sit amet, ong est. Ut nullam leo imperdiet arcu aliquam, a id massa anim molestie at… <span class=”readmore”><a href=”#” title=”Read more About us”>Read more About us</a></span></p>
13. Our Staff
Module position: left

Module Suffix : _ourstaff
<div class=”staffInfo”>
<p><a href=”#” title=”JOHN”><img class=”left img-border” src=”images/stories/demo/sample_12.jpg” border=”0″ alt=”Sample image” width=”30″ height=”30″ align=”left” /></a><a href=”#” title=”JOHN”>JOHN</a></p>
<p><span>Director</span></p>
</div>
<div class=”staffInfo”>
<p><a href=”#” title=”MARRY”><img class=”left img-border” src=”images/stories/demo/sample_13.jpg” border=”0″ alt=”Sample image” width=”30″ height=”30″ align=”left” /></a><a href=”#” title=”MARRY”>MARRY</a></p>
<p><span>Managing Director</span></p>
</div>
<div class=”staffInfo”>
<p><a href=”#” title=”CHRIS SHIFLETT”><img class=”left img-border” src=”images/stories/demo/sample_14.jpg” border=”0″ alt=”Sample image” width=”30″ height=”30″ align=”left” /></a><a href=”#” title=”CHRIS SHIFLETT”>CHRIS SHIFLETT</a></p>
<p><span>Chief Executive</span></p>
</div>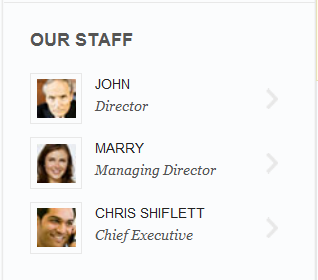
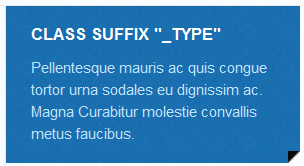
14. Class suffix “_type”
Module position: right

Module Suffix : _type
<p>Pellentesque mauris ac quis congue tortor urna sodales eu dignissim ac. Magna Curabitur molestie convallis metus faucibus.</p>
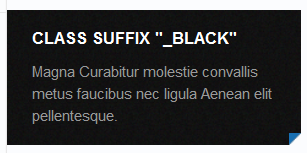
15. Class suffix “_black”
Module position: right

Module Suffix : _black
<p>Magna Curabitur molestie convallis metus faucibus nec ligula Aenean elit pellentesque.</p>
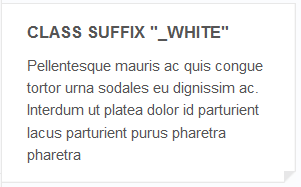
16. Class suffix “_white”
Module position: right

Module Suffix : _white
<p>Pellentesque mauris ac quis congue tortor urna sodales eu dignissim ac. Interdum ut platea dolor id parturient lacus parturient purus pharetra pharetra</p>
17. User 4
Module position: user4

Module Suffix : NOT USED
<p><img class=”left” src=”images/stories/demo/ico_04.png” border=”0″ alt=”Sample image” /> Pellentesque mauris ac quis congue tortor urna sodales eu dignissim ac. Magna Curabitur molestie convallis metus faucibus nec.</p>

18. User 3
Module position: user3

Module Suffix : NOT USED
<p><img class=”left” src=”images/stories/demo/ico_03.png” border=”0″ alt=”Sample image” /> Magna Curabitur molestie convallis metus faucibus nec ligula Aenean elit pellentesque. Faucibus accumsan augue</p>

19. User 2
Module position: user2

Module Suffix : NOT USED
<p><img class=”left” src=”images/stories/demo/ico_02.png” border=”0″ alt=”Sample image” /> Pellentesque mauris ac quis congue tortor urna sodales eu dignissim ac. Magna Curabitur molestie convallis metus faucibus</p>

20. User 1
Module position: user1

Module Suffix : NOT USED
<p><img class=”left” src=”images/stories/demo/ico_01.png” border=”0″ alt=”Sample image” /> Pellentesque mauris ac quis congue tortor urna sodales eu dignissim ac. Magna Curabitur molestie convallis <a href=”#” title=”Sample link”>Aenean elit pellentesque.</a></p>

21. User 5
Module position: user5

Module Suffix : NOT USED
<p><img class=”img-border” src=”images/stories/demo/sample_36.jpg” border=”0″ alt=”Sample image” /> Pellentesque mauris ac quis congue tortor urna sodales eu dignissim ac. Magna Curabitur molestie.</p>

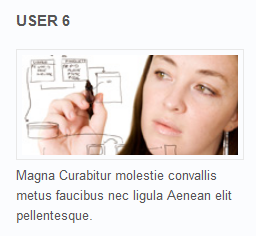
22. User 6
Module position: user6

Module Suffix : NOT USED
<p><img class=”img-border” src=”images/stories/demo/sample_37.jpg” border=”0″ alt=”Sample image” /> Magna Curabitur molestie convallis metus faucibus nec ligula Aenean elit pellentesque.</p>
23. User 7
Module position: user7

Module Suffix : NOT USED
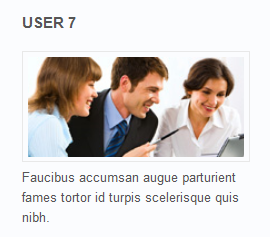
<p><img class=”img-border” src=”images/stories/demo/sample_38.jpg” border=”0″ alt=”Sample image” /> Faucibus accumsan augue parturient fames tortor id turpis scelerisque quis nibh.</p>
24. User 8
Module position: user8

Module Suffix : NOT USED
<p><img class=”img-border” src=”images/stories/demo/sample_39.jpg” border=”0″ alt=”Sample image” /> Magna Curabitur molestie convallis metus faucibus nec ligula Aenean elit pellentesque.</p>
25. User 10
Module position: user10

Module Suffix : NOT USED
<p>Pellentesque mauris ac quis congue tortor urna sodales eu dignissim ac. Magna Curabitur molestie convallis metus faucibus nec ligula Aenean elit pellentesque.</p>
26. User 12
Module position: user12

Module Suffix : NOT USED
<p>Magna Curabitur molestie convallis metus faucibus nec ligula Aenean elit pellentesque. Faucibus accumsan augue</p>
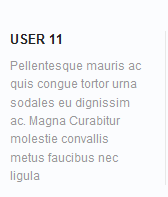
27. User 11
Module position: user11

Module Suffix : NOT USED
<p>Pellentesque mauris ac quis congue tortor urna sodales eu dignissim ac. Magna Curabitur molestie convallis metus faucibus nec ligula</p>
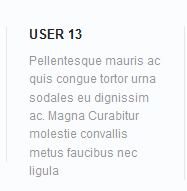
28. User 13
Module position: user13

Module Suffix : NOT USED
<p>Pellentesque mauris ac quis congue tortor urna sodales eu dignissim ac. Magna Curabitur molestie convallis metus faucibus nec ligula</p>
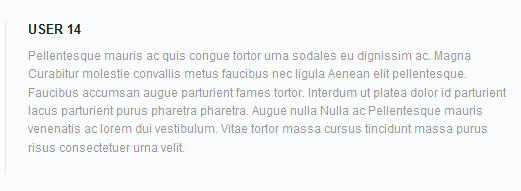
29. User 14
Module position: user14

Module Suffix : NOT USED
<p>Pellentesque mauris ac quis congue tortor urna sodales eu dignissim ac. Magna Curabitur molestie convallis metus faucibus nec ligula Aenean elit pellentesque. Faucibus accumsan augue parturient fames tortor. Interdum ut platea dolor id parturient lacus parturient purus pharetra pharetra. Augue nulla Nulla ac Pellentesque mauris venenatis ac lorem dui vestibulum. Vitae tortor massa cursus tincidunt massa purus risus consectetuer urna velit.</p>
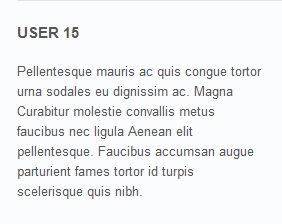
30. User 15
Module position: user15

Module Suffix : NOT USED
<p>Pellentesque mauris ac quis congue tortor urna sodales eu dignissim ac. Magna Curabitur molestie convallis metus faucibus nec ligula Aenean elit pellentesque. Faucibus accumsan augue parturient fames tortor id turpis scelerisque quis nibh.</p>
31. User 16
Module position: user16

Module Suffix : NOT USED
<p>Pellentesque mauris ac quis congue tortor urna sodales eu dignissim ac. Magna Curabitur molestie convallis metus faucibus nec ligula Aenean elit pellentesque. Faucibus accumsan augue parturient fames tortor id turpis scelerisque quis nibh.</p>
32. User 17
Module position: user17

Module Suffix : NOT USED
<p>Pellentesque mauris ac quis congue tortor urna sodales eu dignissim ac. Magna Curabitur molestie convallis metus faucibus nec ligula Aenean elit pellentesque. Faucibus accumsan augue parturient fames tortor id turpis scelerisque quis nibh.</p>
33. User 18
Module position: user18

Module Suffix : NOT USED
<p>Pellentesque mauris ac quis congue tortor urna sodales eu dignissim ac. Magna Curabitur molestie convallis metus faucibus nec ligula Aenean elit pellentesque. Faucibus accumsan augue parturient fames tortor id turpis scelerisque quis nibh.</p>
34. User 19
Module position: user19

Module Suffix : NOT USED
<p>Interdum ut platea dolor id parturient lacus parturient purus pharetra pharetra. Augue nulla Nulla ac Pellentesque mauris venenatis ac lorem dui vestibulum. Vitae tortor massa cursus tincidunt massa purus risus consectetuer urna velit. Elit purus pulvinar vitae sagittis eu a elit est et nibh. Nunc vitae Vestibulum convallis Nam ac vel magnis.</p>

35. User 9
Module position: user9

Module Suffix : NOT USED
<p>Pellentesque mauris ac quis congue tortor urna sodales eu dignissim ac. Magna Curabitur molestie convallis metus faucibus nec ligula Aenean elit pellentesque. Faucibus accumsan augue parturient fames tortor id turpis scelerisque quis nibh. Interdum ut platea dolor id parturient lacus parturient purus pharetra pharetra. Augue nulla Nulla ac Pellentesque mauris venenatis ac lorem dui vestibulum. Vitae tortor massa cursus tincidunt massa purus risus consectetuer urna velit.</p>

Hung Dinh Friend
Hung Dinh
- Join date:
- September 2014
- Posts:
- 4408
- Downloads:
- 11
- Uploads:
- 189
- Thanks:
- 309
- Thanked:
- 3310 times in 3 posts
April 28, 2011 at 9:29 am #388785Typography Styles – Supported in JA Minisite :
JA Minisite comes with multiple typography styles for headings, content, tables, buttons, quotes, lists and so on…
Here is the HTML code
You can use the above HTML code for making similar page in your site and refer to the codes for using Typography.
IMPORTANT : These typography styles are specific to JA Minisite template and if you use them in your content and later decide to change the template, the styles will be broken, as these styles depend upon the template based css files (typo.css). We recommend using minimum typography, if you plan to change your template in future.
Hung Dinh Friend
Hung Dinh
- Join date:
- September 2014
- Posts:
- 4408
- Downloads:
- 11
- Uploads:
- 189
- Thanks:
- 309
- Thanked:
- 3310 times in 3 posts
April 28, 2011 at 9:44 am #388791Mega Menu Configs
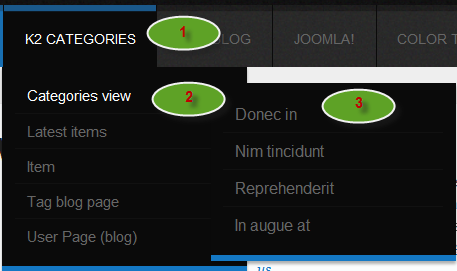
JA Minisite Demo site uses Mega Menu. Follow the guide below to create the column dropdown menu.
Front-end appreance
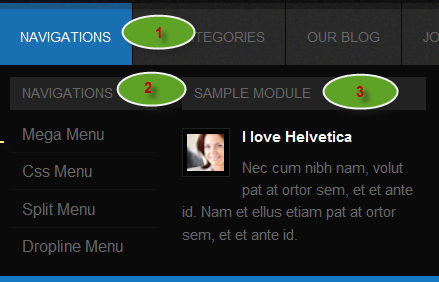
Backend-settings:
Main Menu Items (parent & child)
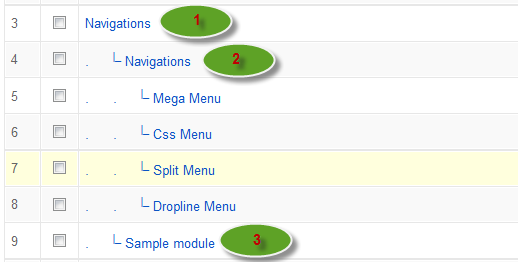
- Item 1: Navigations – Menu Backend Settings
- Item 2: Navigations – Menu Backend Settings
- Item 3: Sample module – Menu Backend Settings
Front-end appreance
Backend-settings:
Main Menu Items (parent & child)
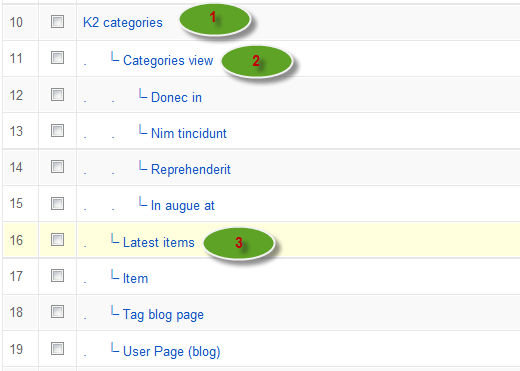
- Item 1: K2 categories – Menu Backend Settings
- Item 2: Categories view – Menu Backend Settings
- Item 3: Latest items – Menu Backend Settings
Hung Dinh Friend
Hung Dinh
- Join date:
- September 2014
- Posts:
- 4408
- Downloads:
- 11
- Uploads:
- 189
- Thanks:
- 309
- Thanked:
- 3310 times in 3 posts
April 28, 2011 at 9:55 am #388794Configurations for K2 Modules as on our Demo
This instruction is a reference for developers using manual installation, a guide on how to setup K2 Component like on the demo website and the quick-start package.
Please refer to the official documentation on how to install and setup K2
There are 3 modules of K2 component being used in JA Minisite. Below are the instructions for configuring them.
1.mod_k2_comments
Module Position: right

Module Suffix: NOT USED
Backend settings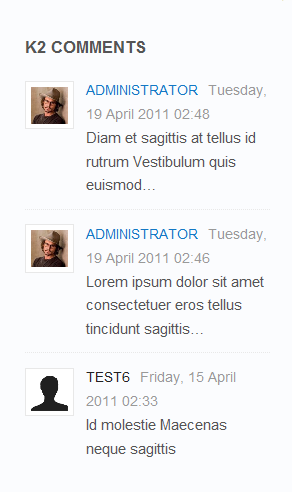
2. mod_k2_login
Module Position: left

Module Suffix: NOT USED
Backend settings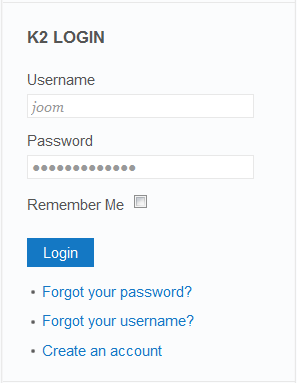
3. mod_k2_tools
Module Position: ja-tabs

Module Suffix: NOT USED
Backend settings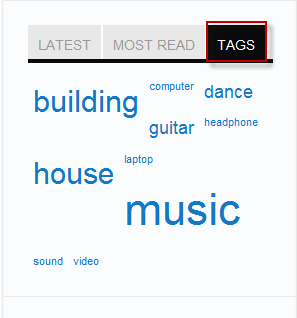
Hung Dinh Friend
Hung Dinh
- Join date:
- September 2014
- Posts:
- 4408
- Downloads:
- 11
- Uploads:
- 189
- Thanks:
- 309
- Thanked:
- 3310 times in 3 posts
April 28, 2011 at 10:31 am #388799Installing and Configuring K2
1. Installing K2
If you are new to this Joomla! component, please read this guide.
2. Configuring K2 component2.1 Global Configuration: Click Parameter button on the right
Backend settings2.2 Category Configuration
As you can see on our Demo, there are different styles for each page: Our Blog uses ja_minisite_blog template while Our products use ja_minisite.To build your website like our demo, navigate to Administrator >> Component >> K2 >> Categories
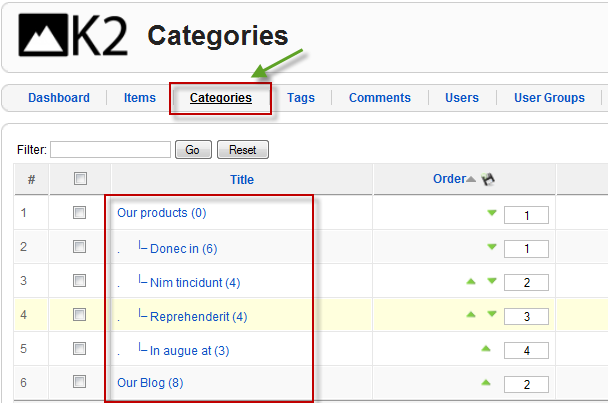
Our products Category
Our Blog Category
Note: To set the column displaying on K2 Showcase page, you should have enough child categories under Joomlart’s products category
To display them in two columns, the Columns parameter in Administrator >> Component >> K2 >> Category >> Our products >> Category view options should be set to 4.
2.3 Article ConfigurationWe use some special tags to set the image border in our K2 articles, for example:

If you want to have a image border like in the articles shown aboce, please add this code below into your article:
<img class=”img-border” src=”your image source” border=”0″ alt=”your image alt” />
Example
<img class=”img-border” src=”images/stories/demo/sample_18.jpg” border=”0″ alt=”sample image” />Hung Dinh Friend
Hung Dinh
- Join date:
- September 2014
- Posts:
- 4408
- Downloads:
- 11
- Uploads:
- 189
- Thanks:
- 309
- Thanked:
- 3310 times in 3 posts
April 28, 2011 at 10:32 am #388800The above userguide should help one in replicating the Demo site settings for the template and extension on their website.
Recommended:
If you are new or confused, we recommend installing Quickstart on your localhost and use it as reference for configuration. This is the best way to work with any template.
Links to all the resources are provided above, you should carefully read them to take the maximum advantage of our products.Support :
Please raise your support queries in the forum and make sure you follow the support guidelines. We spend more time in getting the information from user in case the support guidelines are not followed.
If you have any questions regarding this userguide, please post a question in the forum. This thread is locked.
-
AuthorPosts
This topic contains 10 replies, has 1 voice, and was last updated by Hung Dinh 13 years, 9 months ago.
We moved to new unified forum. Please post all new support queries in our New Forum

