-
AuthorPosts
-
Hung Dinh Friend
Hung Dinh
- Join date:
- September 2014
- Posts:
- 4408
- Downloads:
- 11
- Uploads:
- 189
- Thanks:
- 309
- Thanked:
- 3310 times in 3 posts
December 27, 2011 at 6:00 pm #1722171. Get to Know Your Template
- Everyone should read the Template’s Overview Article! This is a quick and complete overview of the template, from the colours included, to all of the powerful Joomlart complimentary extensions that come with it. You’ll also find links to the LIVE Demo Site, the Download area, as well as the Forum to ask questions.
- Need Help Getting Around Joomlart.com? We’ve created a QUICK ACCESS GUIDE for help you become a Joomlart Power User. This is a wonderful reference full of tips on quickly finding template info, demo sites, module position guides and more. We don’t want you to miss a thing!
2. Download Template and Extensions :
Check download folder for the Quickstart, Template zip and other complimentary extensions zip files.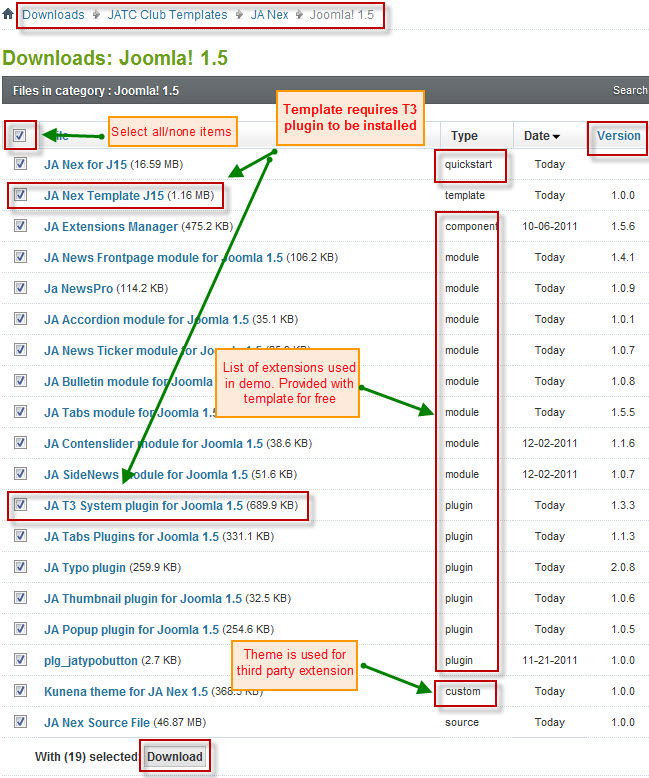
Plan your site Development.
- Making a New Site ? – If you are planning to make a new site, then use our Quickstart package to clone the demo site and replace the demo content with yours. Check How to install Quickstart Package. .
- Installing on your live site ? – If you are planning to use this template on your already live site. Then you should follow How to make your site look like demo site guide first to know about the steps involved. Then you can follow up the userguide below.
The user guide covers the following aspects :
- Installing Template on your Joomla
- Installing T3 Framework 2 Plugin
- Installing complimentary / included extensions.
- Custom HTML Modules.
- Mega Menu configs
- Third Party Extensions Configuration
Hung Dinh Friend
Hung Dinh
- Join date:
- September 2014
- Posts:
- 4408
- Downloads:
- 11
- Uploads:
- 189
- Thanks:
- 309
- Thanked:
- 3310 times in 3 posts
December 27, 2011 at 6:01 pm #4315151. Installing the Template on your Joomla system
- Browse and Download: Go to the Download page of JA Nex and download the Template zip file. Refer to this screenshot for the overview of the download folder.
- Install the Template: Now install the Template on your Joomla 1.5 system. Follow This Guide if you are not familiar with the installation procedure.
Template Configuration:
JA Nex template will install with Settings used on the demo website, so you can postpone the configuration until you complete the setup (install other modules / plugins used in the demo website).
Once, you have completed the setup, you can come back to the template backend and check the various options for customizing your template. Refer to this Universal T3 V2 Backend Config Guide for options on how to customize your installed template.
Please Note: T3 V2 template configurations are same in Joomla 1.5 and Joomla 1.7, so the above guide link is valid for both.
Links to resources on T3 V2 Framework templates and advanced configurations :- Overview
- Developer Guides
- Customization FAQs
- Mega Menu – A missing menu system for Joomla!
- Video Tutorials (valid for Joomla 1.5 and 1.7)
Error? – I see “Missing T3” error on the website frontend?
T3 framework 2 based templates need the T3 Framework Plugin to be installed and enabled.2. Installing T3 Framework 2 Plugin (T3 system plugin)
Download and install T3 Framework 2 Plugin (aka T3 System plugin). Follow this guide if you are not familiar with the installation procedure. After the plugin is installed, enable it as described in the same guide.
Hung Dinh Friend
Hung Dinh
- Join date:
- September 2014
- Posts:
- 4408
- Downloads:
- 11
- Uploads:
- 189
- Thanks:
- 309
- Thanked:
- 3310 times in 3 posts
December 27, 2011 at 6:02 pm #4315163. Installing complimentary / included extensions and Demo configurations :
- Free Extensions : (aka complimentary / included extensions). We use many extensions in our demo site to provide greater flexibility and features. These are provided for free to our members.
- Custom HTML Module : To match the design of the template, we also style (CSS) for Custom HTML modules using different div classes. You will need to check the HTML codes and make sure to use the recommended HTML markup to get correct display. We provide the HTML code in this userguide.
- 3rd Party Extensions : This template uses JA Comment Component (with its plugins) that is also used for JA Nex Joomla J17. You will need to download JA Comment package, it is available to Developer members and JAEC members only.
Know your Module Positions :
- View Module Position Image (used positions only).
- Use Module Position Overlay in Template(used & empty module positions).
TIP: Read more about Checking and Finding Module Positions in T3 Templates.
Installing and Configuring Included Extensions :
List of modules / plugins used in JA Nex Template Demo :
- JA Newsfeatured Module
- JA Newspro Module
- JA Sidenews Module
- JA Contentslider Module
- JA Accordion Module
- JA Bulletin Module
- JA Newsticker Module
- JA Tabs Plugin
- JA Typo Plugin
- JA Typobutton Plugin
- JA Thumbnail Plugin
- JA Popup Plugin
- JA T3v2 System Plugin
- JA System_jarpxnow Plugin (Available to JAEC and JA Developer members only)
- JA Commentoff Plugin (Available to JAEC and JA Developer members only)
- JA Commenton Plugin (Available to JAEC and JA Developer members only)
- JA Comment Component (Available to JAEC and JA Developer members only)
- JA Latest Comment Module (Available to JAEC and JA Developer members only)
- JA Comment Plugin (Available to JAEC and JA Developer members only)
IMPORTANT: We provide settings screenshot from the demo site. Make sure you configure your modules / plugins with the same configs to achieve demo site alike style / functions.Hung Dinh Friend
Hung Dinh
- Join date:
- September 2014
- Posts:
- 4408
- Downloads:
- 11
- Uploads:
- 189
- Thanks:
- 309
- Thanked:
- 3310 times in 3 posts
December 27, 2011 at 6:04 pm #431551Configurations for Modules / Plugins as used in Demo Site.
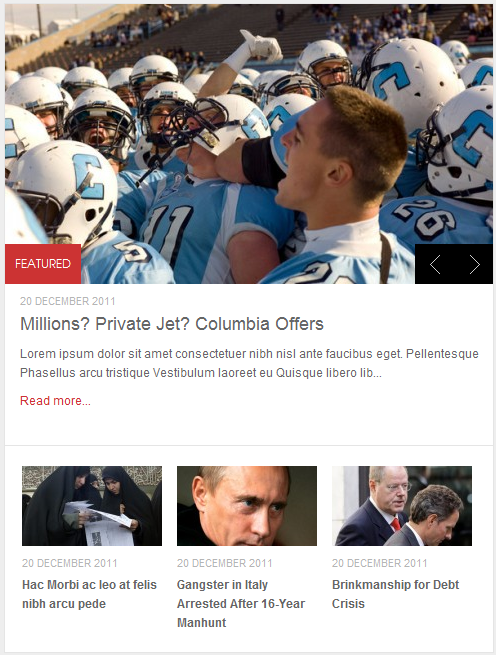
1. JA News_featured ModuleModule Position: sl1-1
Module Suffix: no-padding absolute-title simple-title
Page assignment: Home pageBackend Settings for this module as in Demo
Front-end appearance
2. JA News_pro Module
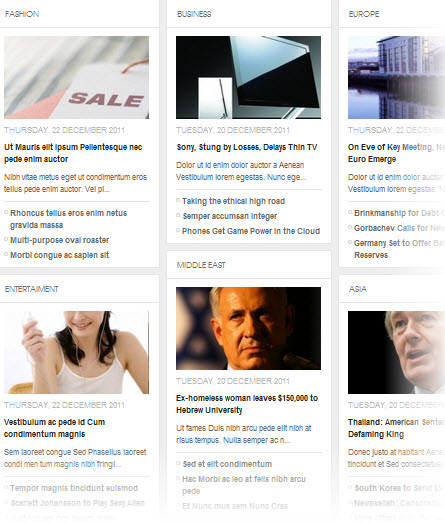
There are 3 JA Newspro modules used in the template:2.1 JA News Pro Module
Module Position: content-mass-top

Module Suffix:   no-bg absolute-title

Page assignment: Home page
Backend Settings for this module as in Demo
Front-end appearance
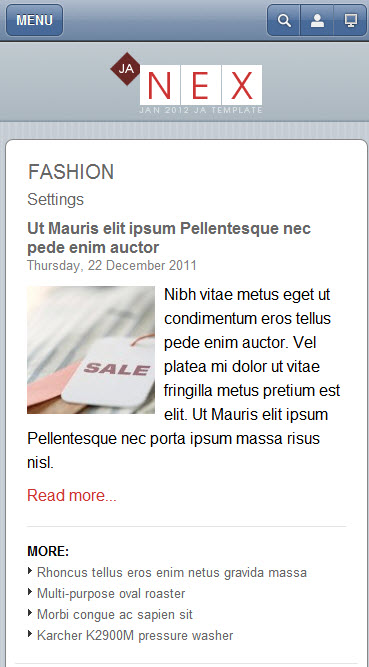
2.2 JA Newspro Mobile
Note: This module is used only for mobileModule Position: ja-news-mobile
Module Suffix: NOT USED
Page assignment: Home pageBackend Settings for this module as in Demo
Front-end appearance
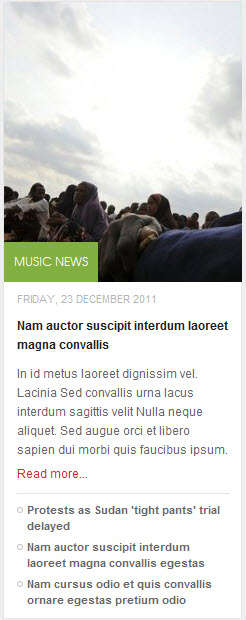
2.3 Music News
Module Position: sl1-2

Module Suffix:  no-bg absolute-title hightlight-title

Page assignment: Home page
Backend Settings for this module as in Demo
Front-end appearance
3. JA Side New
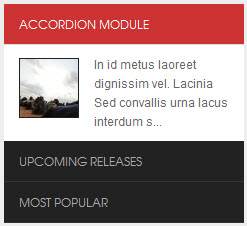
There are 2 JA SideNews modules used in the template named:3.1 Accordion Module
Module Position: accordion

Module Suffix: NOT USED
Backend Settings for this module as in Demo
Front-end appearance
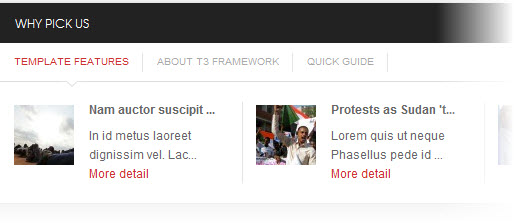
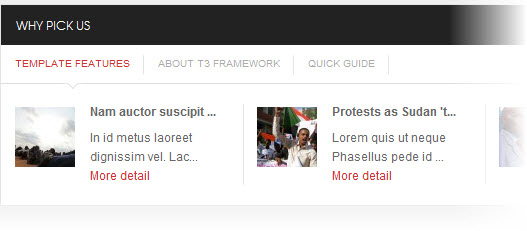
3.2 Template Features
Module Position: ja-tabs

Module Suffix: NOT USED

Page assignment:  All page
Backend Settings for this module as in Demo
Front-end appearance
4 JA Content Slider Module
Module Position: slider

Module Suffix:  no-padding

Page assignment: Home page
Backend Settings for this module as in Demo
Front-end appearance

5 JA Accordion Module
Module Position: right

Module Suffix:   redbg no-bg
Backend Settings for this module as in Demo
Front-end appearance

6 JA Bulletin Module
There are 2 JA Bulletin modules used in the template:
6.1 Upcoming Releases
Module Position: accordion

Module Suffix: NOT USED
Backend Settings for this module as in Demo
Front-end appearance

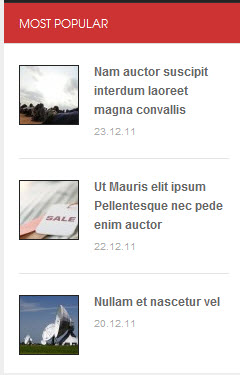
6.2 Most Popular
Module Position: accordion

Module Suffix: NOT USED
Backend Settings for this module as in Demo
Front-end appearance
7 JA News Sticker Module
Module Position: topbar

Module Suffix: NOT USED

Page Assignment: All Page
Backend Settings for this module as in Demo
Front-end appearance

8. JA Comment Extension
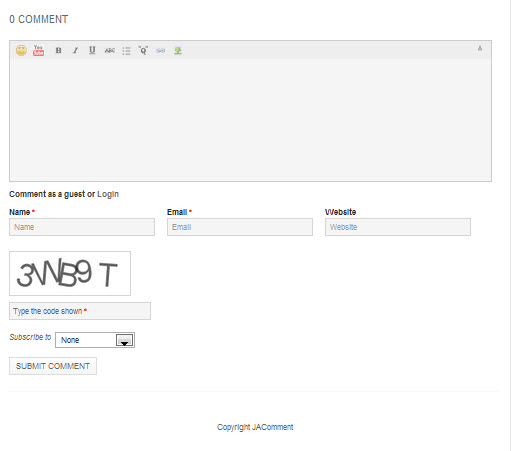
8.1 JA Comment Plugin
Backend Settings for this plugin as in DemoFront-end appearance
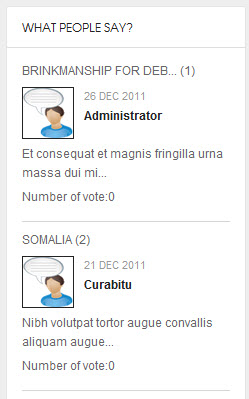
8.2 JA Latest Comment Module
Module Position : right

Module suffix : NOT USED
Backend Settings for this module as in Demo
Front-end appearance
8.3 JA Comment On Plugin
This plugin is to enable comment form in specific articles. To use to plugin, after you install and enable it, open article (in backend) you want to enable the plugin then clicking on the JA Comment On button or input the tag:{jacomment on} in the content field of the article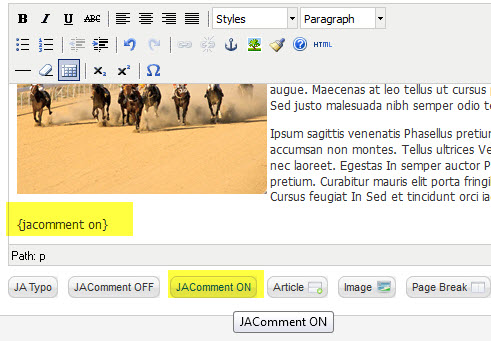
8.4 JA Comment Off Plugin
This plugin is to disable comment form in specific articles. To use to plugin, after you install and enable it, open article (in backend) you want to enable the plugin then clicking on the JA Comment Off button or input the tag: {jacomment off} in the content field of the article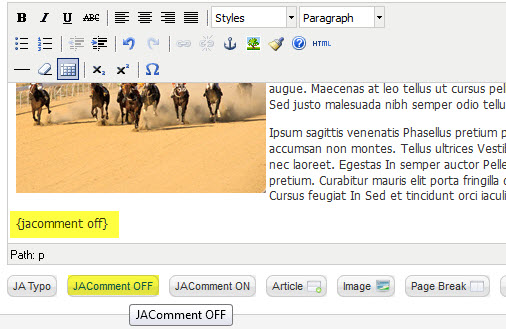
9. JA Tabs Module and PluginJA Tabs Plugin Settings for this plugin as in Demo
JA Tabs Module Settings for this module as in Demo
Module Position : content-mass-bottom

Module suffix :  no-padding
Front-end appearance
10. JA Typo Extension
To use the Typo extension, you have to install 2 plugin named: JA Typo System Plugin and JA Typobutton Plugin. The JA Typo System Plugin will embeds multiple typography styles to use in your site while JA Typobutton Plugin is to enable the Typo button in the Edit form of the Article, by clicking on this button, user can select typo type in the displayed popup.
10.1 JA System Typo Plugin
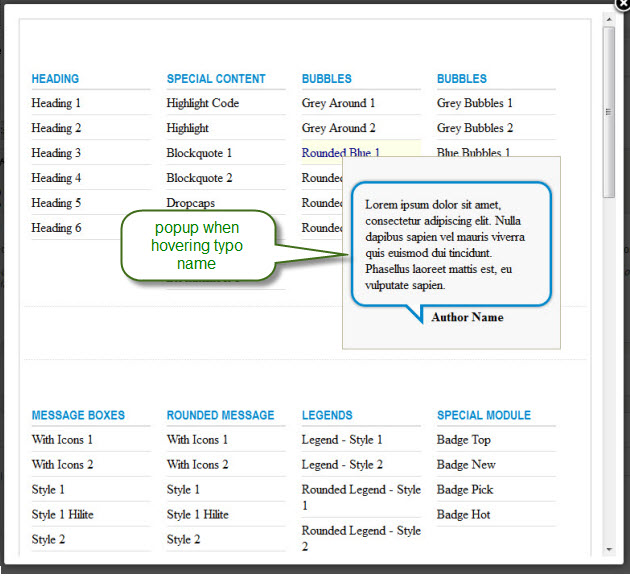
10.2 JA Typobutton Plugin

After you install and enable the plugin, open article (in backend) you want to enable the plugin then clicking on the JATypo button then select typo type you want to add to the article
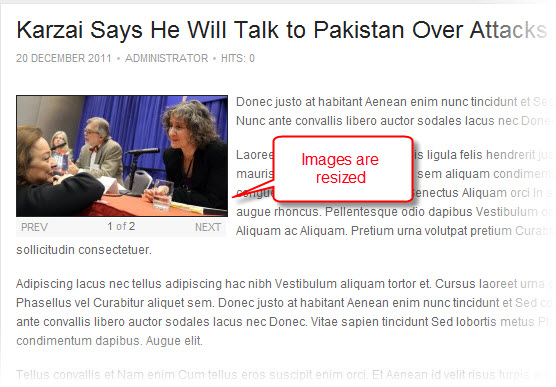
11 JA Thumbnail Plugin
Backend Settings for this plugin as in Demo
Note: we use thumbnail only for category blog layout, so thumbnail mode is Off for single article layout.
Front-end appearance
12 JA Popup Plugin
Backend Settings for this plugin as in Demo
Demo on content
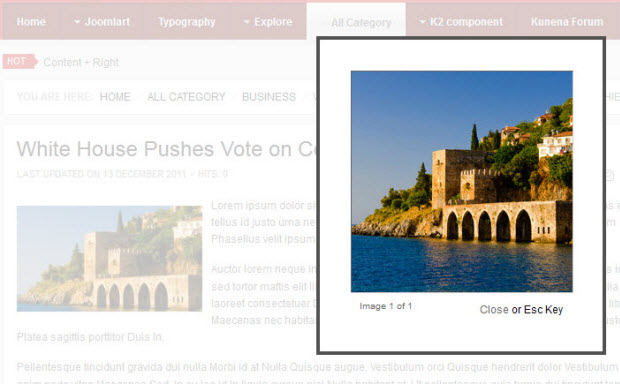
Demo on Photo images
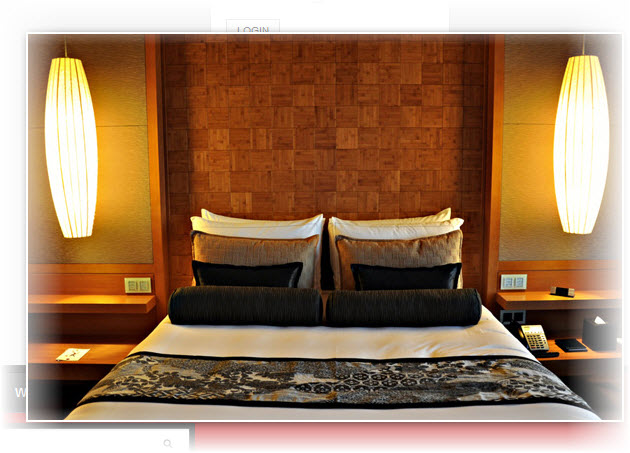
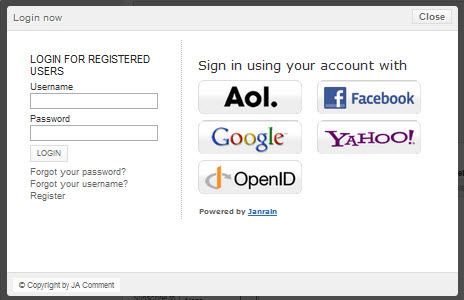
13 JA Rpxnow Plugin
Backend Settings for this plugin as in Demo
Note: Rpxnow plugin is displayed only in Comment form, you can click Login to see it
Front-end appearance
Hong Le Moderator
Hong Le
- Join date:
- December 2012
- Posts:
- 33
- Downloads:
- 261
- Uploads:
- 0
- Thanks:
- 7
- Thanked:
- 4 times in 1 posts
December 27, 2011 at 6:05 pm #431857Custom HTML Modules
If you are not sure how to use Custom HTML Modules or how to access the HTML Editor please Read this Guide.
We will provide you with the HTML Code (markup) for reference below, you will need to replicate it exactly and then change your content. Remember, HTML code has special div classes, which are required for demo alike display.
1. Adv BannerModule Position: content-mass-bottom
Module Suffix: whitebg adv<div class=”images-adv”><img src=”images/stories/demo/adv1.jpg” border=”0″ alt=”Sample photo” title=”Sample photo” /></div>

2. Content Mass Bottom
Module Position: content-mass-bottom

Module Suffix:  NOT USED
<p>Nulla dapibus neque sit amet libero ser suscipit hendrerit. Donec rhoncus mollis suscipit. Mauris posuere turpis eu dui lobortis non iaculis odio tincidunt. Class aptent taciti sociosqu ad litora.</p>

3. Image Temp
Module Position: foot-left

Module Suffix:  imgtemp no-padding
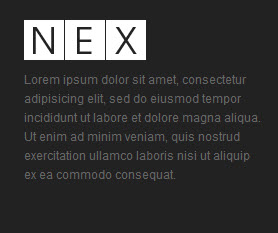
<div><img src=”images/stories/demo/img-footer.gif” border=”0″ alt=”left” title=”Sample photo” width=”122″ />Lorem ipsum dolor sit amet, consectetur adipisicing elit, sed do eiusmod tempor incididunt ut labore et dolore magna aliqua. Ut enim ad minim veniam, quis nostrud exercitation ullamco laboris nisi ut aliquip ex ea commodo consequat.</div>
4. PartnerModule Position: foot-left
Module Suffix: partner no-padding<div class=”clearfix”>
<div class=”list-item first_item”>
<h3>Hubs</h3>
<ul>
<li><a href=”#”>News</a></li>
<li><a href=”#”>Business</a></li>
<li><a href=”#”>Culture</a></li>
<li><a href=”#”>Design</a></li>
<li><a href=”#”>Lifestyle</a></li>
<li><a href=”#”>Technology</a></li>
</ul>
</div>
<div class=”list-item “>
<h3>Features</h3>
<ul>
<li><a href=”#”>Infographics</a></li>
<li><a href=”#”>Videos</a></li>
<li><a href=”#”>Slideshow</a></li>
<li><a href=”#”>Project</a></li>
<li><a href=”#”>Current issue</a></li>
<li><a href=”#”>Online Store</a></li>
</ul>
</div>
<div class=”list-item”>
<h3>Company</h3>
<ul>
<li><a href=”#”>About</a></li>
<li><a href=”#”>Contact</a></li>
<li><a href=”#”>Support</a></li>
<li><a href=”#”>Jobs</a></li>
<li><a href=”#”>Privacy</a></li>
<li><a href=”#”>Terms</a></li>
</ul>
</div>
</div>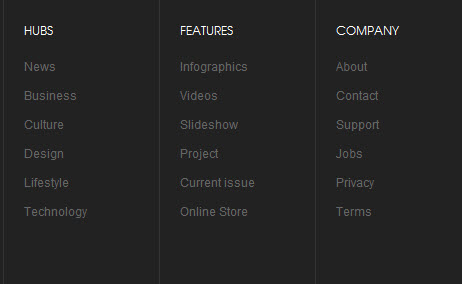
5. ConnectModule Position: foot-right
Module Suffix: connect<div class=”social”><a class=”ico-social ico-facebooks” href=”#” title=”Facebook”><span>Facebook</span></a><a class=”ico-social ico-twitters” href=”#” title=”Twitter”><span>Twitter</span></a><a class=”ico-social ico-rss” href=”#” title=”RSS”><span>RSS</span></a><a class=”ico-social ico-flick” href=”#” title=”Flick”><span>Flick</span></a></div>
6. Newsletter
Module Position: foot-right

Module Suffix: NOT USED
<form action=”index.php” method=”post”><label>Lorem Ipsum is simply dummy text of the printing and typesetting industry</label>
<div><input class=”form-text” maxlength=”60″ name=”Your email” size=”14″ type=”text” /><a class=”links”>Submit</a></div>
</form>
7. About T3 FrameworkModule Position: ja-tabs
Module Suffix: NOT USED<p><img src=”images/stories/demo/demo-2.jpg” border=”0″ alt=”Sample photo” title=”Sample photo” align=”left” />Sed ipsum enim, mollis eu pellentesque a, ullamcorper at sem. Mauris eugiat, dui vel cursus elementum, nulla metus bibendum neque, in tincidunt tellus lorem vitae metus ipsum enim, mollis eu pellentesque a, ullamcorper at sem.</p>
<p><a class=”readmore” href=”#”>Read more</a></p>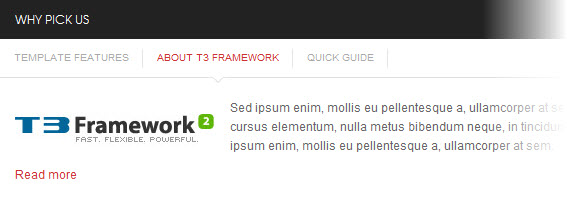
8. Quick guide
Module Position: ja-tabs

Module Suffix: NOT USED
<p><img src=”images/stories/demo/demo-1.jpg” border=”0″ alt=”Sample photo” title=”Sample photo” align=”left” />Sed ipsum enim, mollis eu pellentesque a, ullamcorper at sem. Mauris eugiat, dui vel cursus elementum, nulla metus bibendum neque, in tincidunt tellus lorem vitae metus in tincidunt tellus lorem vitae metus.</p>
<p><a class=”readmore” href=”#”>Read more</a></p>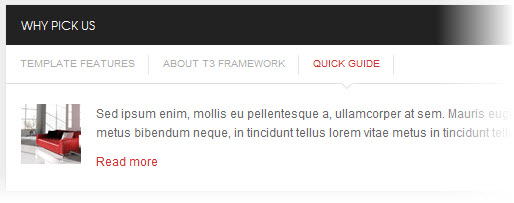
9. I am Module
Module Position: megamenu

Module Suffix:  no-padding no-background
<p><img src=”images/stories/demo/demo-3.jpg” border=”0″ alt=”Sample photo” title=”Sample photo” align=”left” style=”margin-bottom: 10px;” /> Lorem ipsum dolor sit amet, consectetur elit sed sapien. <br /><a class=”readmore” href=”#”>Read more</a></p>
10. Vimeo
Module Position: megamenu

Module Suffix:   no-background
<p style=”padding-bottom: 5px;”><object data=”http://vimeo.com/moogaloop.swf?clip_id=7421222&server=vimeo.com&color=333333&fullscreen=1″ type=”application/x-shockwave-flash” width=”153″ height=”86″><param name=”quality” value=”high” /><param name=”src” value=”http://vimeo.com/moogaloop.swf?clip_id=7421222&server=vimeo.com&color=333333&fullscreen=1″ /><param name=”pluginspage” value=”http://vimeo.com/moogaloop.swf?clip_id=7421222&server=vimeo.com&color=33bbbb&fullscreen=1″ /><param name=”scale” value=”noborder” /></object></p>
11. Right PositionModule Position: right
Module Suffix: badge-vote<p><span><strong>Module Class Suffix</strong>: badge-vote</span></p>
12. Right PositionModule Position: right
Module Suffix: redbg badge-top<p><span><strong>Module Class Suffix</strong>: redbg badge-top</span></p>

13. Right PositionModule Position: right
Module Suffix: redbg badge-top<p><span><strong>Module Class Suffix</strong>: redbg badge-top</span></p>
14. Right Position
Module Position: right

Module Suffix:  blackbg bgcolor
<p><span><strong>Module Class Suffix</strong>: blackbg bgcolor</span></p>
15. Today video
Module Position: right

Module Suffix:  blackbg
<p style=”margin: 0;”>
<object width=”210″ height=”120″ type=”application/x-shockwave-flash” data=”http://vimeo.com/moogaloop.swf?clip_id=7421222&server=vimeo.com&color=333333&fullscreen=1″>
<param name=”quality” value=”high” />
<param name=”src” value=”http://vimeo.com/moogaloop.swf?clip_id=7421222&server=vimeo.com&color=333333&fullscreen=1″ />
<param name=”pluginspage” value=”http://vimeo.com/moogaloop.swf?clip_id=7421222&server=vimeo.com&color=33bbbb&fullscreen=1″ />
<param name=”scale” value=”noborder” />
<param name=”wmode” value=”transparent” />
</object>
</p>
16. Module AdvModule Position: right
Module Suffix: adv<div class=”adv”><img src=”images/stories/demo/adv2.jpg” border=”0″ alt=”Sample photo” title=”Sample photo” align=”middle” /></div>

17. Photo Images
Module Position: right

Module Suffix: NOT USED
<div class=”img-photo clearfix”><span class=”highslide-img”>{japopup type=”image” title=”Sample Images” content=”images/stories/highslide/slide1.jpg” width=”594″ height=”386″} <img src=”images/stories/highslide/thumb-1.jpg” border=”0″ alt=”Sample Image” /> {/japopup} </span> <span class=”highslide-img”>{japopup type=”image” title=”Sample Images” content=”images/stories/highslide/slide2.jpg” width=”594″ height=”386″} <img src=”images/stories/highslide/thumb-2.jpg” border=”0″ alt=”Sample Images” /> {/japopup} </span> <span class=”highslide-img”>{japopup type=”image” title=”Sample Images” content=”images/stories/highslide/slide3.jpg” width=”594″ height=”386″} <img src=”images/stories/highslide/thumb-3.jpg” border=”0″ alt=”Sample Images” /> {/japopup} </span> <span class=”highslide-img”>{japopup type=”image” title=”Sample Images” content=”images/stories/highslide/slide4.jpg” width=”594″ height=”386″} <img src=”images/stories/highslide/thumb-4.jpg” border=”0″ alt=”Sample Images” /> {/japopup} </span> <span class=”highslide-img”>{japopup type=”image” title=”Sample Images” content=”images/stories/highslide/slide5.jpg” width=”594″ height=”386″} <img src=”images/stories/highslide/thumb-5.jpg” border=”0″ alt=”Sample Images” /> {/japopup} </span> <span class=”highslide-img”>{japopup type=”image” title=”Sample Images” content=”images/stories/highslide/slide6.jpg” width=”594″ height=”386″} <img src=”images/stories/highslide/thumb-6.jpg” border=”0″ alt=”Sample Images” /> {/japopup} </span></div>
18. Template FeaturesModule Position: right
Module Suffix: badge-vote<div class=”list-useful”>
<p class=”blocknumber blocknumber-1″><span class=”bignumber”>01</span> <span class=”title-bignumber”>Fluid Grid</span> Lorem ipsum dolor sit amet consectetuer rutrum dignissim et neque id.</p>
<p class=”blocknumber blocknumber-1″><span class=”bignumber”>02</span> <span class=”title-bignumber”>Simple and Clean Design</span> Interdum pharetra in a metus congue In Sed Pellente gravida pellentesque.</p>
<p class=”blocknumber blocknumber-1 last”><span class=”bignumber”>03</span> <span class=”title-bignumber”>Mega Menu</span> In Sed Pellentesque tincidunt pharetra a metus congue tincidunt pharetra.</p>
</div>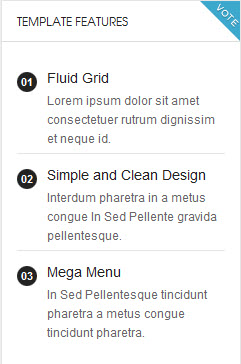
19. Color ModuleModule Position: right
Module Suffix: redbg badge-top<p>Nunc rutrum scelerisque ipsum ut aliquet. Duis et augue nunc, gravida fermentum mi.</p>
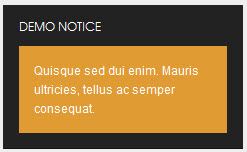
20. Demo notice
Module Position: right

Module Suffix:   blackbg bgcolor
<div>Quisque sed dui enim. Mauris ultricies, tellus ac semper consequat.</div>
21. Sl1-1Module Position: sl1-1
Module Suffix: no-padding absolute-title simple-title<p><img src=”images/stories/demo/demo-4.jpg” border=”0″ alt=”Sample Image” /></p>
<div style=”padding: 20px 15px;”>Nulla dapibus neque sit amet libero ser suscipit hendrerit. Donec rhoncus mollis. <br /><strong>Module Class Suffix</strong>: no-padding absolute-title simple-title</div>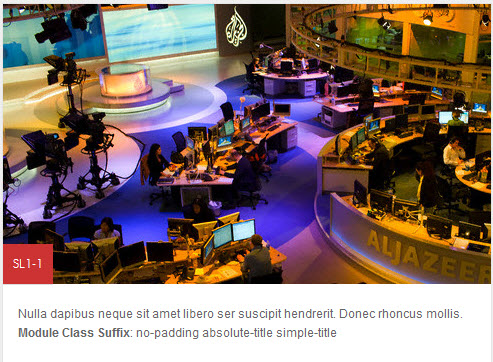
22 . Sl1-2
Module Position: sl1-2

Module Suffix:  no-bg absolute-title hightlight-title
<div style=”background: #fff;”><img src=”images/stories/demo/demo-5.jpg” border=”0″ alt=”” />
<div style=”padding: 20px 15px;”><strong>Module Class Suffix</strong>: no-bg absolute-title hightlight-title</div>
</div>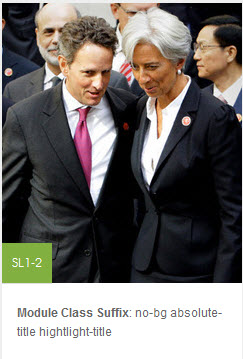
23 . Adv Banner Top
Module Position: sl1-3

Module Suffix:   adv
<div class=”adv”><img src=”images/stories/demo/adv3.jpg” border=”0″ alt=”Sample photo” title=”Sample photo” /></div>

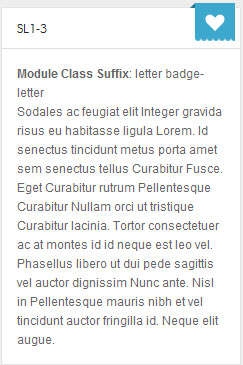
24 . Sl1-3
Module Position: sl1-3

Module Suffix:  letter badge-letter
<p><strong>Module Class Suffix</strong>: letter badge-letter <br /> Sodales ac feugiat elit Integer gravida risus eu habitasse ligula Lorem. Id senectus tincidunt metus porta amet sem senectus tellus Curabitur Fusce. Eget Curabitur rutrum Pellentesque Curabitur Nullam orci ut tristique Curabitur lacinia. Tortor consectetuer ac at montes id id neque est leo vel. Phasellus libero ut dui pede sagittis vel auctor dignissim Nunc ante. Nisl in Pellentesque mauris nibh et vel tincidunt auctor fringilla id. Neque elit augue.</p>
25 . NewsletterModule Position: sl1-3
Module Suffix: letter badge-letter<form action=”index.php” method=”post”><label>Lorem Ipsum is simply dummy text of the printing and typesetting industry</label>
<div><input class=”form-text” type=”text” name=”Your email” size=”14″ maxlength=”60″ /> <a class=”links”>Submit</a></div>
</form>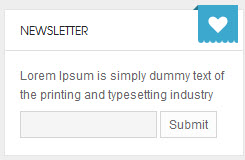
26. Follow me
Module Position:  social

Module Suffix:   NOT USED
<div class=”social”><a class=”ico-social ico-facebooks” href=”#” title=”Facebook”><span>Facebook</span></a><a class=”ico-social ico-twitters” href=”#” title=”Twitter”><span>Twitter</span></a><a class=”ico-social ico-rss” href=”#” title=”RSS”><span>RSS</span></a></div>

1 user says Thank You to Hong Le for this useful post
Hung Dinh Friend
Hung Dinh
- Join date:
- September 2014
- Posts:
- 4408
- Downloads:
- 11
- Uploads:
- 189
- Thanks:
- 309
- Thanked:
- 3310 times in 3 posts
December 27, 2011 at 6:06 pm #431858Typography Styles – Supported in JA Nex Template :
JA Nex comes with multiple typography styles for headings, content, tables, buttons, quotes, lists and so on…
You can view the Typography Page on the Demo site:Typography Page
Here is the HTML code
You can use the above HTML code to make a similar page on your website and refer to the codes for using Typography.
IMPORTANT : These typography styles are specific to JA Nex template and if you use them in your content and later decide to change the template, the styles will be broken, as these styles depend upon the template based css files (typo.css). We recommend using minimum typography, if you plan to change your template in future.
Hung Dinh Friend
Hung Dinh
- Join date:
- September 2014
- Posts:
- 4408
- Downloads:
- 11
- Uploads:
- 189
- Thanks:
- 309
- Thanked:
- 3310 times in 3 posts
December 27, 2011 at 6:07 pm #431881Third Party Extensions Configuration
1. Kunena Forum
In the Demo site, Kunena Forum page uses ja_Nex template as the default style.
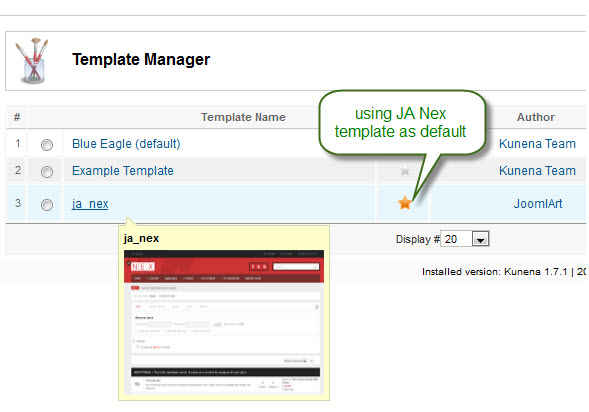
Kurena Forum page in Demo site
To set up for the forum as in Demo site, navigate to Administrator >> Component >> Kunena Forum >> Forum Configuration
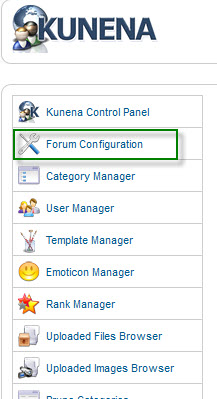
Then configure for all items as our screenshots shown below

- Backend settings for General
- Backend settings for Frontend
- Backend settings for Users
- Backend settings for Security
- Backend settings for Avatar
- Backend settings for Uploads
- Backend settings for Ranking
- Backend settings for BBCode
- Backend settings for Integration
- Backend settings for RSS
- Backend settings for Plug-ins
2. K2 Component
2.1 Installing and Configuring K2
2.1.1 Installing K2
If you are new to this Joomla! component, please read this guide.
2.1.2 Configuring K2 component2.1.2.1 Global Configuration: Click Parameter button on the right
Backend settings2.1.2.2 Category Configuration
As you can see on our Demo, there are different styles for each page: Nex Blog uses nex_blog style while All Categories use nex style.To build your website like our demo, navigate to Administrator >> Component >> K2 >> Categories

Nex Blog category
All Categories
Note: To set the column displaying on K2 Showcase page, you should have enough child categories under All Categories category
To display them in 3 columns as demo, the Columns parameter in Administrator >> Component >> K2 >> Categories >> All Categories >> Category view options and set the value of the field “Columns” to 3.
2.2 Configurations for K2 Modules as on our Demo
This instruction is a reference for developers using manual installation, a guide on how to setup K2 Component like on the demo website and the quick-start package.
Please refer to the official documentation on how to install and setup K2
There are 5 modules of K2 component being used in JA Nex.
2.2.1 . JA K2 Comment Module
Module Position : right

Module suffix : NOT USED
Backend settingsDemo site
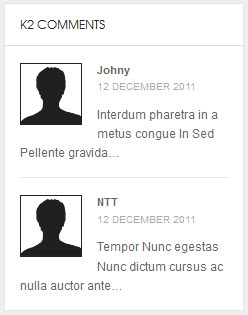
2.2.2 . JA K2 Content Module
Module Position : right

Module suffix : NOT USED
Backend settingsDemo site
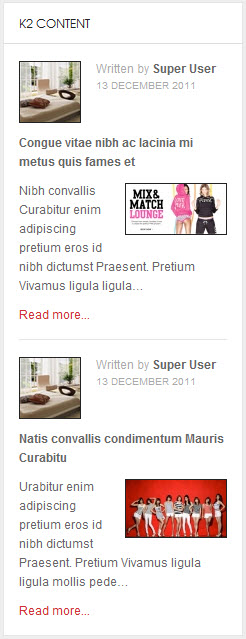
2.2.3 . JA K2 Tools Module
2.2.3.1 K2 Archive
Module Position : right

Module suffix : _menu
Backend settingsDemo site
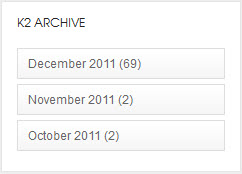
2.2.3.2 K2 Categories
Module Position : right

 Module suffix : _menu
Backend settingsDemo site
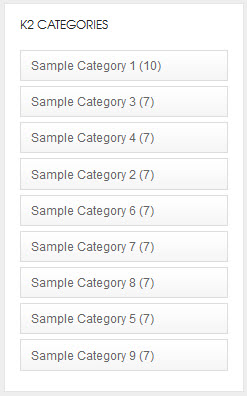
2.2.4 K2 User
Module Position : right

  Module suffix : NOT USED
Backend settingsDemo site
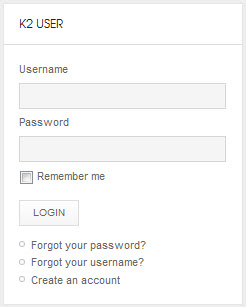
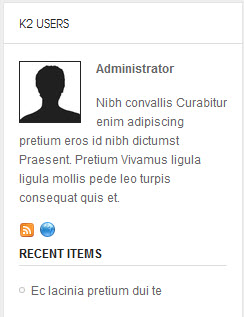
2.2.5 K2 Users
Module Position : right

   Module suffix : NOT USED
Backend settingsDemo site
Hung Dinh Friend
Hung Dinh
- Join date:
- September 2014
- Posts:
- 4408
- Downloads:
- 11
- Uploads:
- 189
- Thanks:
- 309
- Thanked:
- 3310 times in 3 posts
December 27, 2011 at 6:09 pm #431883Mega Menu and Blog Pages Configs
1. Mega Menu Configs
JA Nex site uses Mega Menu. Follow the guide below to create the 2 column dropdown menu.
Frontend Appearance :
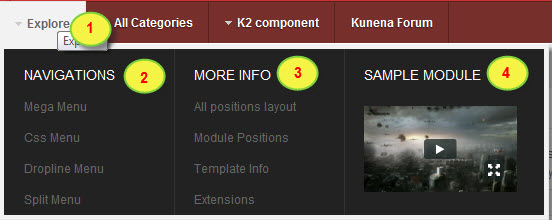
Backend Settings : Main Menu Items (parent & child)
- Item 1 – Explore – Menu Backend Settings
- Item 2 – Navigations – Menu Backend Settings
- Item 3 – More Info – Menu Backend Settings
- Item 4 – Sample Module – Menu Backend Settings
2. Blog pages Configs
Blog page displays content from K2 component

Settings for category where the menu get content from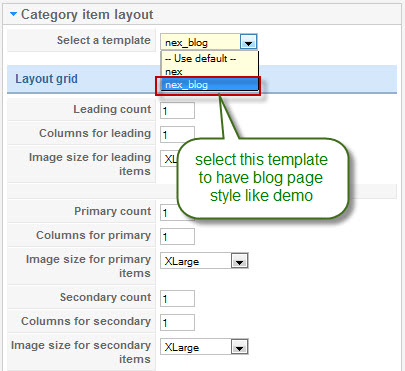
This Blog page gets content from K2 category to dispay in front-end. Go to: Component -> K2 Component -> Category -> Nex Blog – > Select Template then select nex_blog. This template will make the style of the menu that get content from the category same with the style in the Blog page you see in front-end
Hung Dinh Friend
Hung Dinh
- Join date:
- September 2014
- Posts:
- 4408
- Downloads:
- 11
- Uploads:
- 189
- Thanks:
- 309
- Thanked:
- 3310 times in 3 posts
December 30, 2011 at 9:00 am #431885The above userguide should help one in replicating the Demo site settings for the template and extension on their site.
Recommended :
If you are new or are confused. We recommend installing Quickstart on your localhost and use it as reference for configs. This is the best way to work with any template.
Links to all the resources are provided above, you should carefully read them to take the maximum advantage of our products.Support :
Please raise your support queries in the forum and make sure you follow the support guidelines. We spend more time in getting the information from user incase the support guidelines are not followed.
If you have any questions regarding this userguide, please ask in the forum. This thread is locked.
1 user says Thank You to Hung Dinh for this useful post
-
AuthorPosts
This topic contains 9 replies, has 2 voices, and was last updated by Hung Dinh 13 years, 1 month ago.
We moved to new unified forum. Please post all new support queries in our New Forum

