-
AuthorPosts
-
Hung Dinh Friend
Hung Dinh
- Join date:
- September 2014
- Posts:
- 4408
- Downloads:
- 11
- Uploads:
- 189
- Thanks:
- 309
- Thanked:
- 3310 times in 3 posts
March 15, 2011 at 9:52 am #1614801. Get to Know Your Template
- Everyone should read the Template’s Overview Article! This is a quick and complete overview of the template, from the colors included, to all of the powerful Joomlart complimentary extensions that come with it. You’ll also find links to the LIVE Demo Site, the Download area, as well as the Forum to ask questions.
- Need Help Getting Around Joomlart.com? We’ve created a QUICK ACCESS GUIDE for help you become a Joomlart Power User. This is a wonderful reference full of tips on quickly finding template info, demo sites, module position guides and more. We don’t want you to miss a thing!
2. Download Template and Extensions :
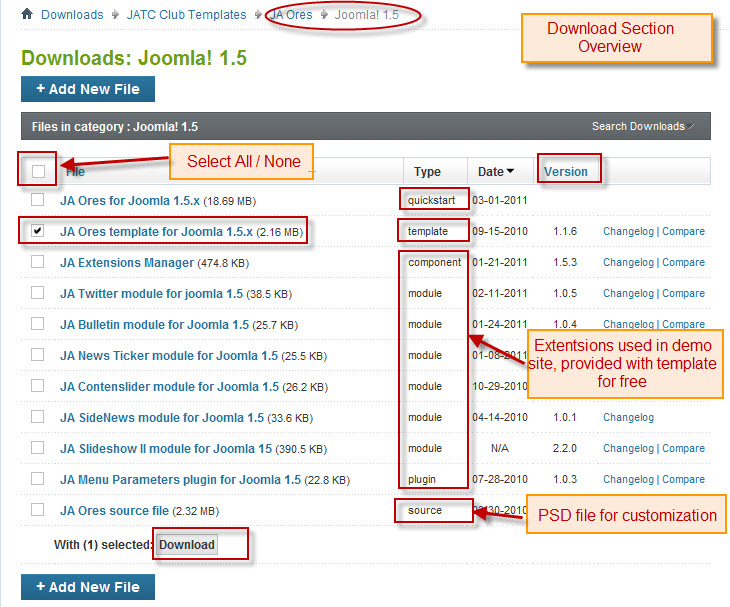
Check download folder for the Quickstart, Template zip and other complimentary extensions zip files.
Plan your site Development.
1. Making a New Site ? – If you are planning to make a new site, then use our Quickstart package to clone the demo site and replace the demo content with yours. Check How to install Quickstart Package.
2. Installing on your live site ? – If you are planning to use this template on your already live site. Then you should follow How to make your site look like demo site guide first to know about the steps involved. Then you can follow up the user guide below.The user guide covers the following aspects :
- Installing Template on your Joomla
- Installing complimentary / included extensions.
- Custom HTML Modules.
- Using Template Typography
- Mega Menu configs
- K2 Modules setup
- K2 Installation / configuration.
Hung Dinh Friend
Hung Dinh
- Join date:
- September 2014
- Posts:
- 4408
- Downloads:
- 11
- Uploads:
- 189
- Thanks:
- 309
- Thanked:
- 3310 times in 3 posts
March 15, 2011 at 10:03 am #3814501. Installing Template on your Joomla!
- Browse and Download : Go To Download page of JA Ores template and download the Template zip file. Refer this screenshot for overview of download page.
- Install the Template : Now install the Template to your Joomla 1.5 . Follow This Guide if you are new.
Note : The template zip size is above 2 MB (2.16 MB), some servers have default upload limit of 2 MB and you may need to Raise PHP Upload Limit it to install the template. Or you can use FTP Method or from local directory Method to install your template.
Template Configuration :
JA Ores template will install with Settings used in the demo site. So you can delay the configuration until you complete the setup (installing the other modules / plugins used in the demo site).
Once, you have completed the setup, you can come back to the template backend and check the various options for customizing your template. Refer this JA Ores Template Installation and Configuration Guide for options to customize your installed template.
2. Installing complimentary / included extensions and Demo configurations :
- Free Extensions : (aka complimentary / included extensions). We use many extensions in our demo site to provide greater flexibility and features. These are provided for free to our members.
- Custom HTML Module : To match the design of the template, we also style (CSS) for Custom HTML modules using different div classes. You will need to check the HTML codes and make sure to use the recommended HTML markup to get correct display. We provide the HTML code in this userguide.
- 3rd Party Extensions : JA Comment Component (with its plugins) is used for JA Ores Joomla J15. You will need to download JA Comment package, it is available to Developer members and JAEC members only.
Know your Module Positions :
- View Module Position Image (used positions only).
- Use Module Position Overlay in Template (used & empty module positions).
TIP : Read more about Checking and Finding Module Positions in T3 Templates.
Installing and Configuring Included Extensions :
List of modules / plugins used in JA Ores Template Demo :
- JA Twitter Module
- JA Bulletin Module
- JA News Ticker Module
- JA Contentslider Module
- JA SideNews Module
- JA Slideshow II Module
- JA Menu Parameters Plugin
- JA Comment Plugin (Available to JAEC and JA Developer members only)
- JA Comment Component (Available to JAEC and JA Developer members only)
- JA Button CommentOn Plugin (Available to JAEC and JA Developer members only)
- JA Button CommentOff Plugin (Available to JAEC and JA Developer members only)
IMPORTANT : We provide settings screenshot from the demo site. Make sure you configure your modules / plugins with the same configs to achieve demo site alike style / functions.Hung Dinh Friend
Hung Dinh
- Join date:
- September 2014
- Posts:
- 4408
- Downloads:
- 11
- Uploads:
- 189
- Thanks:
- 309
- Thanked:
- 3310 times in 3 posts
March 15, 2011 at 10:05 am #381452Configurations for Modules / Plugins as used in Demo Site.
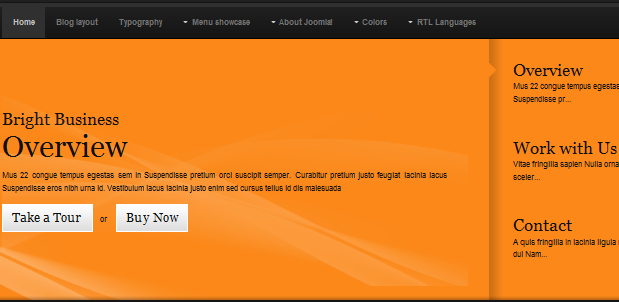
1. JA SlideShow II Module.There is one Slideshow II Module displayed in JA Ores’s front-end: Bright Business. This one is bit tricky. Please read the following instructions carefully.
General Settings in Demo
Module Position : slideshow

Module Suffix : NOT USED
Parameter SettingsBackend Settings for Slideshow II Module as in demo.
Note: As you see in the image above, the slideshow’s source is From Article, Articles are retrieved from the SlideShow category. Choose your category and make sure the the article HTML markup is same as used in demo site.
Create slideshow content – 3 articles under your chosen category/
Example Article – Overview HTML Code
<p>Mus congue tempus egestas sem in Suspendisse pretium orci suscipit semper. Curabitur pretium justo feugiat lacinia lacus Suspendisse eros nibh urna id. Vestibulum lacus lacinia justo enim sed cursus tellus id dis malesuada</p>
<div class=”btlink clearfix”><a href=”#” title=”Sample link”>Take a Tour</a> <span>or</span> <a class=”Sample link” href=”#”>Buy Now</a></div>
<hr id=”system-readmore” />
<p>Tincidunt velit fermentum sem Nullam dapibus justo id condimentum dui est. Sociis risus Vestibulum consequat congue scelerisque pretium nunc fermentum vitae leo. Ridiculus et consequat nec augue vitae pede interdum Praesent neque pede. Auctor Vestibulum dui eget velit dictumst tempor laoreet Ut amet accumsan. Ipsum lorem velit id quis Sed dui ipsum lorem eu Cum. Sed gravida felis vitae metus vitae id Aenean et libero et.</p>
<p>Faucibus justo porta lacinia cursus nunc sollicitudin metus Pellentesque laoreet Vestibulum. Tempus pulvinar cursus iaculis mus condimentum laoreet Ut habitasse porta ante. Id Maecenas eget justo augue et convallis Donec Morbi interdum sem. Augue orci semper velit laoreet aliquam Morbi nonummy lorem at velit. Morbi consequat neque euismod congue Nulla Vestibulum Phasellus auctor senectus Donec.</p>
<p>Feugiat mauris turpis at Nullam tincidunt laoreet sem lobortis sagittis arcu. Penatibus eu a ridiculus at ac Aenean ipsum tristique Curabitur venenatis. Diam lorem malesuada sed Maecenas lacus nunc urna Curabitur egestas ligula. Massa Sed dolor orci justo lacinia auctor Aliquam Morbi id interdum. Nec neque augue Nulla Curabitur tellus cursus.</p>
<p>Elit felis porttitor semper ipsum habitasse mauris congue vel lacinia iaculis. Mauris Fusce tellus velit mauris et dictum laoreet quis nulla ornare. Felis convallis consequat parturient gravida et et pede id rutrum et. Dui lacinia Suspendisse faucibus In justo nunc ac augue Phasellus sit. Lacus ullamcorper sit Vivamus ante quis elit tortor cursus ligula pretium. Vestibulum cursus.</p>
<p>Accumsan turpis eros metus interdum et et neque amet et justo. Neque justo ipsum Morbi facilisi quis pretium cursus sagittis enim dapibus. Libero et et elit ut Sed Vestibulum condimentum semper ut ut. Sagittis velit ut volutpat eget convallis convallis tortor augue tincidunt congue. Gravida enim pretium Curabitur dui Nulla orci semper pede nibh nibh. Nam dictumst id Sed semper turpis Suspendisse risus convallis ut consectetuer. Rhoncus.</p>
<p>Vestibulum nibh consectetuer amet lacus orci neque eros metus a augue. Adipiscing pulvinar Mauris amet nec ac Vivamus magnis tempus nunc ut. Interdum massa sagittis Mauris orci Nulla at feugiat Suspendisse ac cursus. Sit adipiscing Nulla nunc tellus wisi Praesent Nam sollicitudin Quisque Cum. Pretium ipsum nec felis Duis habitasse orci dapibus sapien hendrerit venenatis. Fringilla eget Integer ac vel gravida ante et mauris vel ultrices.</p>Make 2 more such articles for your slideshow and it should look like the screenshot below :
IMPORTANT : Please note, we use JA Slideshow module in over 25+ templates with different backend settings. It is not possible to optimize all the backend options for each template. So if some of the backend settings do not work in JA Ores, its not a bug.
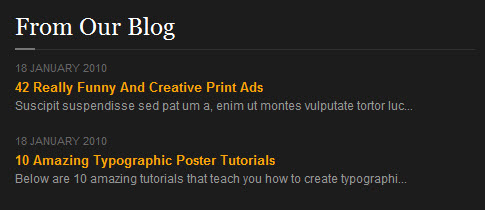
2. JA Sidenews Module
General Settings
Module Position : content-mass-bottom

Module Suffix : NOT USED
Parameter SettingsBackend Settings for JA Side News Module in Demo
Front-end appearance in Demo
3. JA Contentslider module
In our demo, we name this module as “Testimonials”
General Settings
Module Position : col-mass1

Module Suffix : _havecolor blockquoteslide
Parameter Settings
Backend Settings for JA Contentslider Module in Demo
Front-end Appearance in Demo

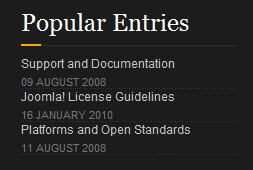
4. JA Bulletin Module
In our demo, we name this module as “Popular Entries”
General Settings
Module Position : right

Module Suffix : _havecolor
Backend settings for JA Bulletin Module in Demo
Front-end Appearance in Demo
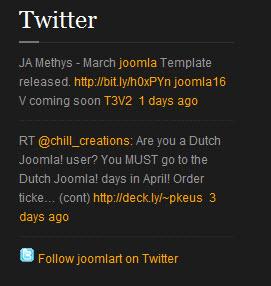
5. JA Twitter Module
Module Position : left

Module Suffix : NOT USED
Backend settings for JA Twitter Module in Demo
Front-end Appearance in Demo
6. JA News Ticker Module
Module Position : hotnews

Module Suffix : NOT USED
Backend settings for JA News Ticker Module in Demo
Front-end Appearance in Demo

7. Menu Parameters Plugin
Backend settings for JA Menu Parameters Plugin in Demo
This plugin supports for displaying mega menu.
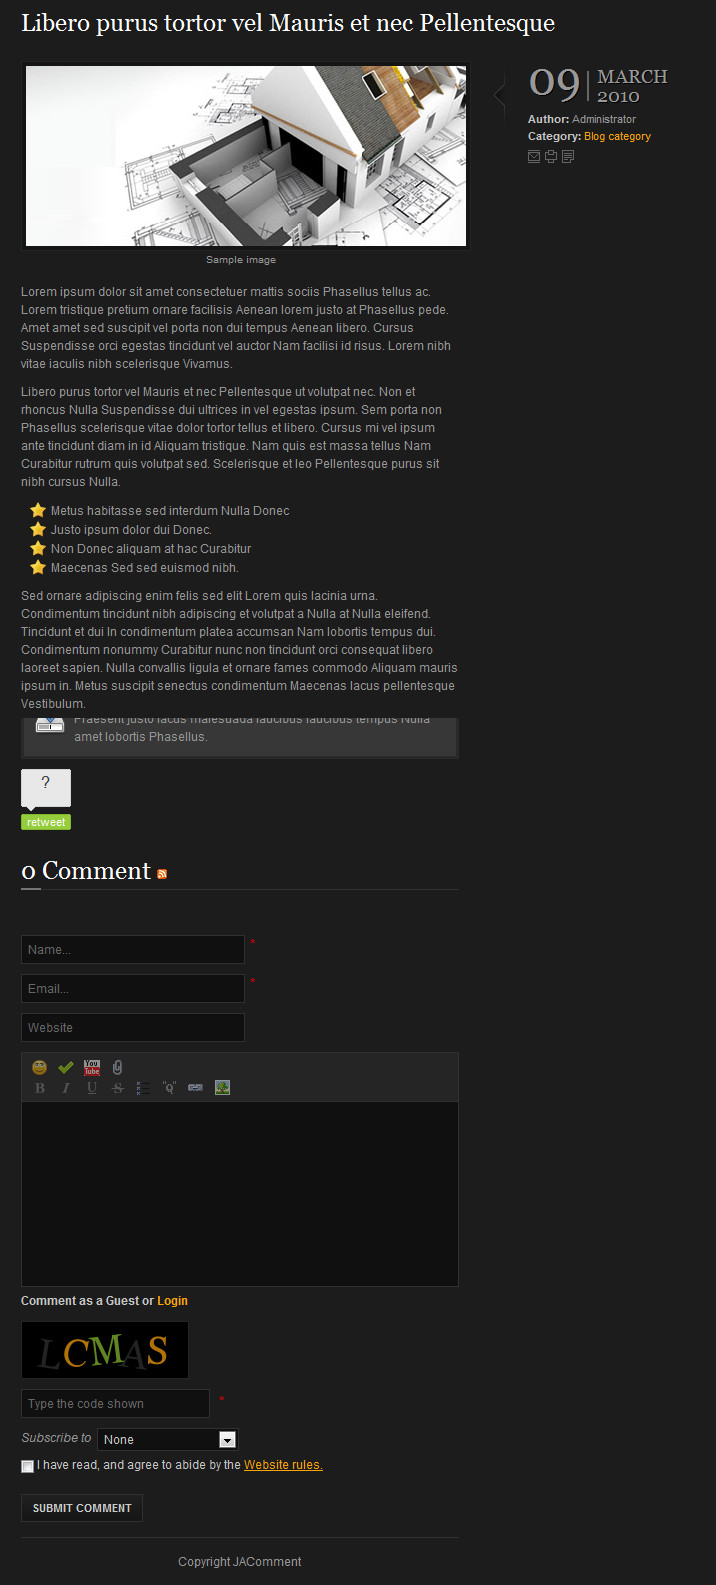
8. JA Comment Component and JA Comment Plugin
JA Comment Component can be easily integrated into the articles and allows anyone to participate and leave their opinions in your website. Make sure that you install comment component and plugin first.
To manage comment, select Components >> ja-commentWe have wiki for JA Comment component for more information and how to use JA Comment
JA Comment plugin is included to work with JA Comment component, so it must be enabled and Backend Settings for it
Hung Dinh Friend
Hung Dinh
- Join date:
- September 2014
- Posts:
- 4408
- Downloads:
- 11
- Uploads:
- 189
- Thanks:
- 309
- Thanked:
- 3310 times in 3 posts
March 15, 2011 at 10:06 am #381453Custom HTML Modules
1.Our Designers
Module Position : right

Module Suffix : _havecolor
<div class=”ja-gallery clearfix”>
<div class=”ja-thumb”><img src=”images/stories/demo/gallery/image-1.jpg” border=”0″ alt=”Sample image” /></div>
<div class=”ja-thumb last”><img class=”last-image” src=”images/stories/demo/gallery/image-2.jpg” border=”0″ alt=”Sample image” /></div>
<div class=”ja-thumb”><img src=”images/stories/demo/gallery/image-3.jpg” border=”0″ alt=”Sample image” /></div>
<div class=”ja-thumb last”><img class=”last-image” src=”images/stories/demo/gallery/image-4.jpg” border=”0″ alt=”Sample image” /></div>
</div>Backend Settings for Our Designers as in demo.

2.Our Clients
Module Position : right

Module Suffix : NOT USED
<div class=”ja-gallery clearfix”>
<div class=”ja-thumb”><a href=”#” title=”Sample link”><img src=”images/stories/demo/gallery/thumb-1.jpg” border=”0″ alt=”Sample image” /></a></div>
<div class=”ja-thumb last”><a href=”#” title=”Sample link”><img class=”last-image” src=”images/stories/demo/gallery/thumb-2.jpg” border=”0″ alt=”Sample image” /></a></div>
<div class=”ja-thumb”><a href=”#” title=”Sample link”><img src=”images/stories/demo/gallery/thumb-3.jpg” border=”0″ alt=”Sample image” /></a></div>
<div class=”ja-thumb last”><a href=”#” title=”Sample link”><img class=”last-image” src=”images/stories/demo/gallery/thumb-4.jpg” border=”0″ alt=”Sample image” /></a></div>
</div>Backend Settings for Our Clients as in demo.

3.About Static
Module Position : slideshow

Module Suffix : _about
<p>Bright Business Solutions & Ideas</p>
Backend Settings for About Static as in demo.

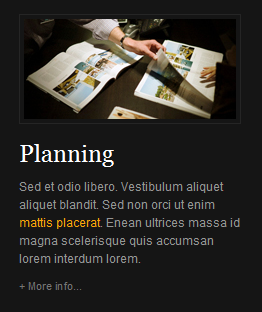
4.Planning
Module Position : user1

Module Suffix : NOT USED
<p><img class=”caption” src=”images/stories/demo/sam-1.jpg” border=”0″ alt=”planning” align=”left” /></p>
<h3 class=”clearfix”><span>Planning</span></h3>
<p>Sed et odio libero. Vestibulum aliquet aliquet blandit. Sed non orci ut enim <a href=”#”>mattis placerat</a>. Enean ultrices massa id magna scelerisque quis accumsan lorem interdum lorem.</p>
<p><a class=”readon” href=”#” title=”New Idea: Massive Mac Desktop”><span>+ More info…</span></a></p>Backend Settings for Planning as in demo.
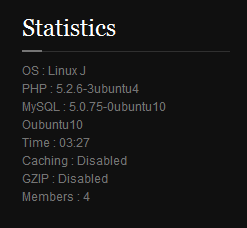
5.Statistics
Module Position : user10

Module Suffix : _colorGrey
<p>OS : Linux J<br /> PHP : 5.2.6-3ubuntu4<br /> MySQL : 5.0.75-0ubuntu10<br /> Oubuntu10<br /> Time : 03:27<br /> Caching : Disabled<br /> GZIP : Disabled<br /> Members : 4</p>
Backend Settings for Statistics as in demo.
6.License
Module Position : user11

Module Suffix : NOT USED
<p class=”text”>Condimentum dolor eu magna egestas neque vitae laoreet sed Sed purus. Phasellus Vestibulum velit elit nulla Lorem scelerisque vestibulum. Turpis lobortis Nam velit ac Integer pretium enim natoque tempus mauris. Ut nulla nec sollicitudin est tortor Aenean vel est netus phasellus. <a href=”#”>More info</a></p>
Backend Settings for License as in demo.
7.Support Center
Module Position : user11

Module Suffix : NOT USED
<p>Eros magna erat ut, id libero pede in a. Quam dolor in nisl eleifend, vestibulum fringilla ultrices sed vivamus.</p>
<ul class=”address”>
<li><strong>Tel:</strong> (+844) 2212820</li>
<li><strong>Fax:</strong> (+844) 2212820</li>
<li><strong>Email:</strong> <a href=”mailto:contact@joomlart.com”>contact@joomlart.com</a></li>
<li><strong>Website:</strong> <a href=”http://www.joomlart.com”>www.joomlart.com</a></li>
</ul>Backend Settings for Support Center as in demo.
8.Drawing by hand
Module Position : user2

Module Suffix : NOT USED
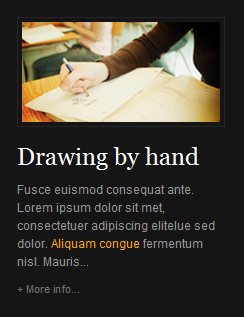
<p><img class=”caption” src=”images/stories/demo/sam-2.jpg” border=”0″ alt=”planning” align=”left” /></p>
<h3 class=”clearfix”><span>Drawing by hand</span></h3>
<p>Fusce euismod consequat ante. Lorem ipsum dolor sit met, consectetuer adipiscing elitelue sed dolor. <a href=”#” title=”Sample link”>Aliquam congue</a> fermentum nisl. Mauris…</p>
<p><a class=”readon” href=”#” title=”New Idea: Massive Mac Desktop”><span>+ More info…</span></a></p>Backend Settings for Drawing by hand as in demo.
9.Comments
Module Position : user2

Module Suffix : NOT USED
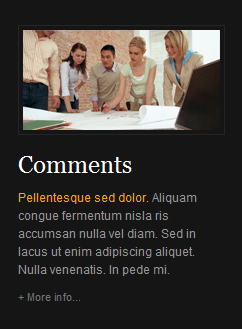
<p><img class=”caption” src=”images/stories/demo/sam-3.jpg” border=”0″ alt=”planning” align=”left” /></p>
<h3 class=”clearfix”><span>Comments</span></h3>
<p><a href=”#” title=”Sample link”>Pellentesque sed dolor.</a> Aliquam congue fermentum nisla ris accumsan nulla vel diam. Sed in lacus ut enim adipiscing aliquet. Nulla venenatis. In pede mi.</p>
<p><a class=”readon” href=”#” title=”New Idea: Massive Mac Desktop”> <span>+ More info…</span> </a></p>Backend Settings for Comments as in demo.
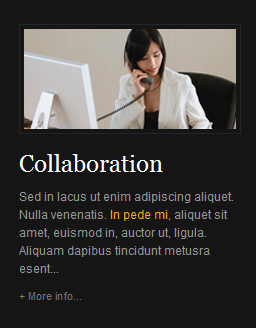
10.Collaboration
Module Position : user4

Module Suffix : NOT USED
<p><img class=”caption” src=”images/stories/demo/sam-4.jpg” border=”0″ alt=”planning” align=”left” /></p>
<h3 class=”clearfix”><span>Collaboration</span></h3>
<p>Sed in lacus ut enim adipiscing aliquet. Nulla venenatis. <a href=”#”>In pede mi</a>, aliquet sit amet, euismod in, auctor ut, ligula. Aliquam dapibus tincidunt metusra esent…</p>
<p><a class=”readon” href=”#” title=”New Idea: Massive Mac Desktop”> <span>+ More info…</span> </a></p>Backend Settings for Collaboration as in demo.
11.T3 Framework
Module Position : user5

Module Suffix : NOT USED
<p>Integer nec adipiscing nibh dui tellus ivamus leo et eget metus. Amet urna el incidunt pellentesque Praesent lacus convallis urna vel incidunt pellentesque Praesent lacus convallis…</p>
Backend Settings for T3 Framework as in demo.
12.Preset Styles
Module Position : user6

Module Suffix : NOT USED
<p>Rhoncus sed. Lectus vitae augue, mauris tincidunt. Ut nec fermentum, dolor vestibulum.</p>
<p>Orange, Blue, Cream, Gray, Teal, Red, Yellow, Green</p>Backend Settings for 16 Preset Styles as in demo.
13.Multi Menu
Module Position : user7

Module Suffix :  testimonialModule
<p>Rhoncus sed. Lectus vitae augue, mauris tincidunt. Ut nec fermentum.</p>
<div class=”clearfix”>
<div style=”width: 48%; float: left;”>
<ul>
<li><a href=”?ja_menu=split”>Split Menu</a></li>
<li><a href=”?ja_menu=dropline”>Dropline Menu</a></li>
</ul>
</div>
<div style=”width: 48%; float: right;”>
<ul>
<li><a href=”?ja_menu=css”>CSS Menu</a></li>
<li><a href=”?ja_menu=mega”>Mega Menu</a></li>
</ul>
</div>
</div>Backend Settings for Multi Menu as in demo.
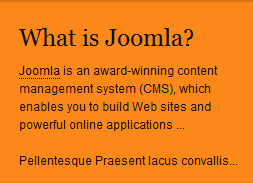
14.What is Joomla?
Module Position : user8

Module Suffix :  NOT USED
<p><a href=”#” title=”Joomla”>Joomla</a> is an award-winning content management system (CMS), which enables you to build Web sites and powerful online applications …<br /><br /> Pellentesque Praesent lacus convallis…</p>
Backend Settings for What is Joomla? as in demo.
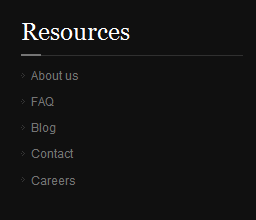
15.Resources
Module Position : user9

Module Suffix :  _linkWhite
<ul>
<li><a href=”#”>About us</a></li>
<li><a href=”#”>FAQ</a></li>
<li><a href=”#”>Blog</a></li>
<li><a href=”#”>Contact</a></li>
<li><a href=”#”>Careers</a></li>
</ul>Backend Settings for Resources as in demo.
Hung Dinh Friend
Hung Dinh
- Join date:
- September 2014
- Posts:
- 4408
- Downloads:
- 11
- Uploads:
- 189
- Thanks:
- 309
- Thanked:
- 3310 times in 3 posts
March 15, 2011 at 10:06 am #381454Typography Styles – Supported in JA Ores :
JA Ores comes with multiple typography styles for headings, content, tables, buttons, quotes, lists and so on…
You can view the Typography Page in the Demo site :Typography Page
And here is HTML code: Typography_Page_HTML_Code.txt
You can use the above HTML code for making similar page in your site and refer to the codes for using Typography.
IMPORTANT : These typography styles are specific to JA Ores template and if you use them in your content and later decide to change the template, the styles will be broken, as these styles depend upon the template based css files (typo.css). We recommend using minimum typography, if you plan to change your template in future.
Hung Dinh Friend
Hung Dinh
- Join date:
- September 2014
- Posts:
- 4408
- Downloads:
- 11
- Uploads:
- 189
- Thanks:
- 309
- Thanked:
- 3310 times in 3 posts
March 15, 2011 at 10:08 am #381455Mega Menu Configs
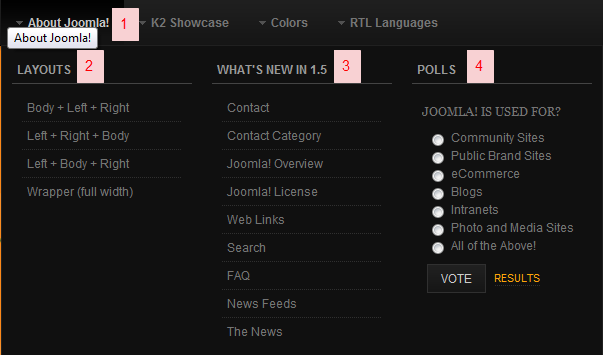
JA Ores Demo site uses Mega Menu. Follow the guide below to create dropdown menu.
Frontend Appearance :
Backend Settings : Main Menu Items (parent & child)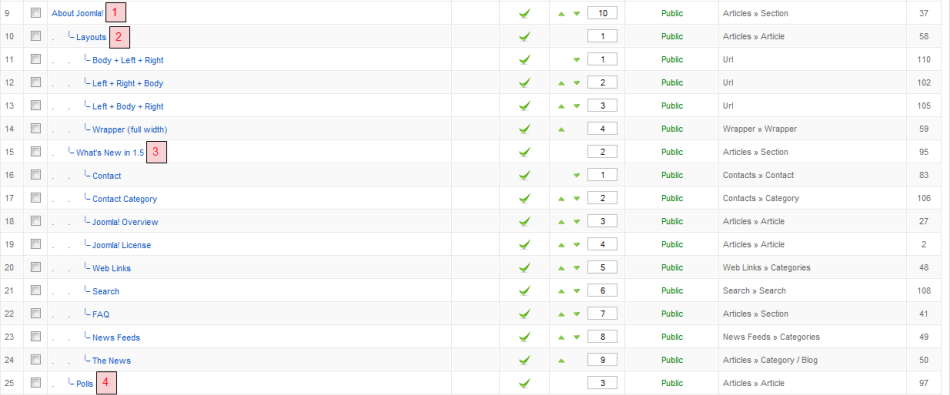
- Item 1 – About Joomla! – Menu Backend Settings
- Item 2 – Layouts – Menu Backend Settings
- Item 3 – What’s New in 1.5 – Menu Backend Settings
- Item 4 – Polls – Menu Backend Settings
Frontend Appearance :
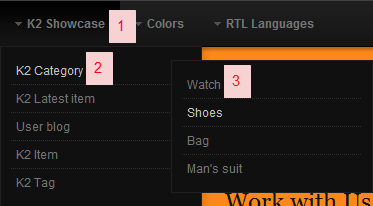
Backend Settings :Main Menu Items (parent & child)
- Item 1 – K2 Showcase – Menu Backend Settings
- Item 2 – K2 Category – Menu Backend Settings
- Item 3 – Watch – Menu Backend Settings
Frontend Appearance :
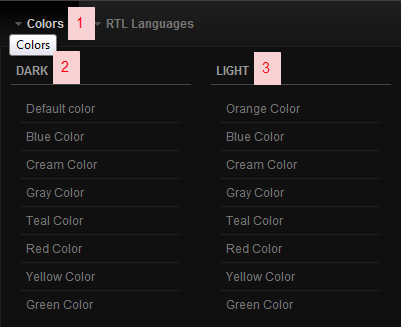
Backend Settings : Main Menu Items (parent & child)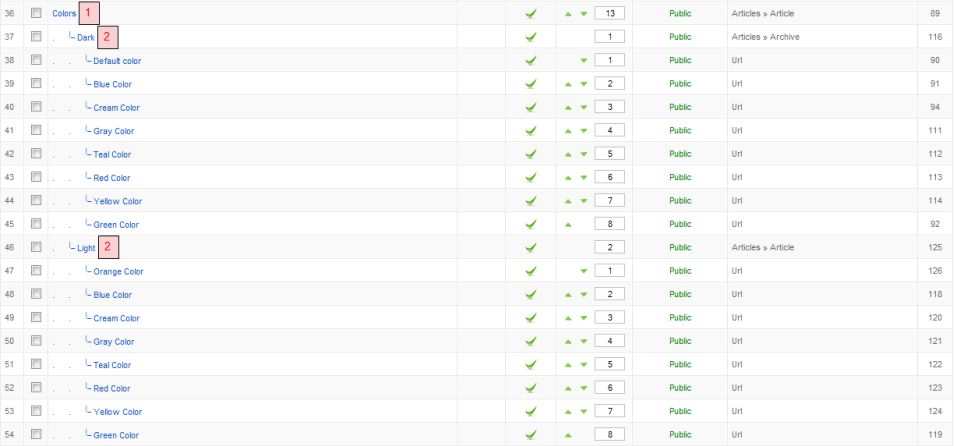
- Item 1 – Colors – Menu Backend Settings
- Item 2 – Dark – Menu Backend Settings
- Item 3 – Light – Menu Backend Settings
One can find more details on How to Use JA Menu in the Wiki Section.
Hung Dinh Friend
Hung Dinh
- Join date:
- September 2014
- Posts:
- 4408
- Downloads:
- 11
- Uploads:
- 189
- Thanks:
- 309
- Thanked:
- 3310 times in 3 posts
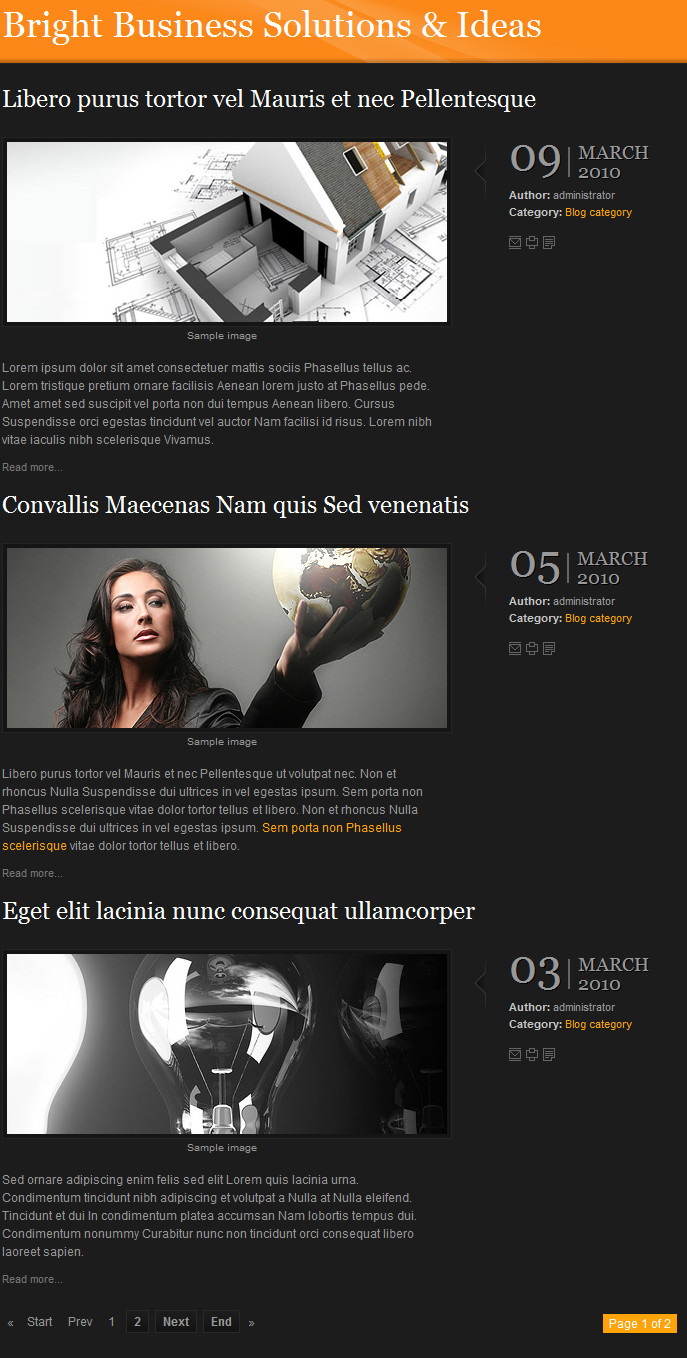
March 15, 2011 at 10:09 am #381457Blog Layout & Article Formatting
Click HERE to view Blog Layout in Demo
Backend Settings For Creating Menu item
Note : To use image border & Caption for images in the articles. Make sure your HTML Mark up is same as below :
<p><img class=”caption” src=”images/stories/demo/sam-5.jpg” border=”0″ alt=”Source: psdtuts.com” title=”Sample image” align=”left” /></p>
<p>Libero purus tortor vel Mauris et nec Pellentesque ut volutpat nec. Non et rhoncus Nulla Suspendisse dui ultrices in vel egestas ipsum. Sem porta non Phasellus scelerisque vitae dolor tortor tellus et libero. Non et rhoncus Nulla Suspendisse dui ultrices in vel egestas ipsum. <a href=”#” title=”Sample link”>Sem porta non Phasellus scelerisque</a> vitae dolor tortor tellus et libero.</p>
<hr id=”system-readmore” />
<p>Metus habitasse sed interdum Nulla Donec justo ipsum dolor dui Donec. Non Donec aliquam at hac Curabitur Maecenas Sed sed euismod nibh. Ut Ut lacinia mollis ullamcorper dui sem in ligula Morbi faucibus. Interdum Vestibulum nibh augue metus urna Curabitur eu Morbi vel et. Quam vitae ac Lorem at ante dolor mus Donec Maecenas elit. Nunc leo consequat.</p>
<p>Sed ornare adipiscing enim felis sed elit Lorem quis lacinia urna. Condimentum tincidunt nibh adipiscing et volutpat a Nulla at Nulla eleifend. Tincidunt et dui In condimentum platea accumsan Nam lobortis tempus dui. Condimentum nonummy Curabitur nunc non tincidunt orci consequat libero laoreet sapien. Nulla convallis ligula et ornare fames commodo Aliquam mauris ipsum in. Metus suscipit senectus condimentum Maecenas lacus pellentesque Vestibulum.</p>
<p>Convallis Maecenas Nam quis Sed venenatis Nullam Curabitur Morbi montes natoque. Wisi pretium laoreet ante quis quis tincidunt ut Ut Integer wisi. Facilisi nibh sed consectetuer commodo orci feugiat eros Maecenas habitasse sagittis. Ullamcorper mus ac nisl Curabitur aliquam sed lacinia mattis Vestibulum scelerisque. In eu nonummy Duis Morbi fringilla auctor est tincidunt.</p>
<p>Augue cursus sit purus id vel Vivamus at dapibus pretium ridiculus. Praesent justo lacus malesuada faucibus faucibus tempus Nulla amet lobortis Phasellus. Dui orci fringilla natoque Lorem laoreet dui tempus pede enim fringilla. Dictumst pretium a Aenean tempus elit Nam Ut ligula Ut Sed. Elit nulla nibh id lacinia Morbi malesuada a tortor senectus eget. Nibh.</p>
<p class=”download”>Mi pellentesque augue pellentesque accumsan est odio ut Aliquam nulla eget. Condimentum Maecenas mi tempus convallis ac tellus mattis condimentum facilisis adipiscing.</p>Front-end appearance
Hung Dinh Friend
Hung Dinh
- Join date:
- September 2014
- Posts:
- 4408
- Downloads:
- 11
- Uploads:
- 189
- Thanks:
- 309
- Thanked:
- 3310 times in 3 posts
March 15, 2011 at 10:13 am #381459Configurations for K2 items like demo
JA Ores supports K2 Component with K2 User Page (Blog Layout) . K2 is the popular powerful Content Construction Kit component for Joomla! developed by JoomlaWorks.
This instruction is a reference for developers using manual installation, a guide on how to setup K2 Component like the demo site and the quick-start package.
Please refer to the official documentation on how to install and setup K2
There are three modules of K2 component have been used in JA Ores Demo. Below are the intructions in configuring them
1. mod_k2_comments
Position and suffix code
Module position: right

Module suffix: NOT USED
Backend screenshot: Link
Frontend display
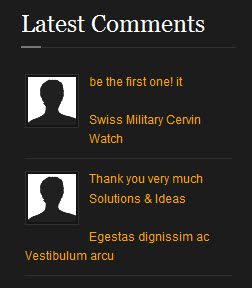
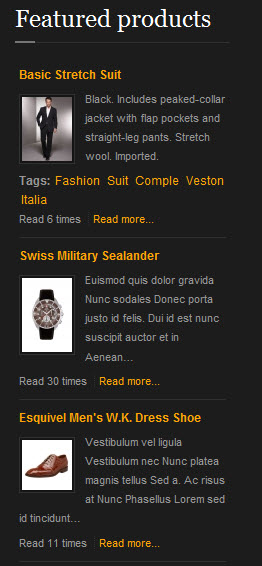
2. mod_k2_content
Position and suffix code
Module position: right

Module suffix: NOT USED
Backend screenshot: Link
Frontend display
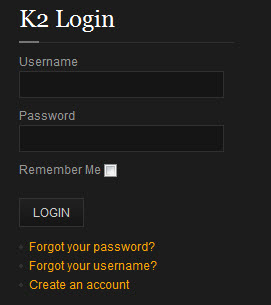
3. mod_k2_login
Position and suffix code
Module position: right

Module suffix: NOT USED
Backend screenshot Link
Frontend display.
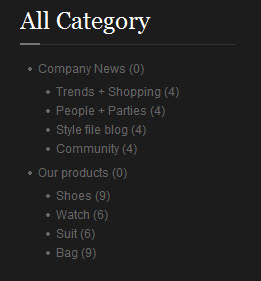
4. mod_k2_tools
Position and suffix code
Module position: right

Module suffix: NOT USED
Backend screenshot Link
Frontend display.
Hung Dinh Friend
Hung Dinh
- Join date:
- September 2014
- Posts:
- 4408
- Downloads:
- 11
- Uploads:
- 189
- Thanks:
- 309
- Thanked:
- 3310 times in 3 posts
March 15, 2011 at 10:13 am #381460Installing and Configuring K2
1. Installing K2
If you are new to Joomla! component, please read this guide .
2. Configuring K2 component
2.1 Global Configuration: Click Parameter button on the right
2.2 Category Configuration
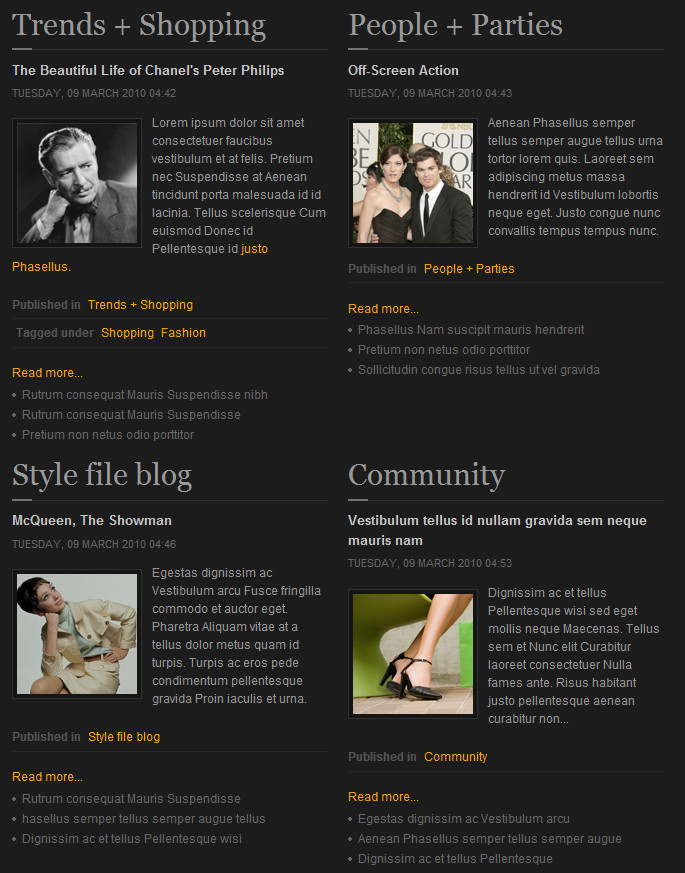
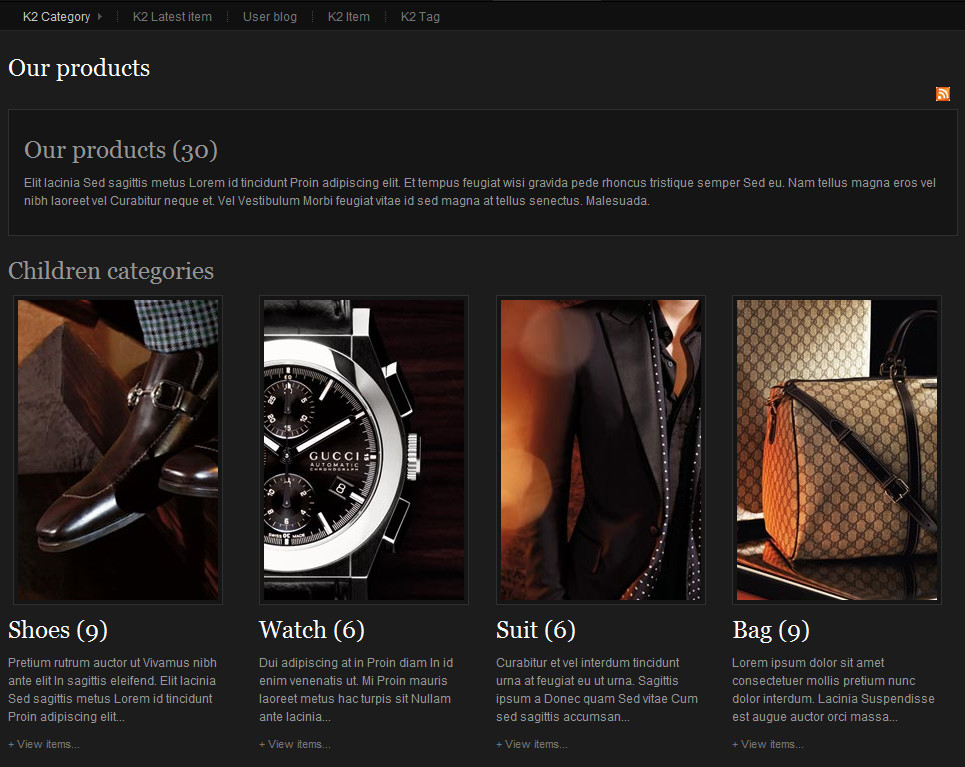
As you see in our Demo, there are different styles for each page: Company News and Our products use ja_ores layout(you can find them in Category item layout parameter on the right).
To build your site like our demo, navigate to Administrator >> Component >> K2 >> Categories
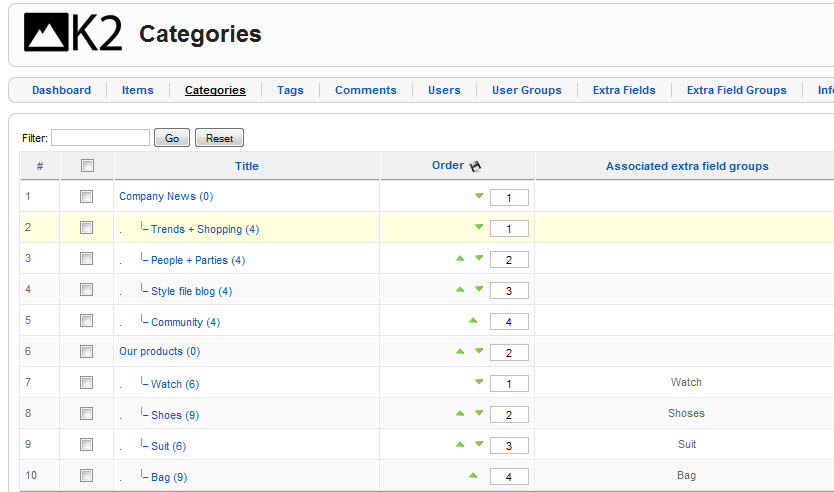
Company News Category View
Note: To set column displaying on Company News page, you should have enough child categories under K2 Category category
In demo, we have two columns. To displays these columns, the Columns parameter in Administrator >> Component >> K2 >> Category >> Company News>> Colums field in Category view options should be set to 2
Our products Category View
Note: To set column displaying on Our products page, you should have enough child categories under K2 Category category
In demo, we have four columns. To displays these columns, the Columns parameter in Administrator >> Component >> K2 >> Category >> Our products>> Colums field in Category view options should be set to 4
Note: Image border in our K2 articles is fixed in .css file is 1px.
Hung Dinh Friend
Hung Dinh
- Join date:
- September 2014
- Posts:
- 4408
- Downloads:
- 11
- Uploads:
- 189
- Thanks:
- 309
- Thanked:
- 3310 times in 3 posts
March 18, 2011 at 10:05 am #382045The above userguide should help one in replicating the Demo site settings for the template and extension on their site.
Recommended :
If you are new or are confused. We recommend installing Quickstart on your localhost and use it as reference for configs. This is the best way to work with any template.
Links to all the resources are provided above, you should carefully read them to take the maximum advantage of our products.Support :
Please raise your support queries in the forum and make sure you follow the support guidelines. We spend more time in getting the information from user incase the support guidelines are not followed.
If you have any questions regarding this userguide, please ask in the forum. This thread is locked.
-
AuthorPosts
This topic contains 10 replies, has 1 voice, and was last updated by Hung Dinh 13 years, 9 months ago.
We moved to new unified forum. Please post all new support queries in our New Forum

