Introduction
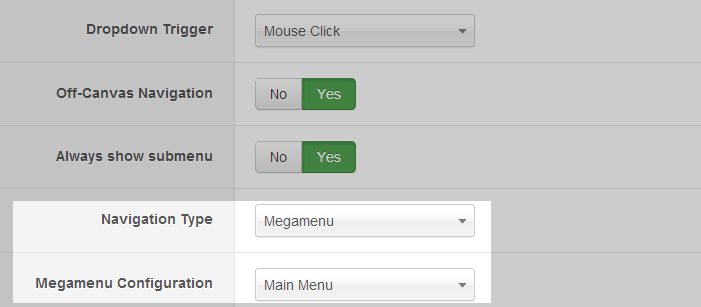
JA Brisk sports all the features introduced in the T3v3 Framework. It is responsive by default with layouts to support various mobile devices, comes with ease to use layout configurator and thememagic, which lets you control and customize almost every part of the template. It also comes with great K2 blog styles apart from bonus styles.
- JA Brisk does not support RTL language, but this feature will come soon.
- Fully compatible with Joomla 2.5 & Joomla 3
1. Main Features
- T3 Framework latest version
- Integrated Bootstrap
- Fully responsive
- K2 Component Support
- Support Mega Menu
- Support 4 themes and 4 layouts.
2. JA Extensions Supported
- JA Slideshow Lite module
- JA Masshead module
- T3 Framework plugin
- JA Extensions Manager Component
3. Third Party Extensions
- K2 Component
- Acymailing Component
4. Layout and Module Positions
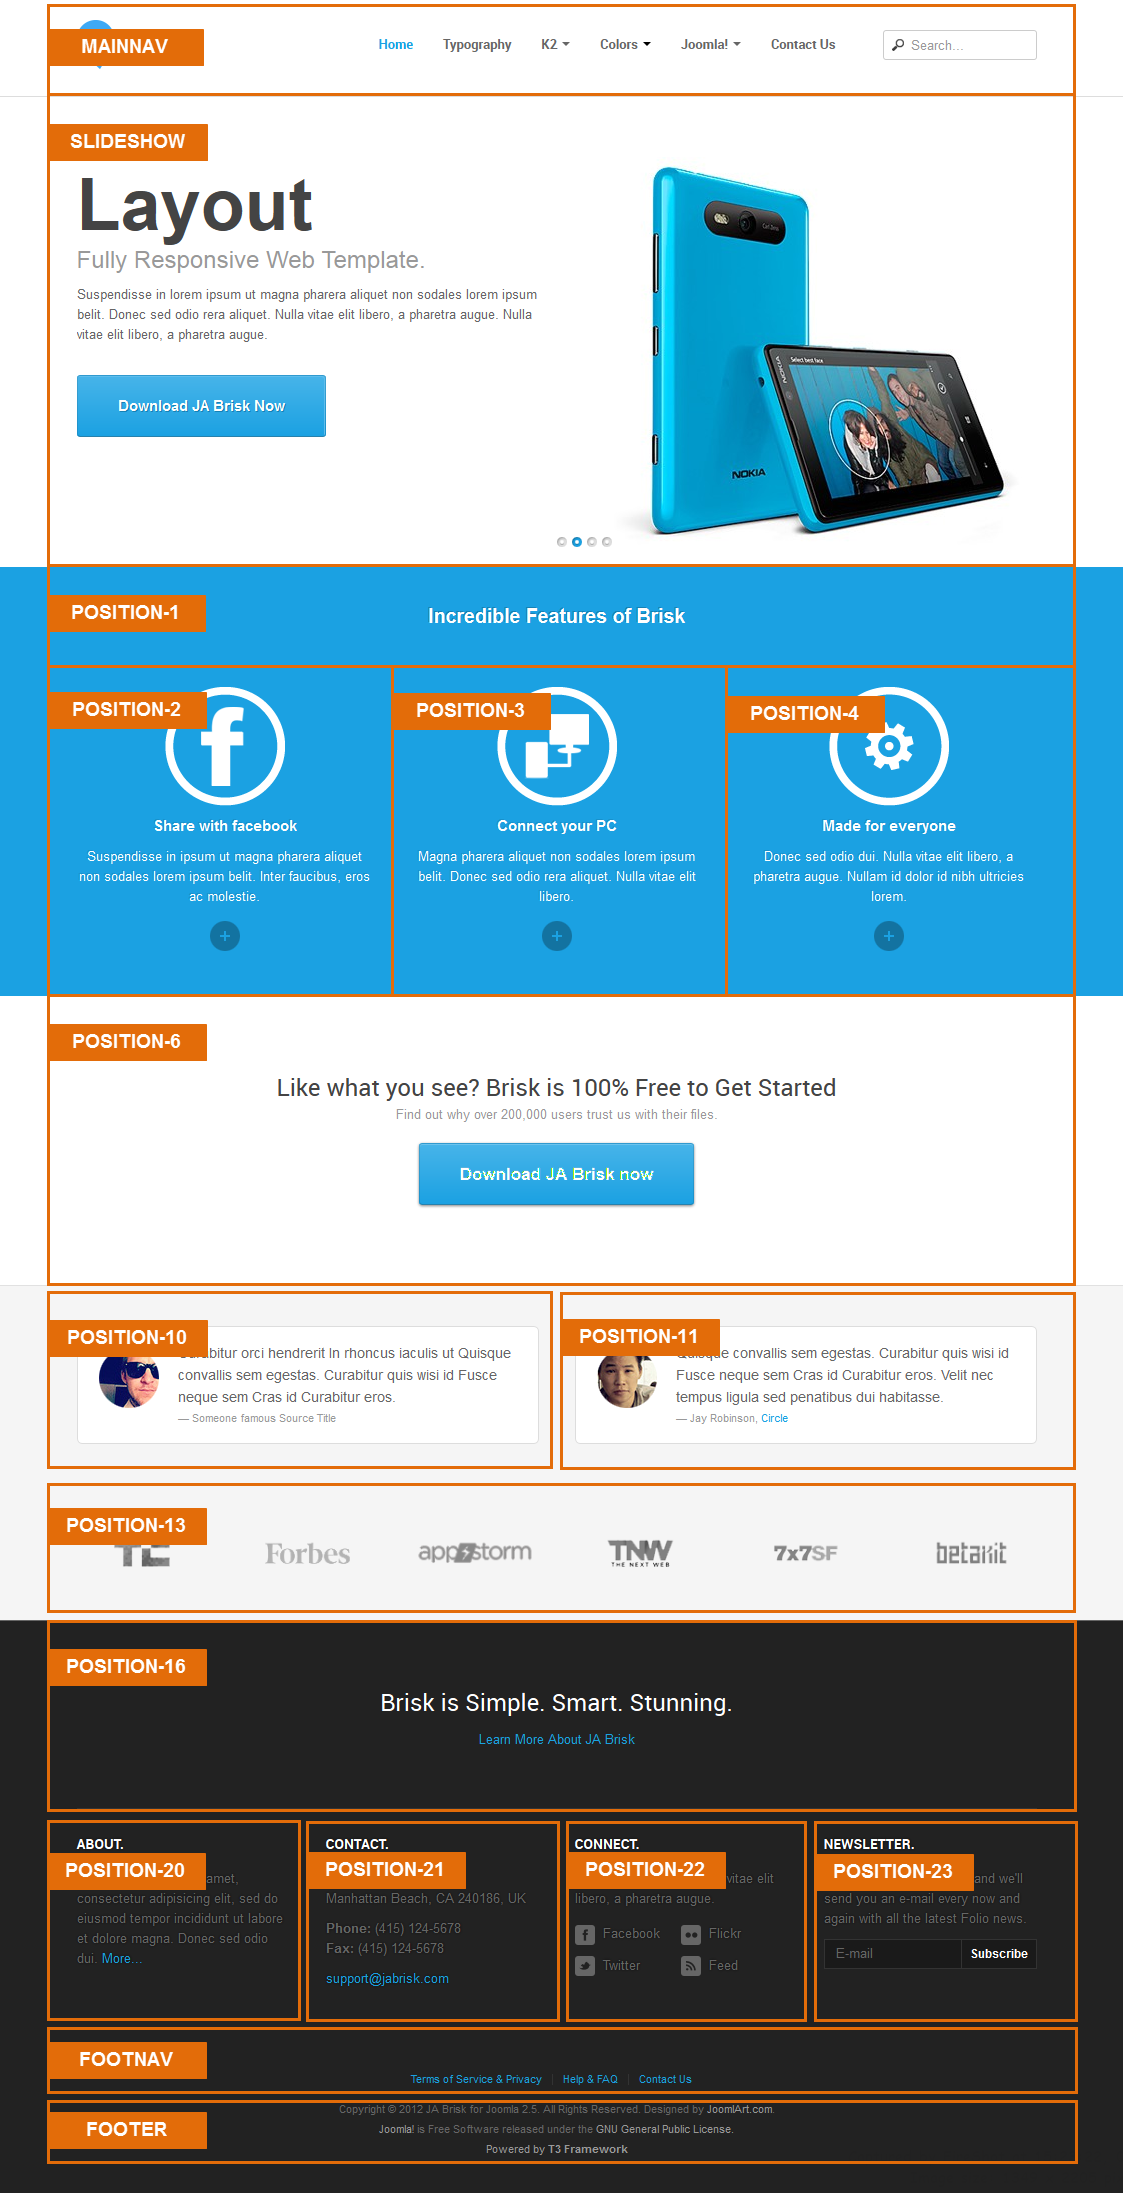
Please check the image below to know the structure, layout, module positions of JA Brisk.
System requirement
JA Brisk is compatible with Joomla 3 and Joomla 2.5. Please make sure your system meets the following requirements:
Joomla 3 System requirement
Software
- PHP (Magic Quotes GPC off): 5.3.1 + (5.4+ recommended)
Databases
- MySQL(InnoDB support required): 5.1+
- MSSQL 10.50.1600.1+
- PostgreSQL 8.3.18+
Web Severs
- Apache 2.x+
- Microsoft IIS 7
- Nginx 1.0 (1.1 recommended)
Joomla 2.5+ system requirement
Software
- PHP 5.2.4+ (5.4+ recommended)
- MySQL: 5.0.4+
Web Sever
- Apache: 2.x+
- Microsoft: IIS 7
- Nginx: 1.0 (1.1 recommended)
Browser requirement
The requirements are the same with both Joomla 2.5 and Joomla 3
- Firefox 4+
- IE (Internet Explorer) 8+
- Google Chrome 10+
- Opera 10+
- Safari 5+
Development Environment
The requirements are the same with both Joomla 2.5 and Joomla 3
During development process, Localhost is preferred. You can use the following servers on your PC to develop your site.
Windows
- WAMPSEVER
- XAMPP for Windows
Linux
- LAMP Bubdle
- XAMPP for Linux
Mac OS
- MAMP & MAMP Pro
- XAMPP for Mac OS
Download & Installation
1. Plan your site Development
- Making a New Site ? - If you are planning to make a new site, then use our Quickstart package to clone the demo site and replace the demo content with yours. Check How to install Quickstart Package.
- Installing on your live site ? - If you are planning to use this template on your already live site. Then you should follow How to make your site look like demo site guide first to know about the steps involved.
2. Download Template and Extensions
Browse and Download: Go to the Download page of JA Brisk and download the Template zip file.
3. Install Template and Extensions
- Install the template that you download in your Joomla 2.5 system.
- JA Brisk template will install with Settings used on the demo website, so you can postpone the configuration until you complete the setup (install other modules / plugins used in the demo website).
If you are new to Joomla installation procedure, please check the following documentation. This guide will show you step by step instructions to install Template and Extensions to your Joomla 2.5 and 3.x system.
Detail documentationNote:
Custom HTML Module: To match the design of the template, we also style (CSS) for Custom HTML modules using different div classes. You will need to check the HTML codes and make sure to use the recommended HTML markup to get correct display. We provide the HTML code in this user-guide.
Extensions Configuration
1. JA Slideshow Lite Module
Module position : slideshow
Module Suffix : NOT USED
Slideshow's description: Add description for each slideshow item, the following is the sample code for description used in demo site.
<h2>JA Brisk</h2><h3>Simple. Smart. Stunning.</h3><p>Suspendisse in lorem ipsum ut magna pharera aliquet non sodales lorem ipsum belit. Donec sed odio rera aliquet. Nulla vitae elit libero, a pharetra augue. Nulla vitae elit libero, a pharetra augue.</span></p>
<div><a class="btn btn-primary btn-lg" href="#" title="Download Brisk Now!">Download JA Brisk Now</a></div>
[/desc]
[desc img="sl-2.jpg" url="#"]
<h2>Layout</h2><h3>Fully Responsive Web Template.</h3><p>Suspendisse in lorem ipsum ut magna pharera aliquet non sodales lorem ipsum belit. Donec sed odio rera aliquet. Nulla vitae elit libero, a pharetra augue. Nulla vitae elit libero, a pharetra augue.</span></p>
<div><a class="btn btn-primary btn-lg" href="#" title="Download Brisk Now!">Download JA Brisk Now</a></div>
[/desc]
[desc img="sl-3.jpg" url="#"]
<h2>Design</h2><h3>Template for Tech news site.</h3><p>Suspendisse in lorem ipsum ut magna pharera aliquet non sodales lorem ipsum belit. Donec sed odio rera aliquet. Nulla vitae elit libero, a pharetra augue. Nulla vitae elit libero, a pharetra augue.</span></p>
<div><a class="btn btn-primary btn-lg" href="#" title="Download Brisk Now!">Download JA Brisk Now</a></div>
[/desc]
[desc img="sl-4.jpg" url="#"]
<h2>Support</h2><h3>Great Customers Support.</h3><p>Suspendisse in lorem ipsum ut magna pharera aliquet non sodales lorem ipsum belit. Donec sed odio rera aliquet. Nulla vitae elit libero, a pharetra augue. Nulla vitae elit libero, a pharetra augue.</span></p>
<div><a class="btn btn-primary btn-lg" href="#" title="Download Brisk Now!">Download JA Brisk Now</a></div>
[/desc]
- Back-end Settings
- Front-end Appearance

For more detail, please check the documentation of the module.
Detail documentation2. JA Masshead Module
Module position : masshead
Module Suffix : NOT USED
How to get condition values for: Itemid
Firstly, you have to disable Search Engine Friendly URLs option. To do that, from the back-end of your site, go to: Site --> Global Configuration --> then navigate to SEO Settings ---> set No for field: Search Engine Friendly URLs
When done, from front-end, go to page where you want to add condition in masshead module, you will see the condition of the page where you can get to configure for the masshead module.

- Back-end Settings
- HTML used in Configuration Condition field in the setting panel.
[Masshead Itemid="470" title="Typography"][/Masshead]
[Masshead Itemid="489" title="About us"][/Masshead]
[Masshead Itemid="509" title="K2 Component"][/Masshead]
[Masshead Itemid="510" title="All Categories"][/Masshead]
[Masshead Itemid="511" title="Mobile and Tablet"][/Masshead]
[Masshead Itemid="512" title="Gadgets"][/Masshead]
[Masshead Itemid="513" title="UI and UX"][/Masshead]
[Masshead Itemid="514" title="Apps and Software"][/Masshead]
[Masshead Itemid="545" title="Storage Devices"][/Masshead]
[Masshead Itemid="546" title="Dev and Design"][/Masshead]
[Masshead Itemid="529" title="Item Page"][/Masshead]
[Masshead Itemid="530" title="Tag Page"][/Masshead]
[Masshead Itemid="531" title="User Page"][/Masshead]
[Masshead Itemid="515" title="Blog post"][/Masshead]
[Masshead Itemid="479" title="Bonus Pages"][/Masshead]
[Masshead Itemid="472" title="Login Page"][/Masshead]
[Masshead Itemid="488" title="Registration Form"][/Masshead]
[Masshead Itemid="473" title="Smart Search"][/Masshead]
[Masshead Itemid="474" title="Offline Page"][/Masshead]
[Masshead Itemid="475" title="Weblinks"][/Masshead]
[Masshead Itemid="476" title="News Feed"][/Masshead]
[Masshead Itemid="491" title="All Positions layout"][/Masshead]
[Masshead Itemid="519" title="Pricing Page"][/Masshead]
[Masshead Itemid="536" title="Joomla Content"][/Masshead]
[Masshead Itemid="537" title="All Categories"][/Masshead]
[Masshead Itemid="538" title="Gadgets"][/Masshead]
[Masshead Itemid="539" title="Mobile"][/Masshead]
[Masshead Itemid="540" title="Tablet"][/Masshead]
[Masshead Itemid="541" title="Mobile App"][/Masshead]
[Masshead Itemid="542" title="Apple iOS"][/Masshead]
[Masshead Itemid="543" title="UI and UX"][/Masshead]
[Masshead Itemid="544" title="Item Page"][/Masshead]
[Masshead Itemid="578" title="Contact Us"][/Masshead]
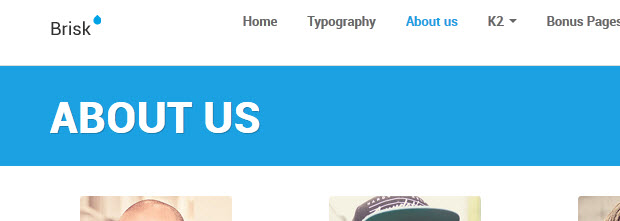
For more detail, please check the documentation of the module.
Detail documentationCustom HTML Modules
If you are not sure how to use Custom HTML Modules or how to access the HTML Editor, please Read this Guide.
We will provide you with the HTML Code (markup) for reference below, you will need to replicate it exactly and then change your content. Remember, HTML code has special div classes, which are required for demo alike display.
1. Spotlight 1: title
Module position : position-1
Module Suffix : NOT USED
<h3 class="sl-title">Incredible Features of Brisk</h3>
- Back-end Settings
- Front-end Appearance

2. Custom quote 1
Module position : position-10
Module Suffix : NOT USED
<blockquote class="rounded"><span class="avatar"> <img src="/images/joomlart/ja_brisk/avt-1.jpg" border="0" alt="Sample avatar" /> <span class="avt-mask">*</span> </span>
<p>Curabitur orci hendrerit In rhoncus iaculis ut Quisque convallis sem egestas. Curabitur quis wisi id Fusce neque sem Cras id Curabitur eros.</p>
<small>Someone famous <cite title="Source Title">Source Title</cite></small></blockquote>
- Back-end Settings
- Front-end Appearance

3. Sample quote 2
Module position : position-11
Module Suffix : NOT USED
<blockquote class="rounded"><span class="avatar"> <img src="/images/joomlart/ja_brisk/avt-2.jpg" border="0" alt="Sample avatar" /> <span class="avt-mask">*</span> </span>
<p>Quisque convallis sem egestas. Curabitur quis wisi id Fusce neque sem Cras id Curabitur eros. Velit nec tempus ligula sed penatibus dui habitasse.</p>
<small>Jay Robinson, <a href="#" title="Sample link">Circle</a></small></blockquote>
- Back-end Settings
- Front-end Appearance

4. Partners
Module position : position-13
Module Suffix : NOT USED
<div class="row">
<div class="span2"><a href="#" title="Logo 1"><img src="/images/joomlart/ja_brisk/logo-1.png" border="0" alt="" /></a></div>
<div class="span2"><a href="#" title="Logo 2"><img src="/images/joomlart/ja_brisk/logo-2.png" border="0" alt="" /></a></div>
<div class="span2"><a href="#" title="Logo 3"><img src="/images/joomlart/ja_brisk/logo-3.png" border="0" alt="" /></a></div>
<div class="span2"><a href="#" title="Logo 4"><img src="/images/joomlart/ja_brisk/logo-4.png" border="0" alt="" /></a></div>
<div class="span2"><a href="#" title="Logo 5"><img src="/images/joomlart/ja_brisk/logo-5.png" border="0" alt="" /></a></div>
<div class="span2"><a href="#" title="Logo 6"><img src="/images/joomlart/ja_brisk/logo-6.png" border="0" alt="" /></a></div>
- Back-end Settings
- Front-end Appearance

5. Jumbutron 2
Module position : position-16
Module Suffix : NOT USED
<div class="jumbotron">
<h3>Brisk is Simple. Smart. Stunning.</h3>
<p><a href="#" title="Sample link">Learn More About JA Brisk</a></p>
</div>
- Back-end Settings
- Front-end Appearance

6. Share with Facebook
Module position : position-2
Module Suffix: NOT USED
<p><img src="/images/joomlart/ja_brisk/icon-1.png" border="0" alt="icon Facebook" /></p>
<h4>Share with Facebook</h4>
<p>Suspendisse in ipsum ut magna pharera aliquet non sodales lorem ipsum belit. Inter faucibus, eros ac molestie.</p>
<p class="readmore"><a href="#" title="Read on">Read more</a></p>
- Back-end Settings
- Front-end Appearance

7. Connect your PC
Module position : position-3
Module Suffix : NOT USED
<p><img src="/images/joomlart/ja_brisk/icon-2.png" border="0" alt="icon Facebook" /></p>
<h4>Connect your PC</h4>
<p>Magna pharera aliquet non sodales lorem ipsum belit. Donec sed odio rera aliquet. Nulla vitae elit libero.</p>
<p class="readmore"><a href="#" title="Read on">Read more</a></p>
- Back-end Settings
- Front-end Appearance

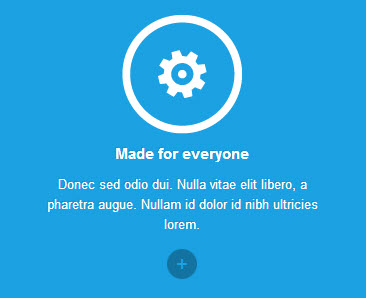
8. Made for everyone
Module position : position-4
Module Suffix : NOT USED
<p><img src="/images/joomlart/ja_brisk/icon-3.png" border="0" alt="icon Facebook" /></p>
<h4>Made for everyone</h4>
<p>Donec sed odio dui. Nulla vitae elit libero, a pharetra augue. Nullam id dolor id nibh ultricies lorem.</p>
<p class="readmore"><a href="#" title="Read on">Read more</a></p>
- Back-end Settings
- Front-end Appearance
9. About
Module position : position-20
Module Suffix : NOT USED
<p>Lorem ipsum dolor sit amet, consectetur adipisicing elit, sed do eiusmod tempor incididunt ut labore et dolore magna. Donec sed odio dui. <a href="#" title="Sample link">More...</a></p>
- Back-end Settings
- Front-end Appearance

10. Contact
Module position : position-21
Module Suffix : NOT USED
<p>0123 Unknow Str, Manhattan Beach, CA 240186, UK</p>
<p><strong>Phone:</strong> (415) 124-5678 <strong>Fax:</strong> (415) 124-5678</p>
<p>support@jabrisk.com</p>
- Back-end Settings
- Front-end Appearance

11. Contact
Module position : position-22
Module Suffix : NOT USED
<p>Donec sed odio dui. Nulla vitae elit libero, a pharetra augue.</p>
<ul class="social-list">
<li class="Facebook"><a href="#" title="Facebook"><span>*</span>Facebook</a></li>
<li class="flickr"><a href="#" title="Flickr"><span>*</span>Flickr</a></li>
<li class="twitter"><a href="#" title="Twitter"><span>*</span>Twitter</a></li>
<li class="feed"><a href="#" title="Feed"><span>*</span>Feed</a></li>
</ul>
- Back-end Settings
- Front-end Appearance

12. Position 5
Module position : position-6
Module Suffix : NOT USED
<h3>Like what you see? Brisk is 100% Free to Get Started</h3>
<p class="intro">Find out why over 200,000 users trust us with their files.</p>
<div><a class="btn btn-primary btn-lg" href="#" title="Download now">Download JA Brisk now</a></div>
- Back-end Settings
- Front-end Appearance

13. About us
Module position : slidebar-2
Module Suffix : NOT USED
<p>Nullam id dolor id nibh ultricies ehicula ut id elit. <a href="#" title="Sample link">Integer posuere</a>erat a ante lorem enenatis dapibus posuere. Cras nec purus ac dolor.</p>
<p><a href="#" title="Sample link">More About Us</a></p>
- Back-end Settings
- Front-end Appearance

K2 Configuration
1. Installation
If you are new to K2 Component, please follow THIS GUIDE to know more about the component, how to install, how to use.
2. Configuring K2 component
We provide a template for K2: ja_brisk. Assign categories for the template to use the template in your site. In our demo site, the template: ja_brisk is assigned to all categories.
2.1 Global Configuration: (click Parameter button on the top right side).
Back-end Setting
- Layout & View Settings
- Content Settings
- Images Settings
- Social Settings
- Comments Settings
- Frontend & Editing Settings
- Advanced Settings
2.2 Category Configuration:
To build your website like our demo, navigate to: Administrator >> Components >> K2 >> Categories

Front-end Appearance
- All categories page
- K2 article detail page


Back-end settings for each category
Note: other categories are inherited from category Mobile and Tablet settings.
3. Configurations for K2 Modules
These modules are all available for you to use when you install K2 in your site.
3.1 K2 Comments
Module position : slidebar-2
Module Suffix : NOT USED
- Back-end Settings
- Front-end Appearance

3.2 K2 Content
Module position : sidebar-2
Module Suffix : NOT USED
- Back-end Settings
- Front-end Appearance

3.3 K2 Tools
3.3.1 K2 Archive
Module position : sidebar-2
Module Suffix : NOT USED
- Back-end Settings
- Front-end Appearance

3.3.2 K2 Calendar
Module position : sidebar-2
Module Suffix : NOT USED
- Back-end Settings
- Front-end Appearance

3.3.2 K2 Tags
Module position : sidebar-2
Module Suffix : NOT USED
- Back-end Settings
- Front-end Appearance

Typography Styles and About Us Article
1. Typography Styles
JA Brisk comes with multiple typography styles for headings, contents, tables, buttons, quotes, lists and so on... It uses Typography of T3V3.
You can view the Typography Page on the Demo site: Typography Page.
Here is the Typo HTML code.
You can use the above HTML code to make a similar page on your website and refer to the codes for using Typography.
2. About Us Article
In the demo, we have a Contact Us menu, this menu displays Contact Us article. The following is the HTML code of the article.

6.3 Pricing Page
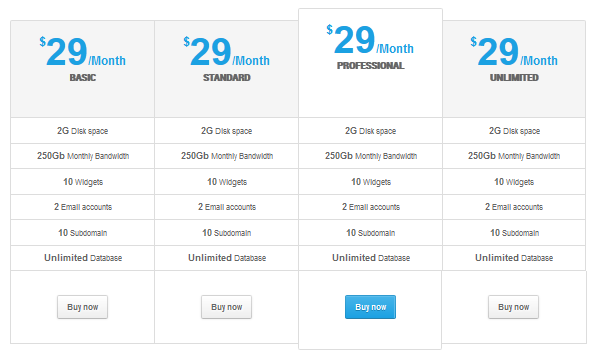
HTML Code
<div class="pricing-table style1">
<div class="col-wrap four-cols">
<div class="col col-first">
<div class="col-header"><span class="price"><sup>$</sup>29<small>/Month</small></span> <strong>Basic</strong></div>
<ul>
<li><strong>2G</strong> Disk space</li>
<li><strong>250Gb</strong> Monthly Bandwidth</li>
<li><strong>10</strong> Widgets</li>
<li><strong>2</strong> Email accounts</li>
<li><strong>10</strong> Subdomain</li>
<li><strong>Unlimited</strong> Database</li>
</ul>
<div class="col-footer"><a class="btn" href="#" title="Buy now">Buy now</a></div>
</div>
<div class="col">
<div class="col-header"><span class="price"><sup>$</sup>29<small>/Month</small></span> <strong>Standard</strong></div>
<ul>
<li><strong>2G</strong> Disk space</li>
<li><strong>250Gb</strong> Monthly Bandwidth</li>
<li><strong>10</strong> Widgets</li>
<li><strong>2</strong> Email accounts</li>
<li><strong>10</strong> Subdomain</li>
<li><strong>Unlimited</strong> Database</li>
</ul>
<div class="col-footer"><a class="btn" href="#" title="Buy now">Buy now</a></div>
</div>
<div class="col featured">
<div class="col-header"><span class="price"><sup>$</sup>29<small>/Month</small></span> <strong>Professional</strong></div>
<ul>
<li><strong>2G</strong> Disk space</li>
<li><strong>250Gb</strong> Monthly Bandwidth</li>
<li><strong>10</strong> Widgets</li>
<li><strong>2</strong> Email accounts</li>
<li><strong>10</strong> Subdomain</li>
<li><strong>Unlimited</strong> Database</li>
</ul>
<div class="col-footer"><a class="btn" href="#" title="Buy now">Buy now</a></div>
</div>
<div class="col col-last feature-rs">
<div class="col-header"><span class="price"><sup>$</sup>29<small>/Month</small></span> <strong>Unlimited</strong></div>
<ul>
<li><strong>2G</strong> Disk space</li>
<li><strong>250Gb</strong> Monthly Bandwidth</li>
<li><strong>10</strong> Widgets</li>
<li><strong>2</strong> Email accounts</li>
<li><strong>10</strong> Subdomain</li>
<li><strong>Unlimited</strong> Database</li>
</ul>
<div class="col-footer"><a class="btn" href="#" title="Buy now">Buy now</a></div>
</div>
</div>
</div>
Template Customization
1. Template Override
In summary, to override template, you clone a style then edit as you wish. After all, assign the cloned style to specific menus. The assigned menus will override the same menus in the default style.
Each style can be configured to use a theme, layout so in one website, you can have menus with different themes, layouts.
2. Themes Setting

Let's check how front-end looks like.

3. Layout Setting
JA Brisk supports 2 layouts: "default" layout and "home" layout.
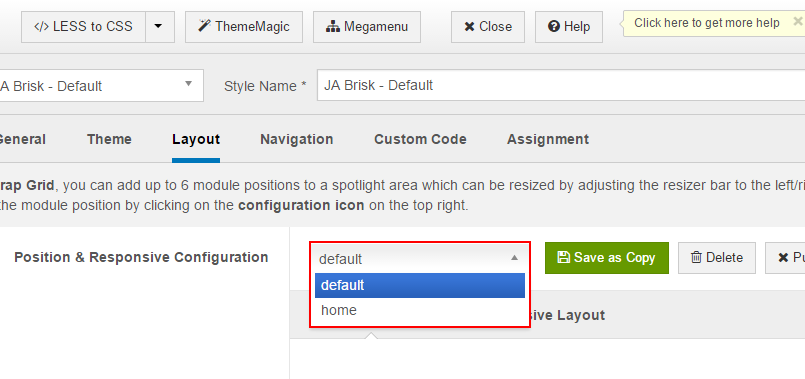
For more detail, check out video tutorials for layout configuration and layout customization from the links below:
Layout configuration video tutorial Layout customization video tutorial
4. ThemeMagic Setting
JA Brisk is developed with T3 so you can customize themes with ThemeMagic.
To customize theme with the feature, firstly, you have to enable the option.

In the setting panel, you can customize all the themes. The left panel is the setting area while the right panel is your site front-end. Each time you change setting, click on "Preview" button to view the change in front-end on the right panel.

For more info, please check out the video tutorial from the link below:
Recommendation
The above userguide should help one in replicating the Demo site settings for the template and extension on their site.
Recommended :
If you are new or are confused. We recommend installing Quickstart on your localhost and use it as reference for configs. This is the best way to work with any template. Links to all the resources are provided above, you should carefully read them to take the maximum advantage of our products.
Support :
Please raise your support queries in the forum and make sure you follow the support guidelines. We spend more time in getting the information from users in case the support guidelines are not followed.

