Installation
The section will help you with steps to install the JA Vogue quickstart or manual installation.
- Quickstart installation: Replicate Template demo to your server.
- Manual installation: install template, plugin manually on your Joomla site
System requirement
Please make sure your system meets the following requirements:
Software
- Software: PHP (Magic Quotes GPC off): 7.2+ (8.0 recommended)
Databases
- MySQL(InnoDB support required): 5.61+
- MSSQL 10.50.1600.1 +
- PostgreSQL 11.0
Web Servers
- Apache 2.4+
- Microsoft IIS 7
- Nginx 1.10 (1.18+ recommended)
Browser requirement
- Firefox 13+
- IE (Internet Explorer) 8+
- Google Chrome XY and the latest
- Opera 11.6+
- Safari 5.1+
Development Environment
During the development process, Localhost is preferred. You can use the following servers on your PC to develop your site.
Windows
- wamp server
- XAMPP for Windows
Linux
- LAMP Bundle
- XAMPP for Linux
Mac OS
- MAMP & MAMP Pro
- XAMPP for Mac OS
Joomla 5 System requirement
Extensions & Compatibility:
Joomla 5 introduces Fontawesome 6.4, Codemirror 6, and has updated its Webauthn Library. Notably, Joomla now requires PHP 8.1, MySQL 8.0.13+, MariaDB 10.4+, and PostgreSQL 12+ for optimal performance.
Cleaner Code Base: Joomla 5 places a strong emphasis on code cleanliness. The transition from older APIs, removal of es5 support, and other heavily coded cleanups ensure the CMS runs efficiently.
Download packages
JA Vogue download section includes the following files:
- Quickstart package for Joomla 5
- Quickstart package for Joomla 4
- JA Vogue template
- T4 Framework plugin
- JA ACM Module
- JA Social Share plugin
- Smart Search Module
Quickstart installation
Quickstart installation allows you to replicate the demo site to your server with all T4 extensions installed and demo content
Manual Installation
Installing the JA Vogue, T4 framework, and other extensions on your existing Joomla website.
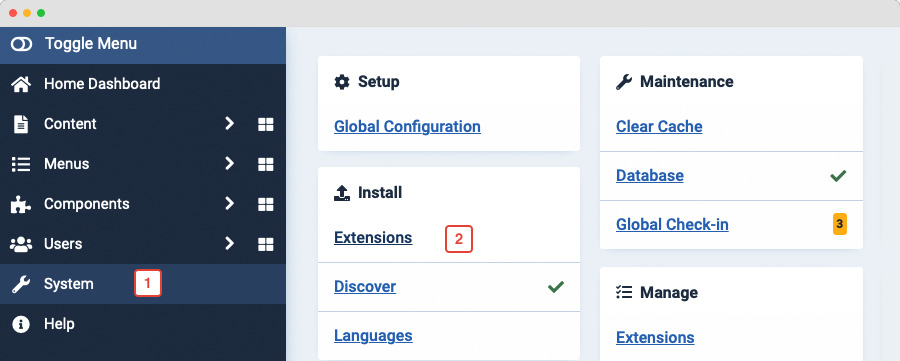
From your back-end setting panel, go to: "Extensions > Extension Manager", browse the extension installation files then hit the "Upload and Install"
- T4 Framework plugin
- JA Vogue template
- JA ACM module
- JA Extension manager component
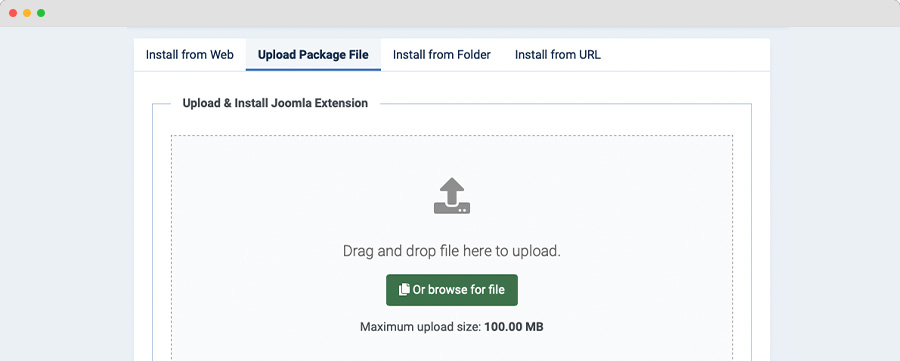
By default, the T4 plugin will be auto-enabled after installation. You can check this by going to "Extensions > Plugin Manager" then find T4 Plugin.
Set JA Vogue as the default template style
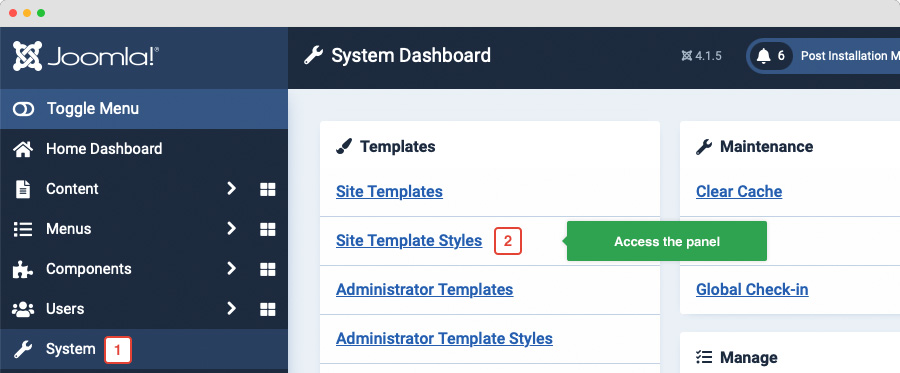
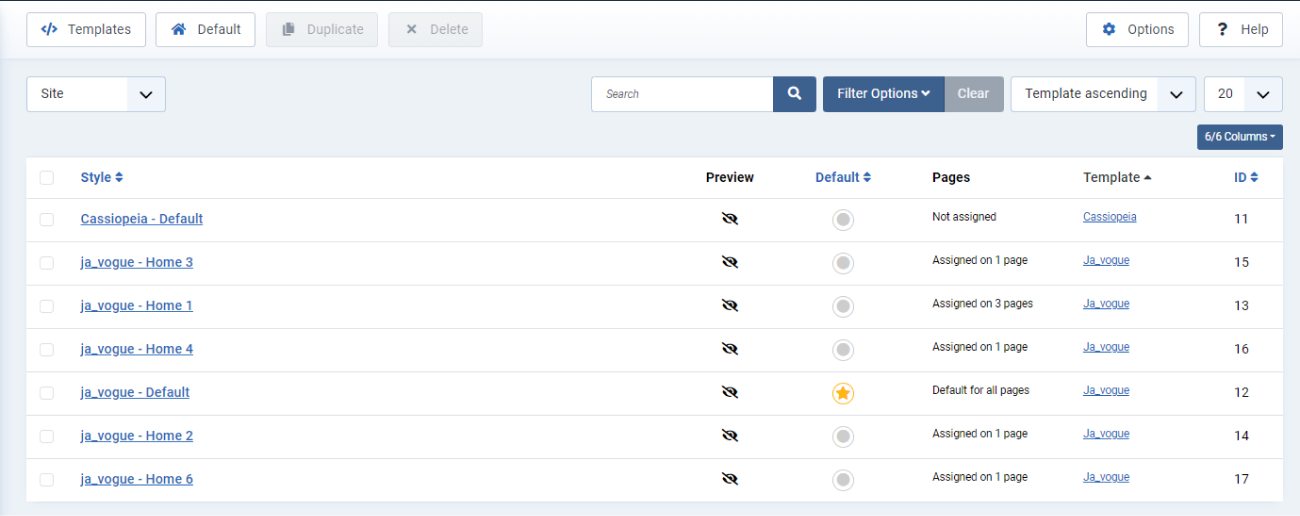
Joomla 4: Go to: "System > Site Template Styles", set JA Vogue template style as your default template style.
Template folder structure
This section is to help you understand the folder structure of the JA Vogue template, where to find the files you want.
JA Vogue template
JA Vogue template is built on the T4 Framework so its folder structure is almost the same as any other JA Templates that are developed with T4 Framework.
/templates/ja_vogue/
		+-- scss/                 /*  all SCSS files */
		+--     scss/tpl                 /*  theme tpl SCSS files */
		¦    +--  _acm.scss
		¦    +--  _all.scss
		¦    +--  _offcanvas.scss
		¦    +--  _styles.scss
		¦    +--  _typo.scss
		¦    +--  _utilities.scss
		¦    +--  _variables.scss
		¦    +--  _vars.scss
		¦    +--  _virtuemart.scss
		¦    +--  jpages.scss
		¦    +--  rtl.scss
		¦    +--  template.scss
		¦    +--  theme.scss
		¦    +--  _bootstrap.scss
		¦    +--  _components.scss
		¦    +--  _forms.scss
		¦    +--  _global.scss
		¦    +--  _joomla.scss
		¦    +--  _megamenu.scss
		¦    +--  _modules.scss
		¦    +--  _navigations.scss
		+-- scss/tpls
		+-- css/                     /*compiled files from SCSS*/
		¦    +-- template.css
		¦    +-- rtl.css
		¦    +-- acm.css
		¦    +-- jpages.css
		¦    +-- off-canvas.css/
		¦    +-- offline.css/
		+-- html/               /*override modules and Joomla com_content*/
		¦    +-- com_content/
		¦    ¦    +-- article/
		¦    ¦    +-- category/
		¦    ¦    +-- featured/
		¦    +-- com_contact/
		¦    ¦    +-- contact/
		¦    +-- mod_articles_categories/
		¦    +-- mod_articles_category
		¦    +-- layouts/
		¦    +-- ...
		+-- fonts/
		+-- js/
		¦    +--owl-carousel/
		¦    +--html5lightbox/
		¦    +-- bootstrap.bundle.js
		¦    +-- template.js
		¦    +-- imagesloaded.pkgd.js
		¦    +-- isotope.pkgd.js
		+-- images/
		+-- language/
		+-- templateDetails.xml
		+-- templateInfo.php/
		+-- templateHook.php/
CSS and SCSS customization
Any customization is not recommended in the t4 plugin.
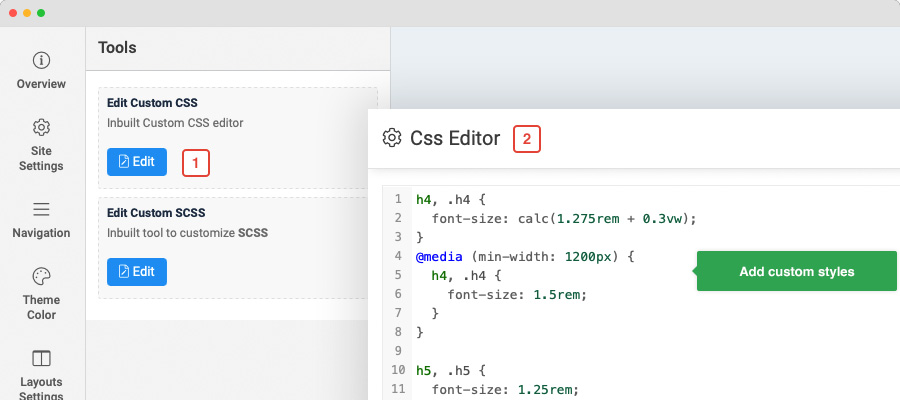
To customize your site style, you can use either CSS or SCSS customization tool.
Template configuration
1. Layout configuration
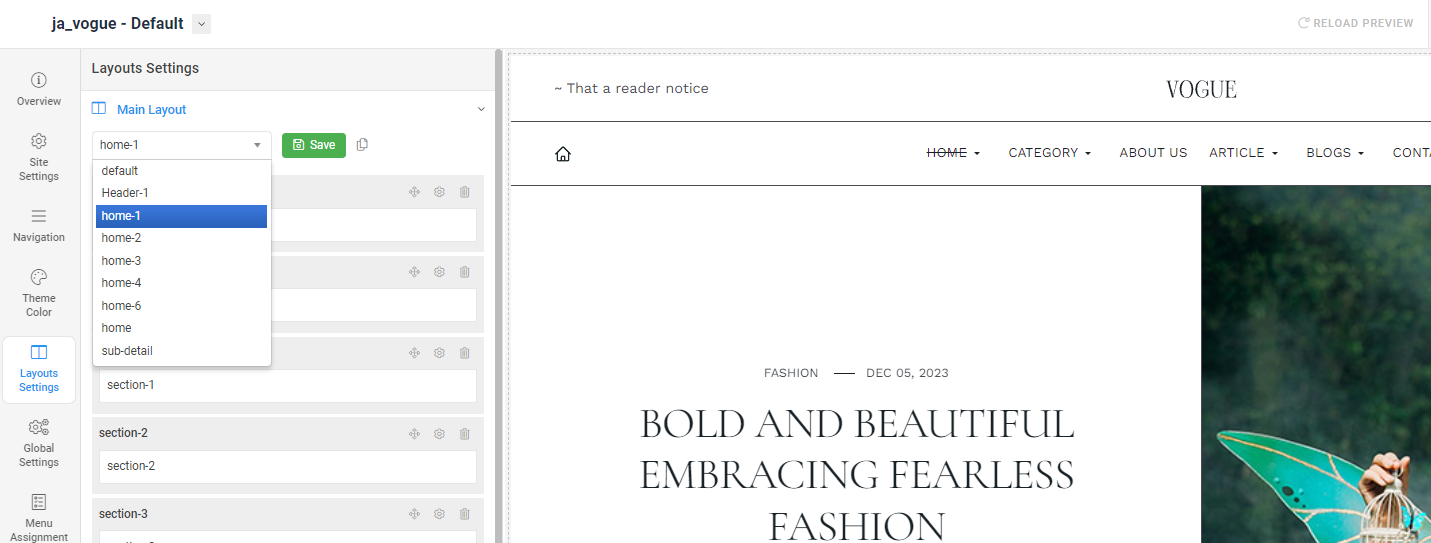
JA Vogue supports different layouts by default and you can create more layouts using layout builder.
Assign Layout for a template style
To assign a layout for a JA Vogue template style, open the template style » Layout setting panel » and assign a layout for the template style.
Set sub-layout
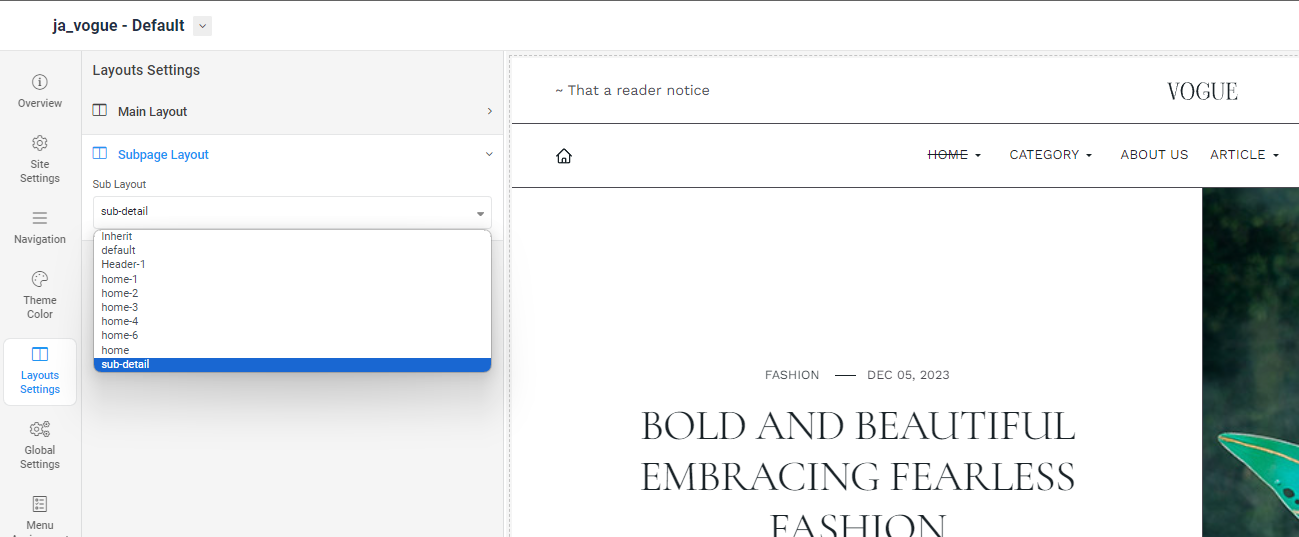
The sub layout is used for child pages. For example, if the Category page is assigned to the main layout, the article detail page is the child page of the Category page, and it will be using the sub-layout, in case the setting is active.
To configure the sub-layout, in the layout setting panel, scroll down and you will find the Sub Layout setting, assign a layout and save the layout setting.
Layout positions:
- home layout
- home-1 layout
- home-2 layout
- home-3 layout
- home-4 layout
- default layout
- Sub detail layout
- header-1 layout
Note: You can create multiple template styles with different layouts assigned. Then assign each template style to specific pages.
3. Site settings

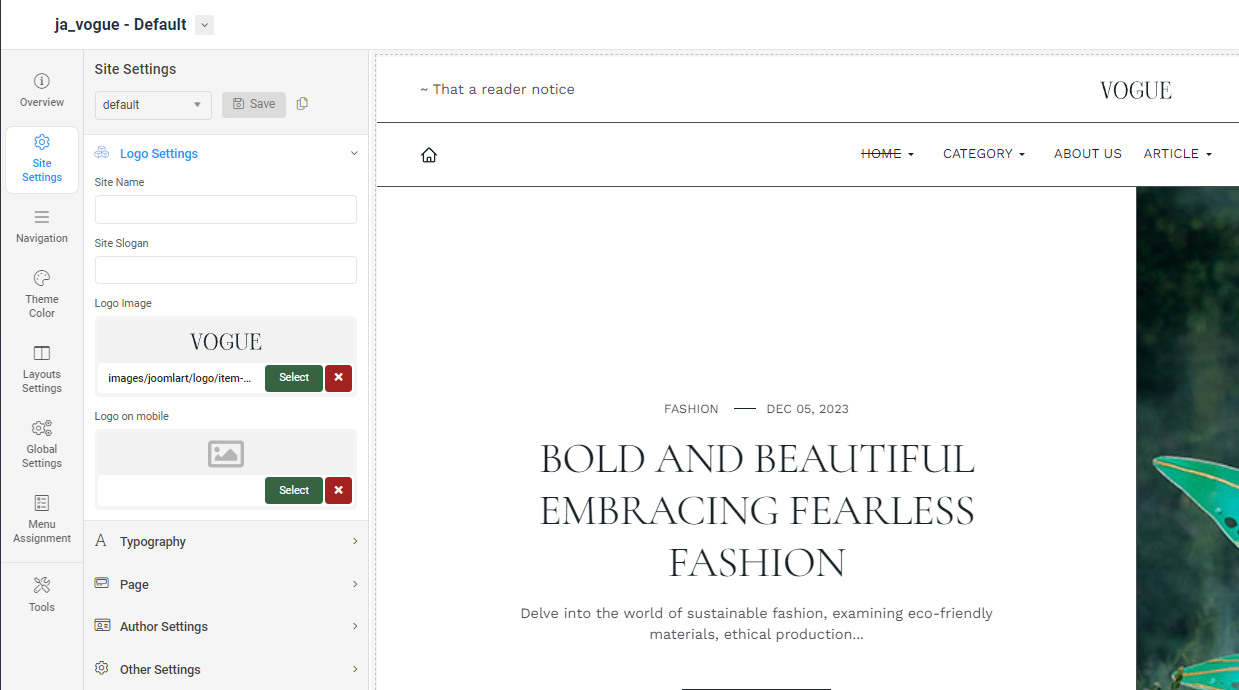
Logo settings
The Logo settings are present under Site configuration > Logo Settings.
For the logo, you can select to use an image logo or text logo. You can also select the different logos for mobile view and dark theme logo
Typography settings
The typography includes the global settings for font family, font weight, and line height.
You can enable the custom font setting for heading and navigation (menu).
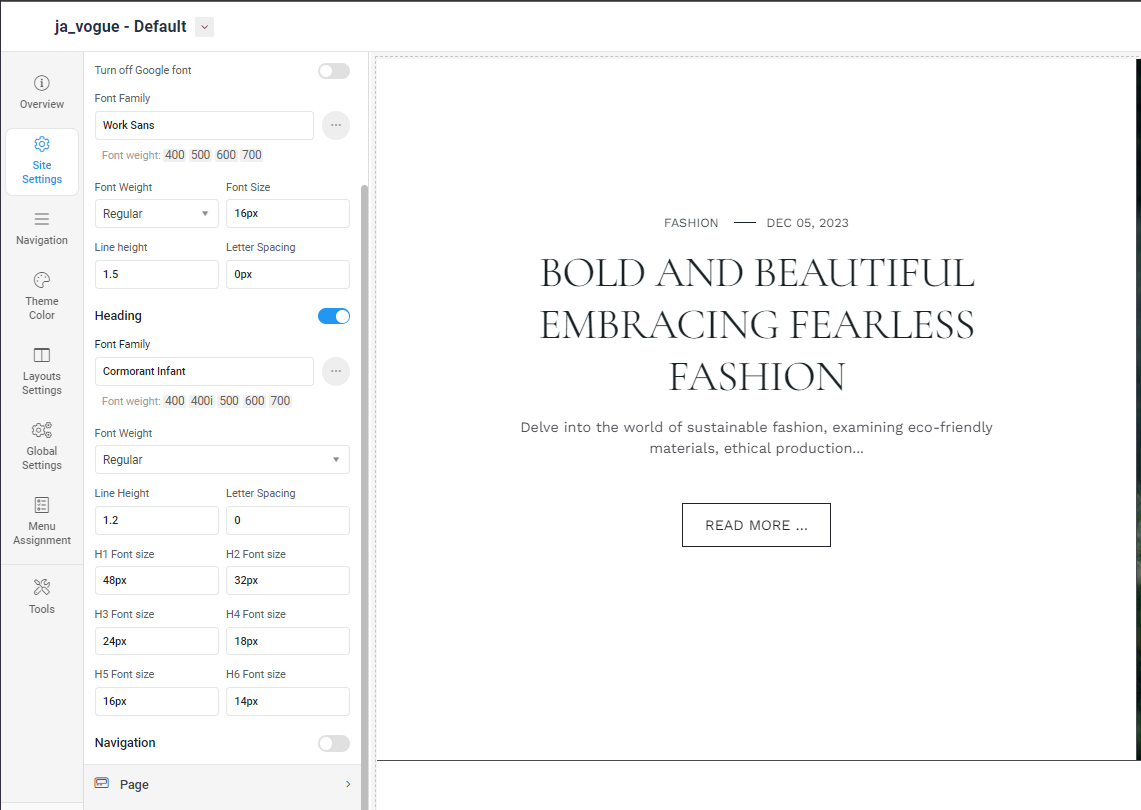
Local font supported: due to the GDPR issue, you can disable Google font, and use the local font that is already supported at core.
Other settings:
- Page: set page backgroud image and background style attributes
- Author Settings: show, hide the author block and link for the author
- Favicon setting: add custom favicon
4. Navigation configuration
JA vogue supports Megamenu for Desktop layout and dropdown or Off-canvas for Mobile layout.
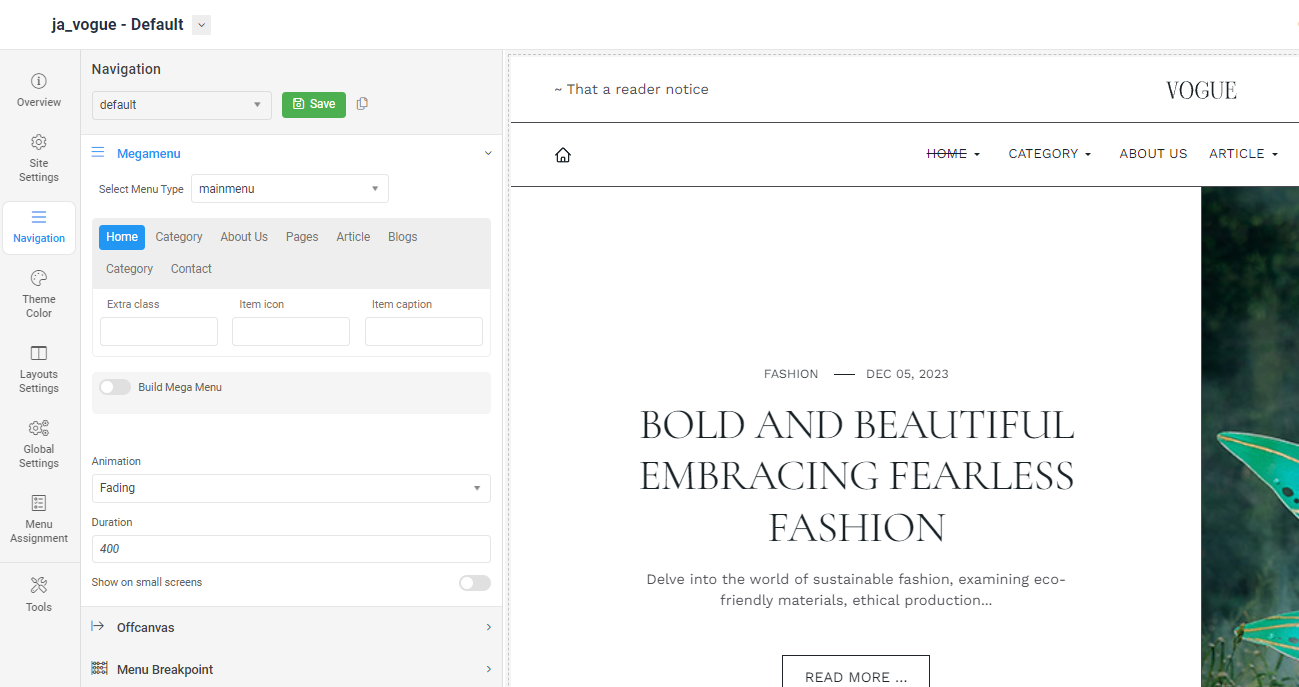
Megamenu setting
Go to Navigation > Megamenu, select a menu and configure the megamenu. You can build a mega menu with multiple rows, each row can include multiple columns. You can assign menu items, modules or a module position to each column.
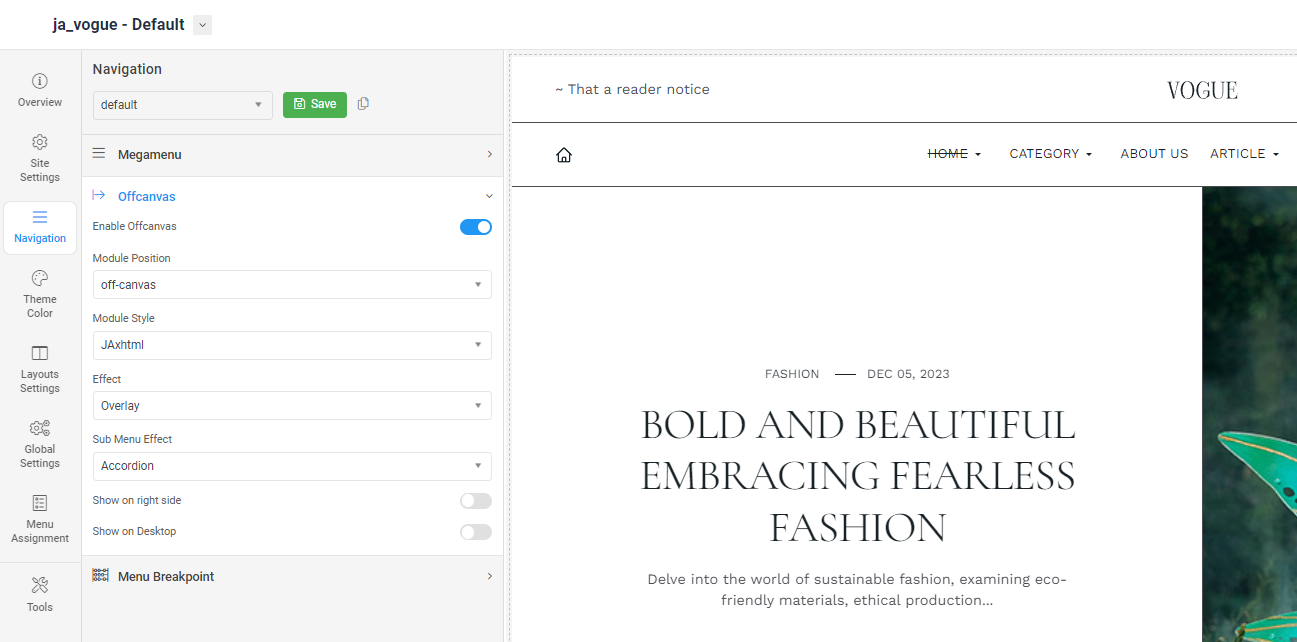
Off-canvas Menu setting
Enable Off-canvas (it is enabled by default), select module position, module style and other options.
Next, create a menu module, assign it to the position: off-canvas.
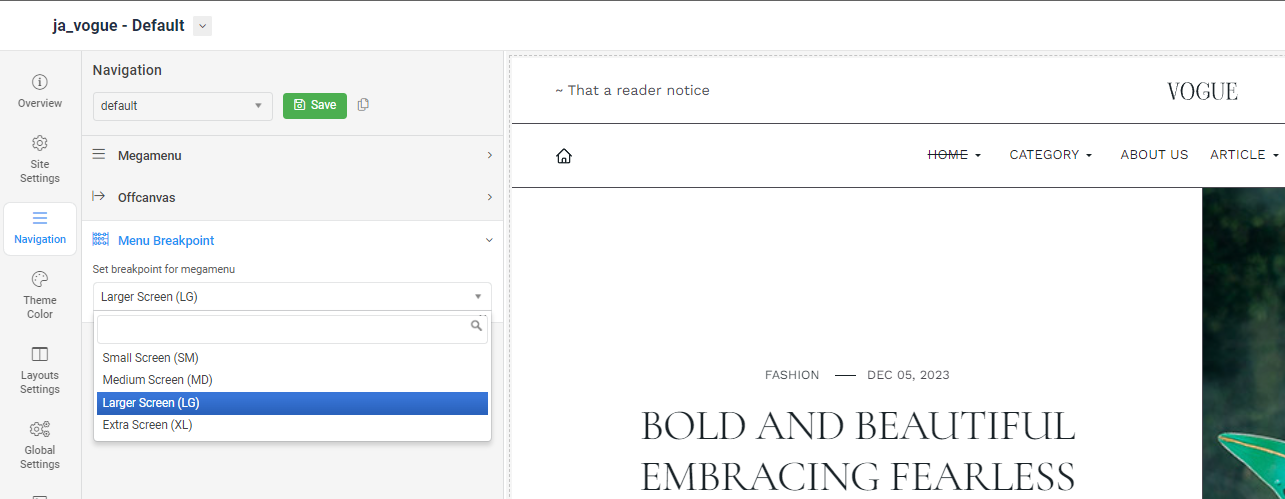
Menu Breakpoint setting
The Mobile Menu Breakpoint is an additional customization option. Using this feature, you can choose the screen width necessary for the Mobile Menu to be triggered. With a larger Breakpoint Width, you can make the mobile menu appear on the desktop.
5. Theme color settings
The theme color allows you to use the color picker to change color for brand colors, base colors, main menu colors, and footer colors.
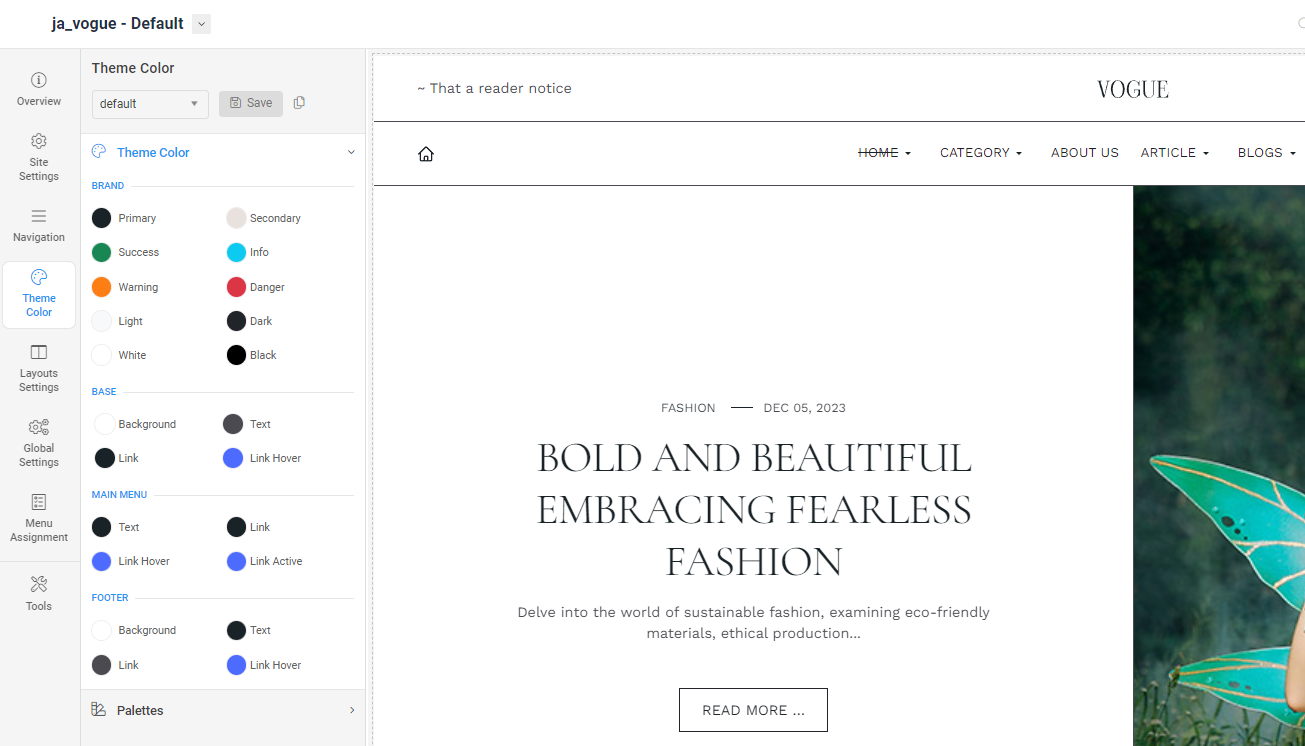
You can view the changes in the website preview on the right panel.
6. Global settings
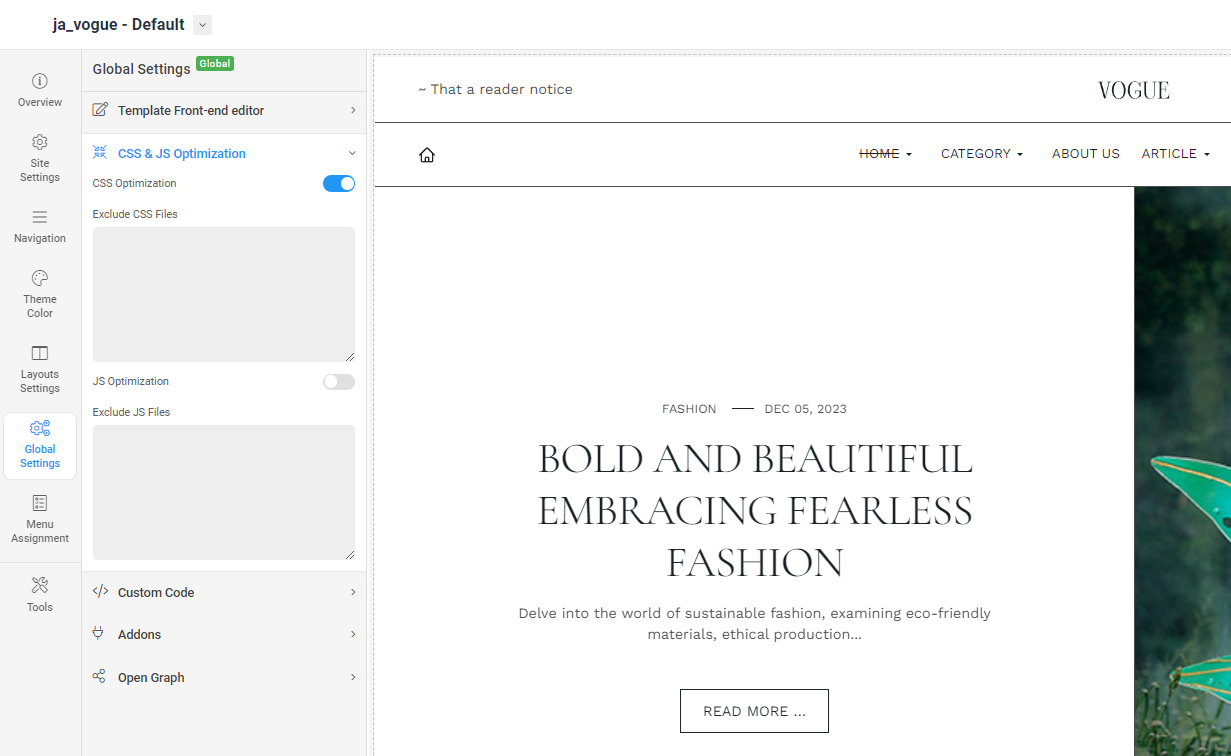
JA vogue template global settings include:
- T4 edit layout: this is the front-end editor (article, module) layout setting, you can select to use clean layout or full position layout
- CSS & JS optimization: JS and CSS optimization is the process of making your website smaller and faster to load by minifying the JS and CSS codes.
- Custom Code: You can insert any CSS, JS, meta tags, links, and verification codes using the custom code option. With multiple options to add custom to specific tags.
- Add-ons: includes settings to enable or disable font icons like Font Awesome, Iconmoon. When an Addon is disabled, its CSS and JS will not be loaded on your website, this is to help keep your site clean and load faster.
- Open Graph: Open Graph Meta Tags are used to provide structured data to social media platforms, such as Facebook and Twitter, about a webpage's content. This helps these platforms to display the content in a more visually appealing and informative way, such as images, titles, and descriptions.
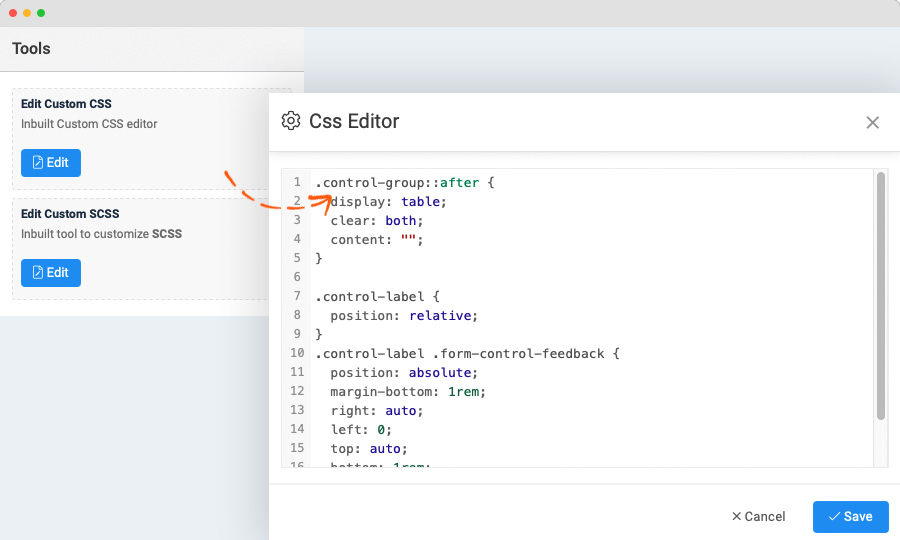
7. CSS & SCSS editor tool
Customizing style for your site is even simpler with the inbuilt custom CSS Editor. In the Tools panel, hit the Edit Custom CSS button and you can add your own custom CSS rules to the editor.
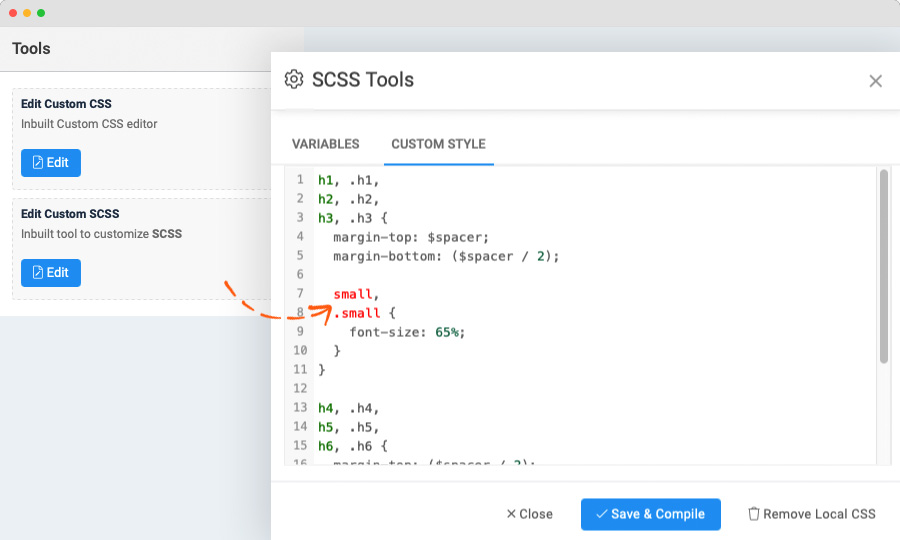
You can override the default variables in the Variables customization editor, as well as the adding custom SCSS.
Home page 1 set up
Step 1. Create menu item
Go to Menu » Main menu, add a new menu item, select Articles » Featured news menu type.
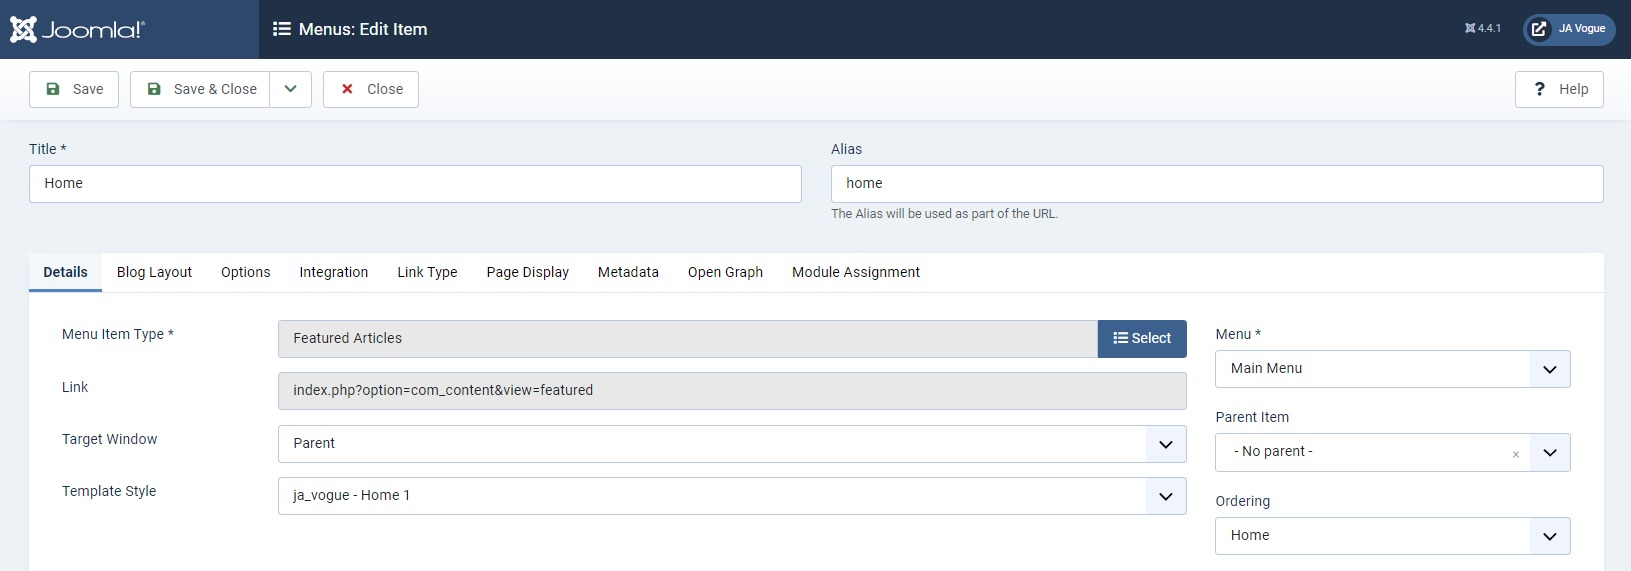
Step 2. Assign content to the Home page
The home page includes multiple sections, each section is a module.
1. Feature Article: Articles - Category Module
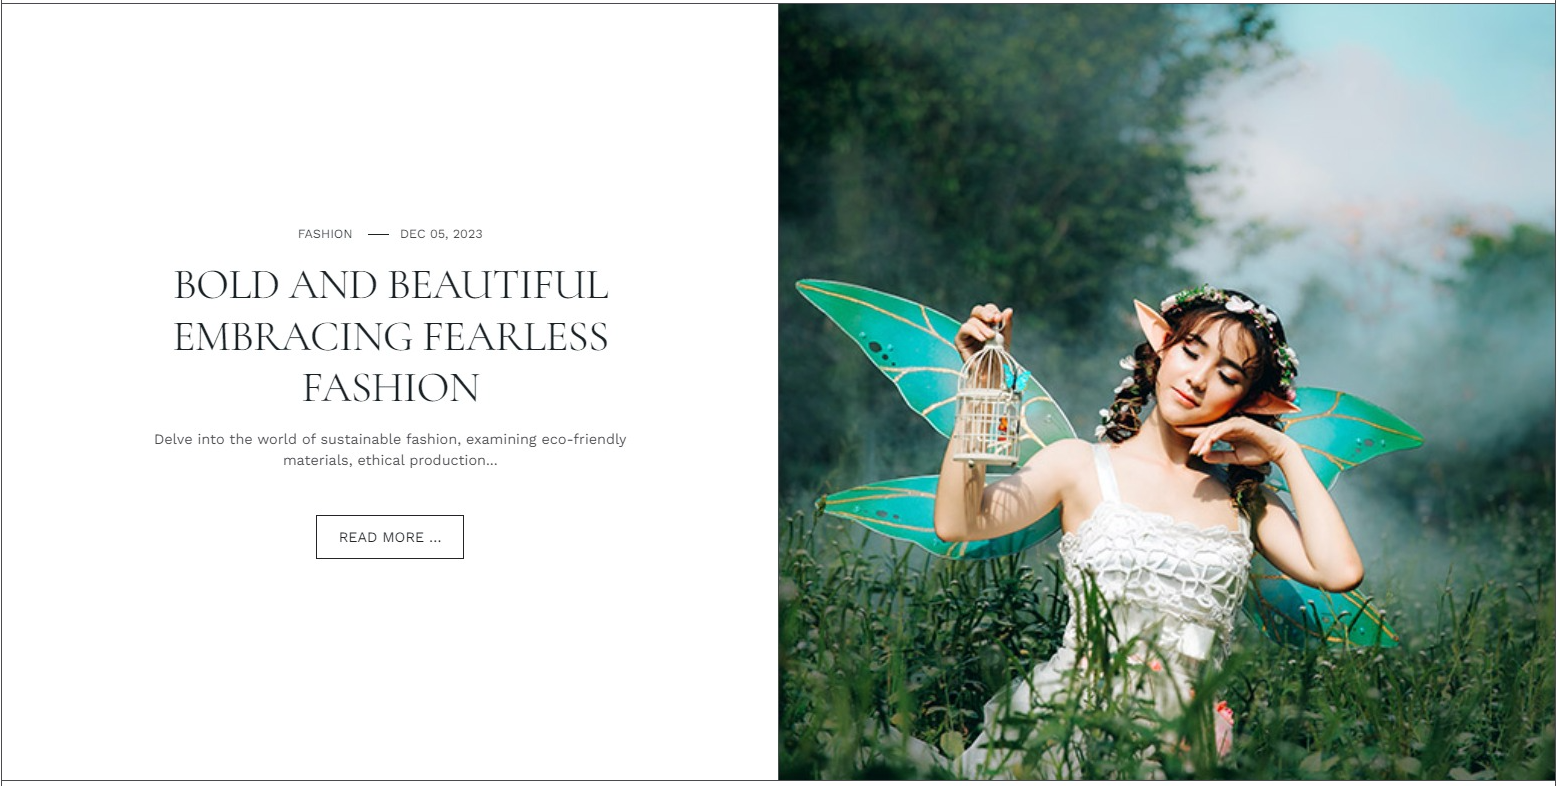
- Module position: section-1
- Module Suffix: NOT USED
- Layout: slide-1
2. EDITORIAL'S PICK: Articles - Category Module
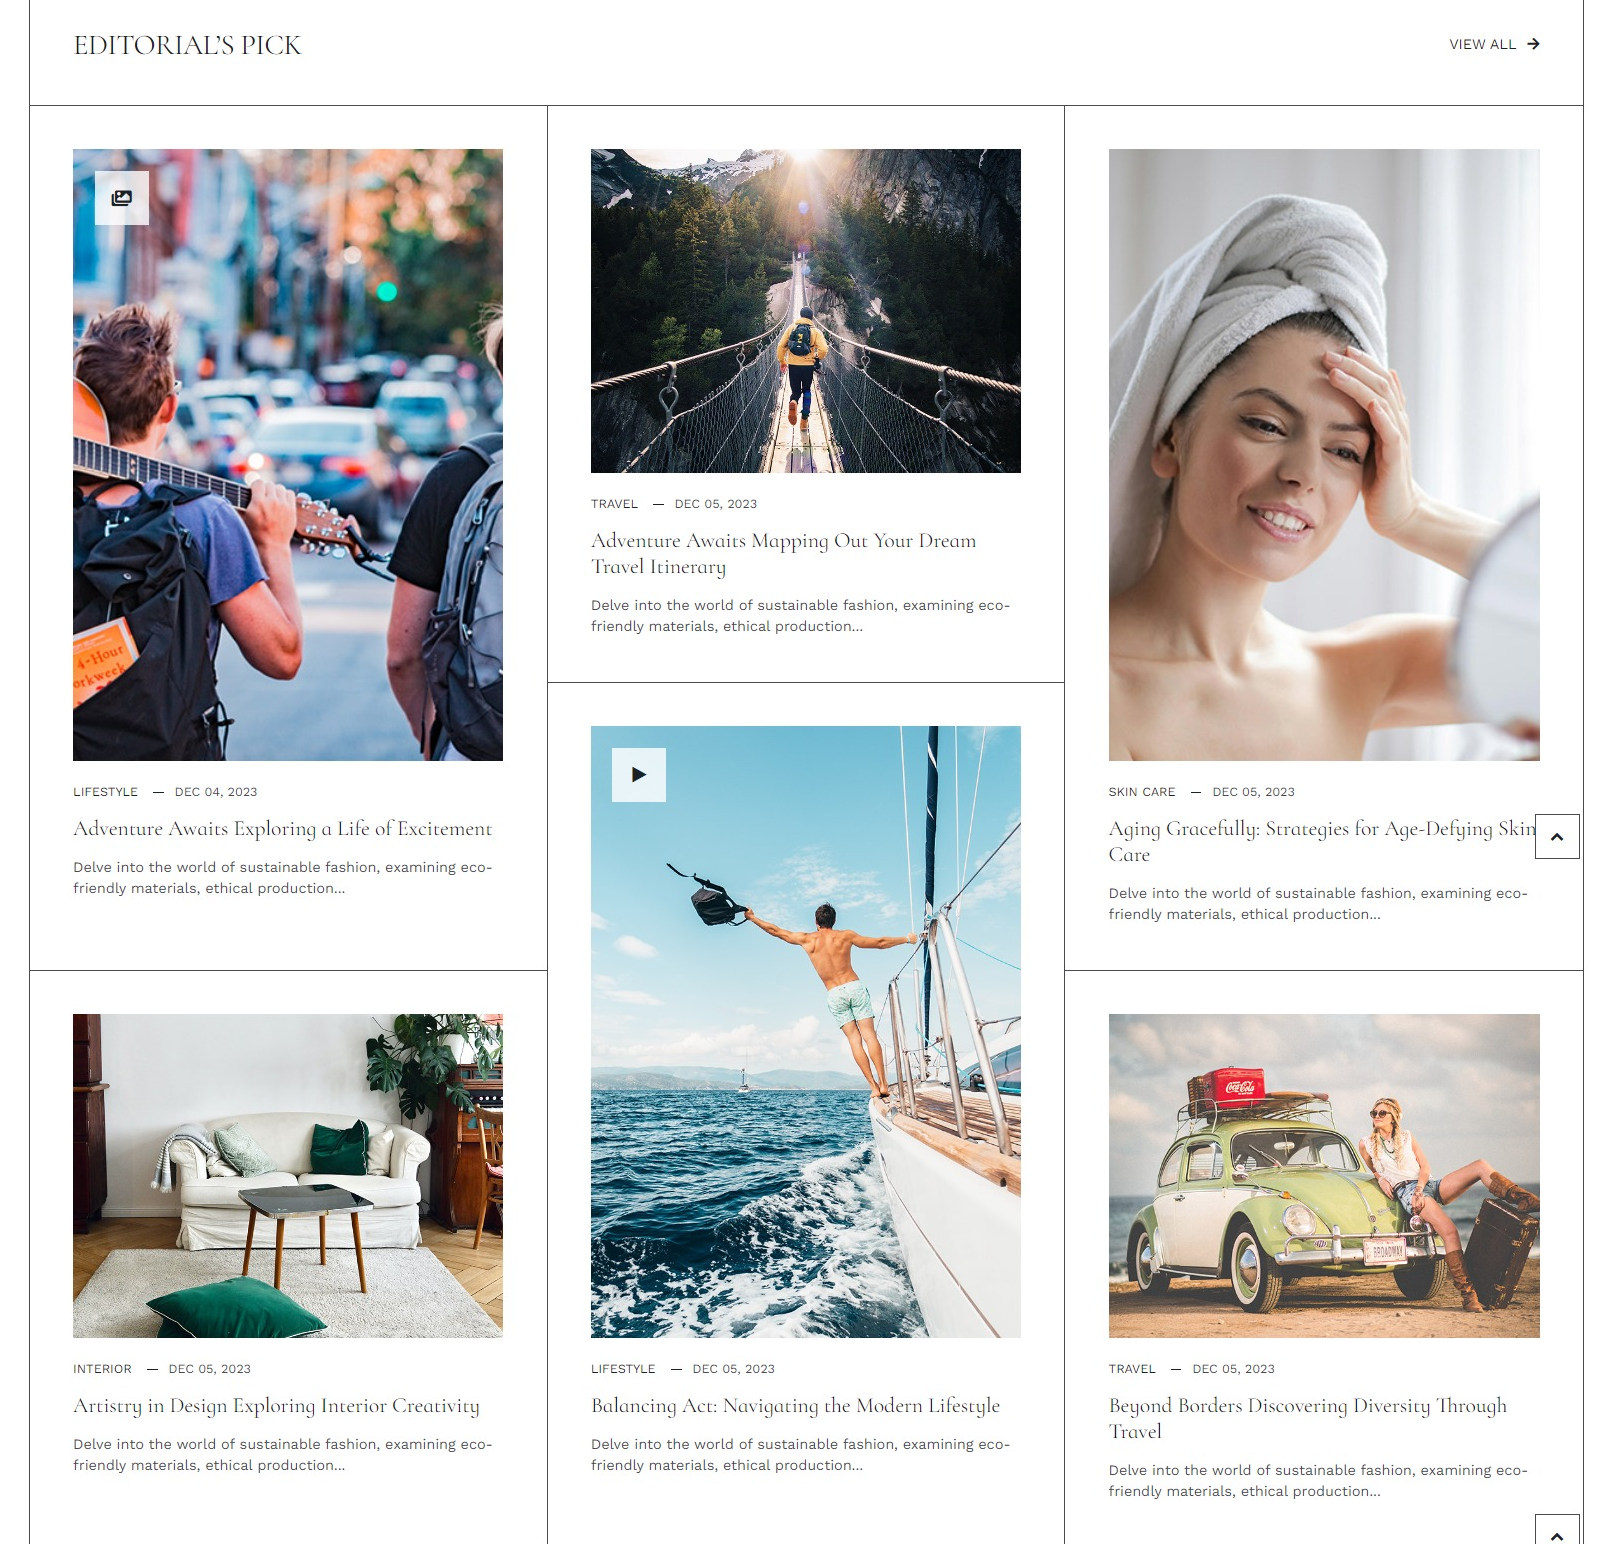
- Module position: section-2
- Module Suffix: NOT USED
- Layout: isotope-1
3. Feature Article: Articles - Category Module

- Module position: section-3
- Module Suffix: NOT USED
- Layout: slide-2
4. Our Latest Stories: Articles - Category Module
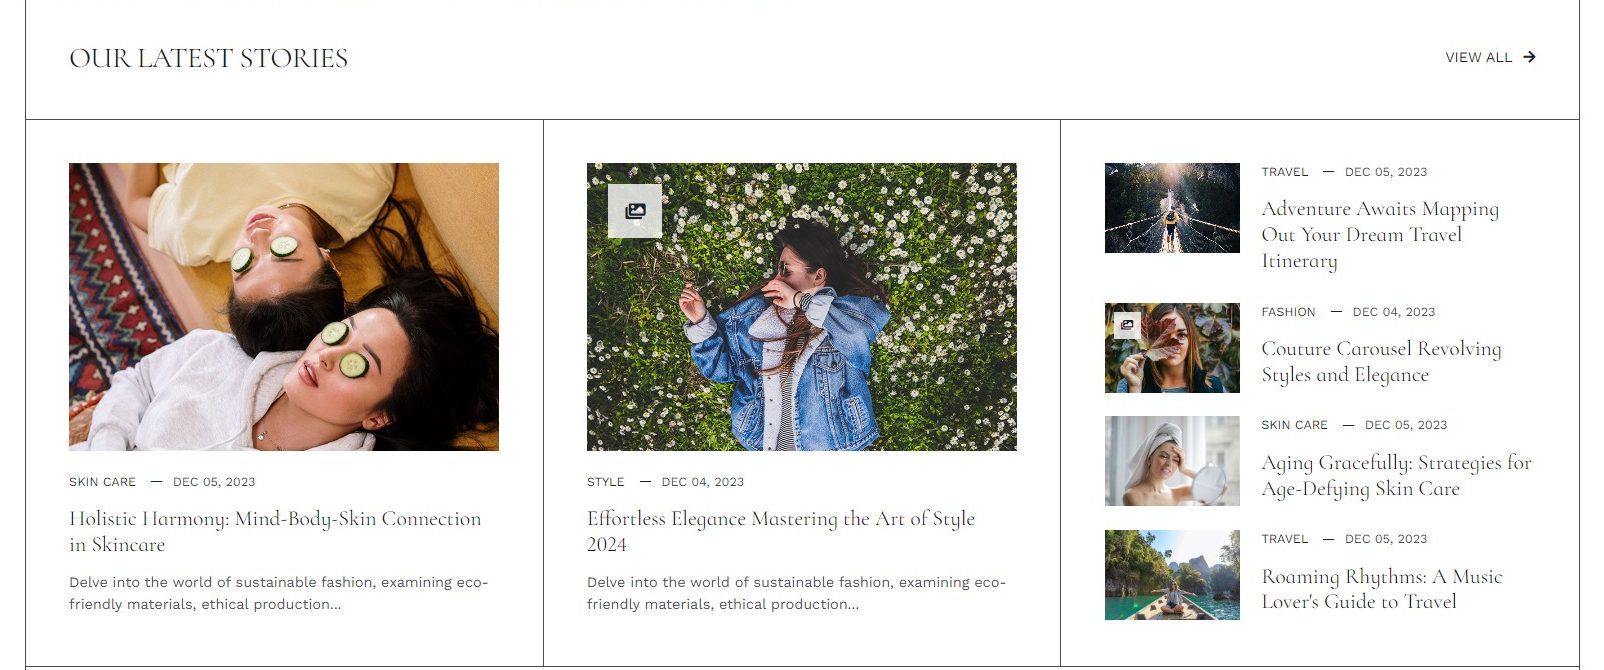
- Module position: section-4
- Module Suffix: NOT USED
- Layout: grid-1
5. Instagram: JoomlArt Advanced Custom Module
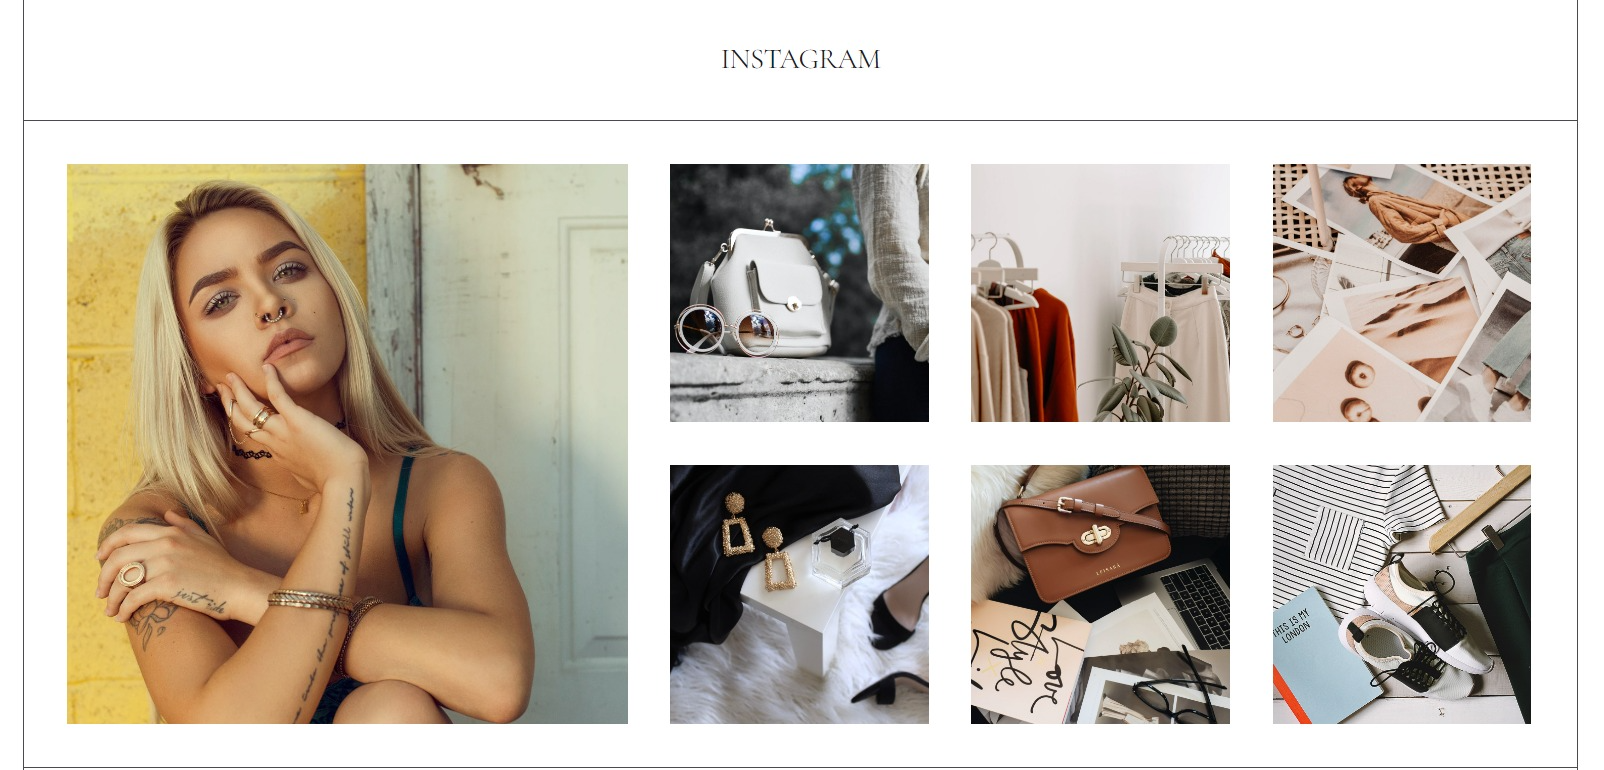
Gallery : style-1
- Module position: section-5
- Module Suffix: NOT USED
- Layout: Default
6. Make An Enquiry: JoomlArt Advanced Custom Module

CTA : style-1
- Module position: section-6
- Module Suffix: NOT USED
- Layout: Default
Home page 2 set up
Step 1. Create menu item
Go to Menu » Main menu, add a new menu item, select Articles » Featured news menu type.
Step 2. Assign content to the Home page
The home page includes multiple sections, each section is a module.
This page will have some of the sections/modules as the previous page, you can find some differences on this page here:
1. Feature Article: Articles - Category Module
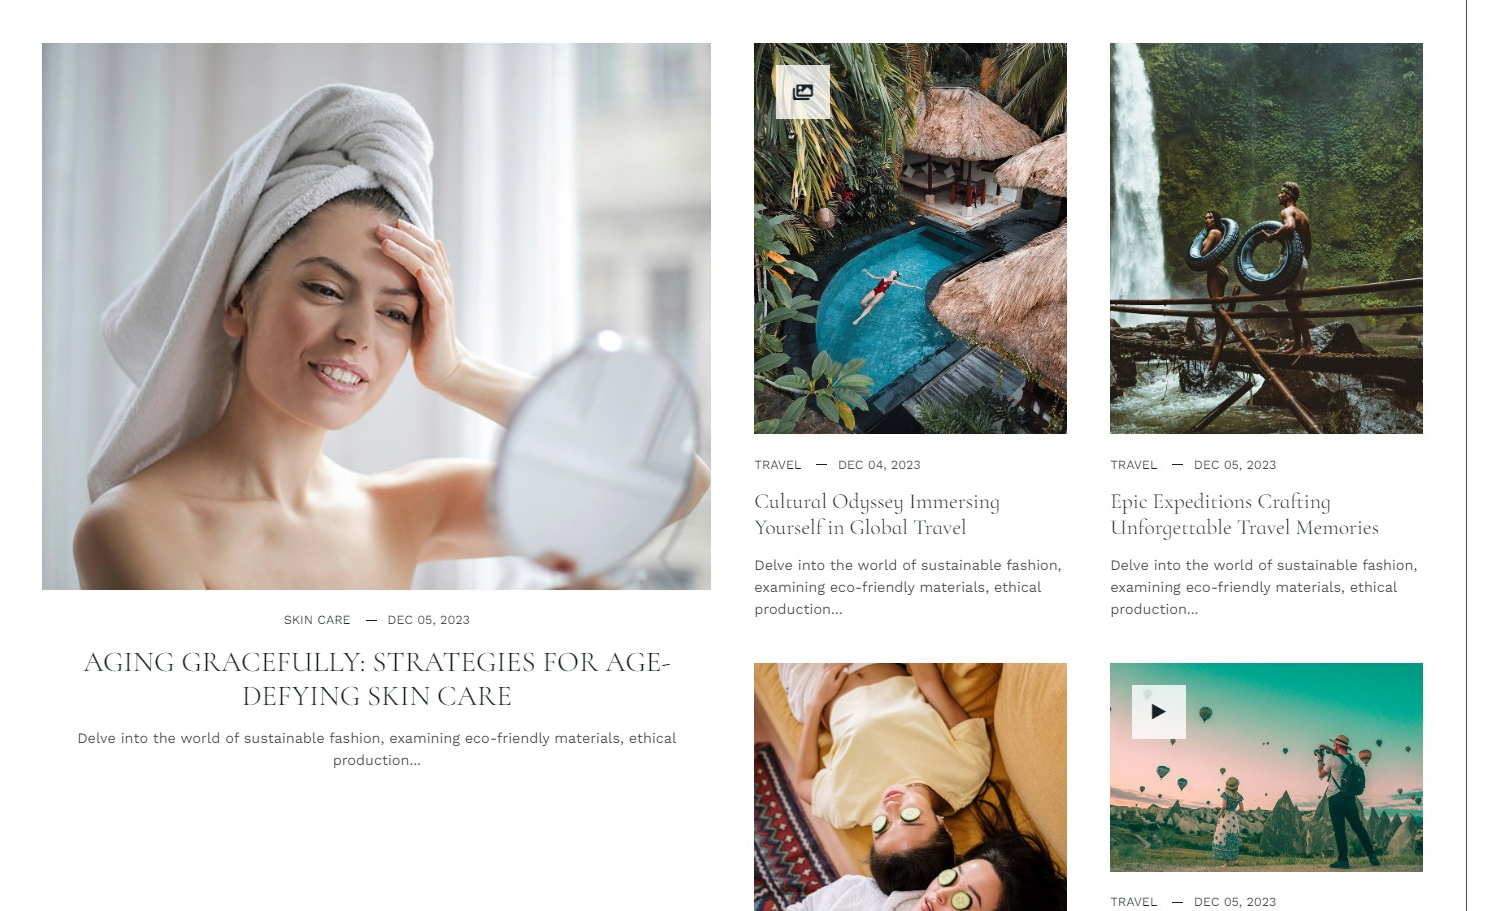
- Module position: section-1
- Module Suffix: NOT USED
- Layout: isotope-2
2. Feature Article: Articles - Category Module

- Module position: section-2
- Module Suffix: NOT USED
- Layout: slide-3
3. Categories: Articles - Categories Module

- Module position: section-5
- Module Suffix: NOT USED
- Layout: list
Home page 3 set up
Step 1. Create menu item
Go to Menu » Main menu, add a new menu item, select Articles » Featured news menu type.
Step 2. Assign content to the Home page
The home page includes multiple sections, each section is a module.
This page will have some of the sections/modules as the previous page, you can find some differences on this page here:
1. An magazine 06: JoomlArt Advanced Custom Module

Hero : style-1
- Module position: hero
- Module Suffix: NOT USED
- Layout: Default
2. AN IS THE magazine, YOUNG AND dynamic: Custom Module

- Module position: section-1
- Module Suffix: NOT USED
- Layout: Default
3. EDITORIAL'S PICK: Articles - Category Module
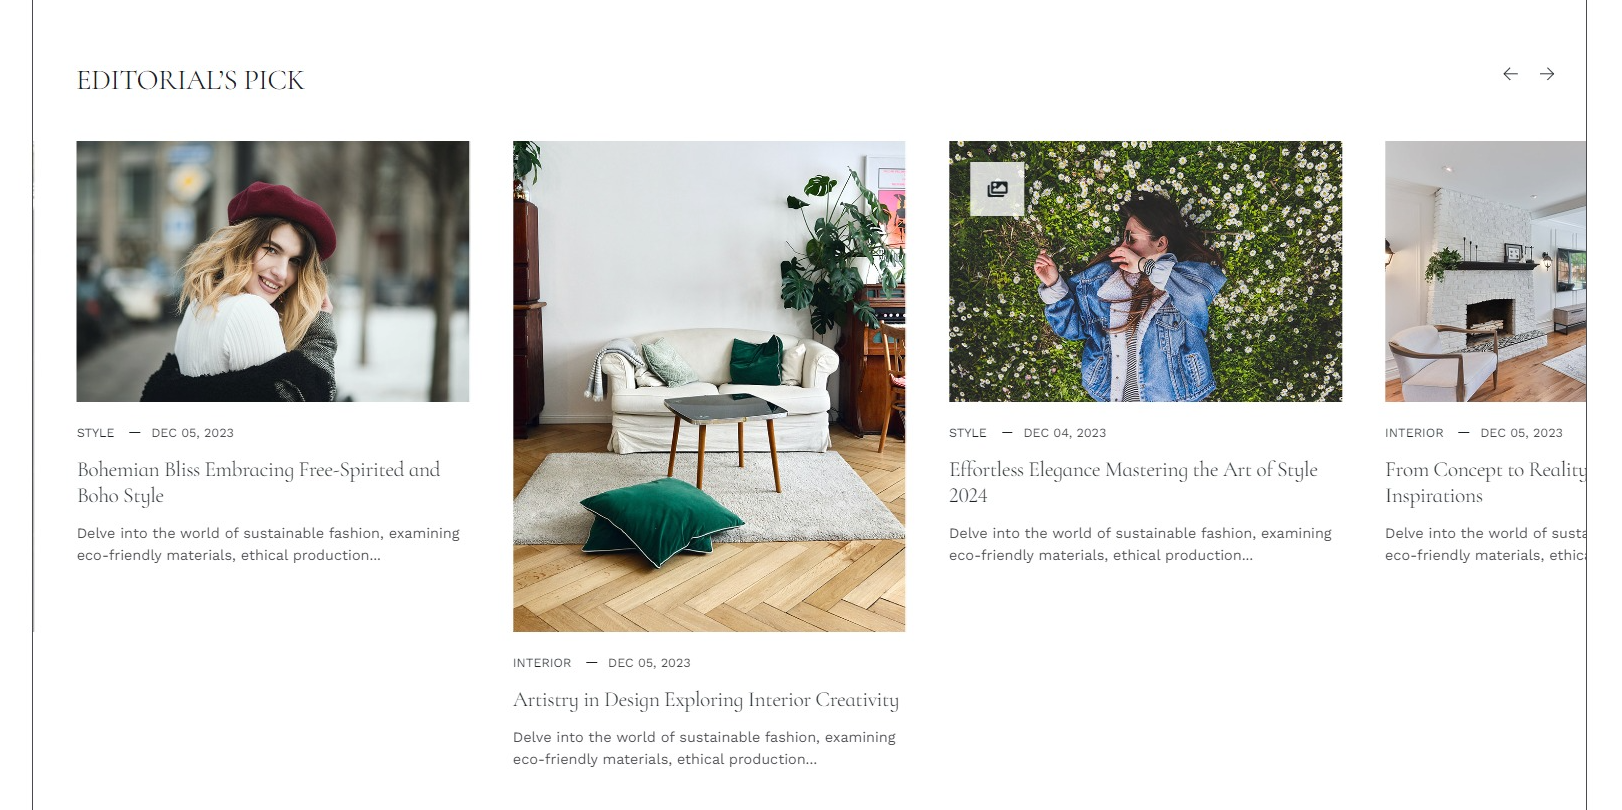
- Module position: section-2
- Module Suffix: NOT USED
- Layout: slide-5
3. Banner: Banners Module

- Module position: section-3
- Module Suffix: NOT USED
- Layout: Default
4. Featured Articles: Menu item configuration
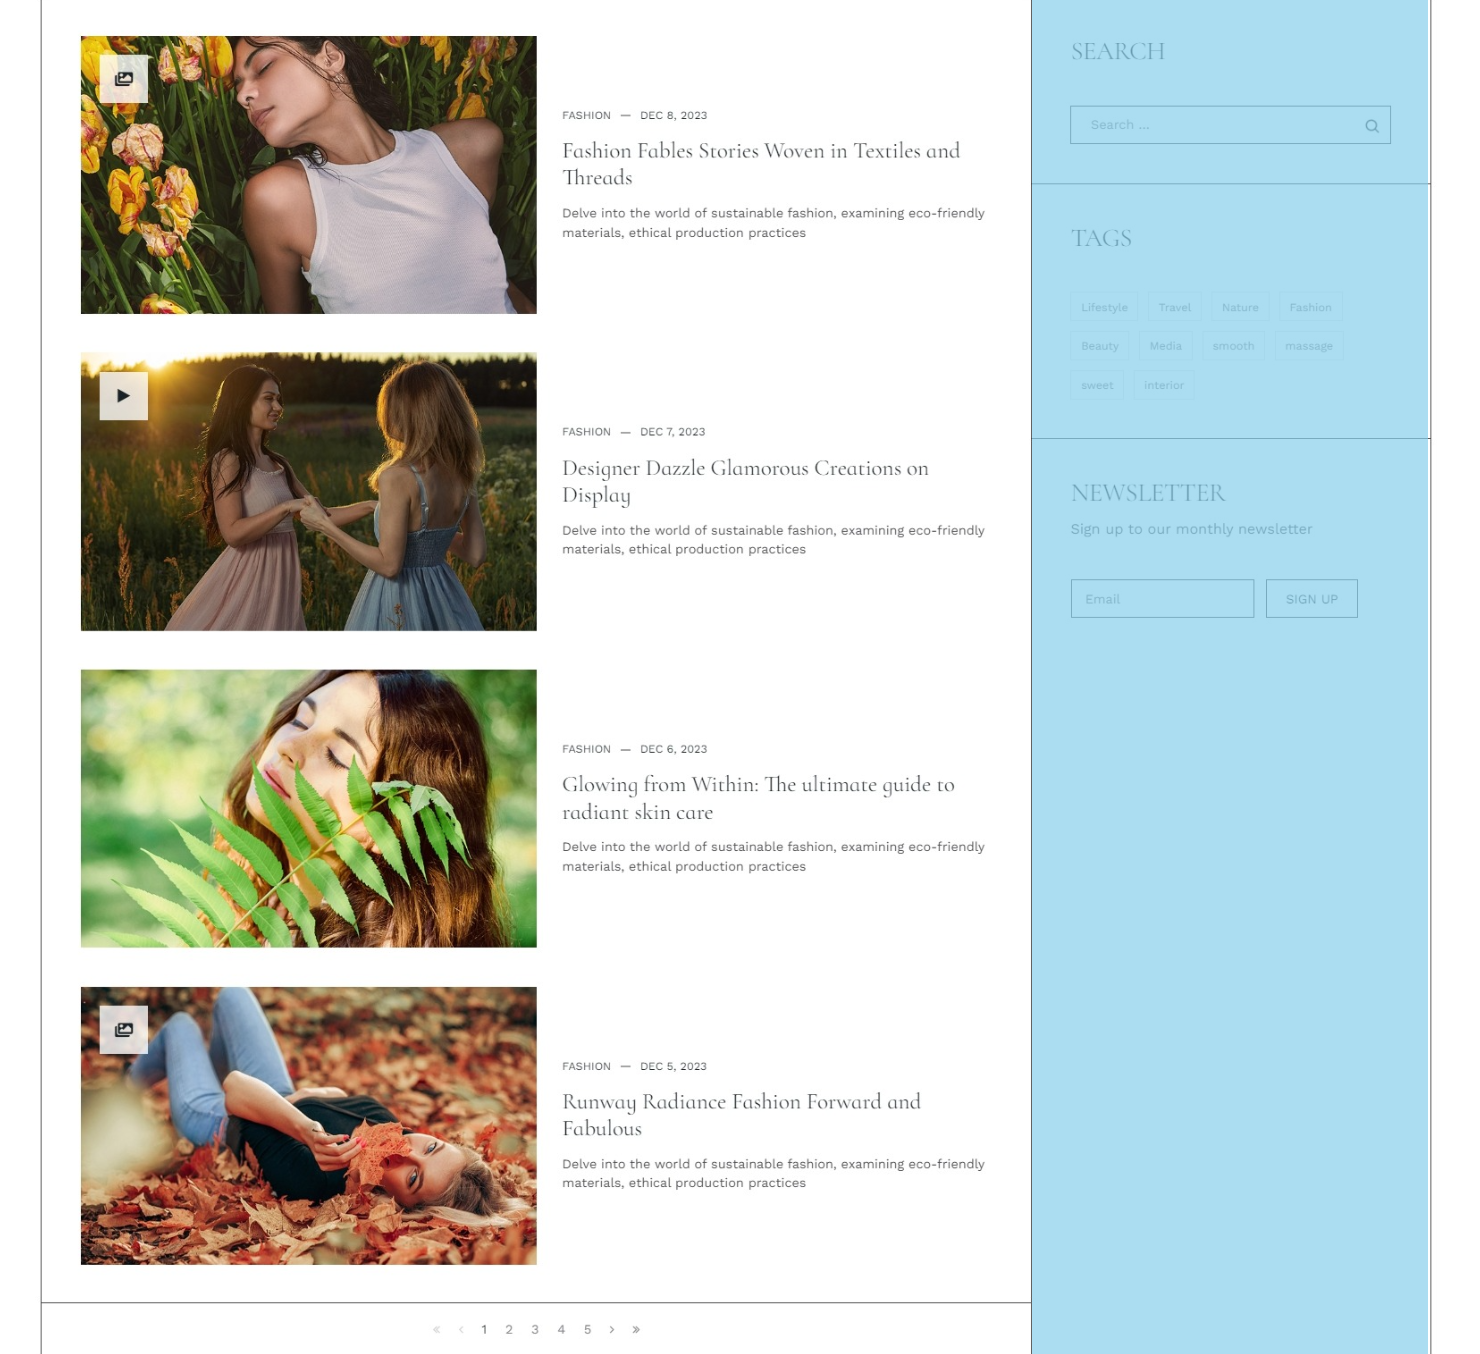
You can configure this section from the Backend » Menu » Home 3 » Blog layout tabs
Home page 4 set up
Step 1. Create menu item
Go to Menu » Main menu, add a new menu item, select Articles » CATEGORY_BLOG_MASONRY 1 menu type.
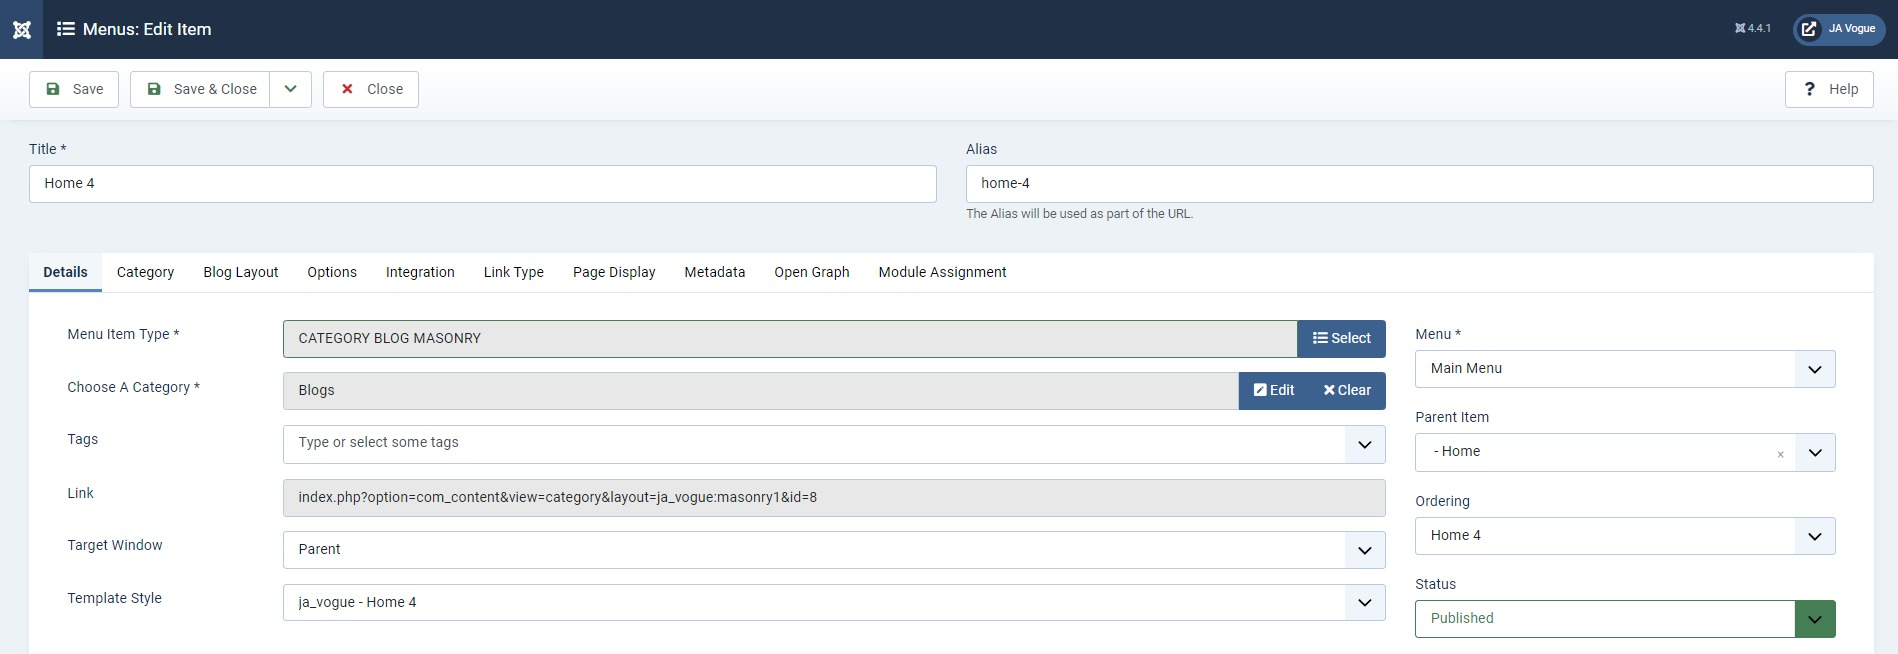
Step 2. Assign content to the Home page
The home page includes multiple sections, each section is a module.
This page will have some of the sections/modules as the previous page, you can find some differences on this page here:
1. Featured Articles: Menu item configuration
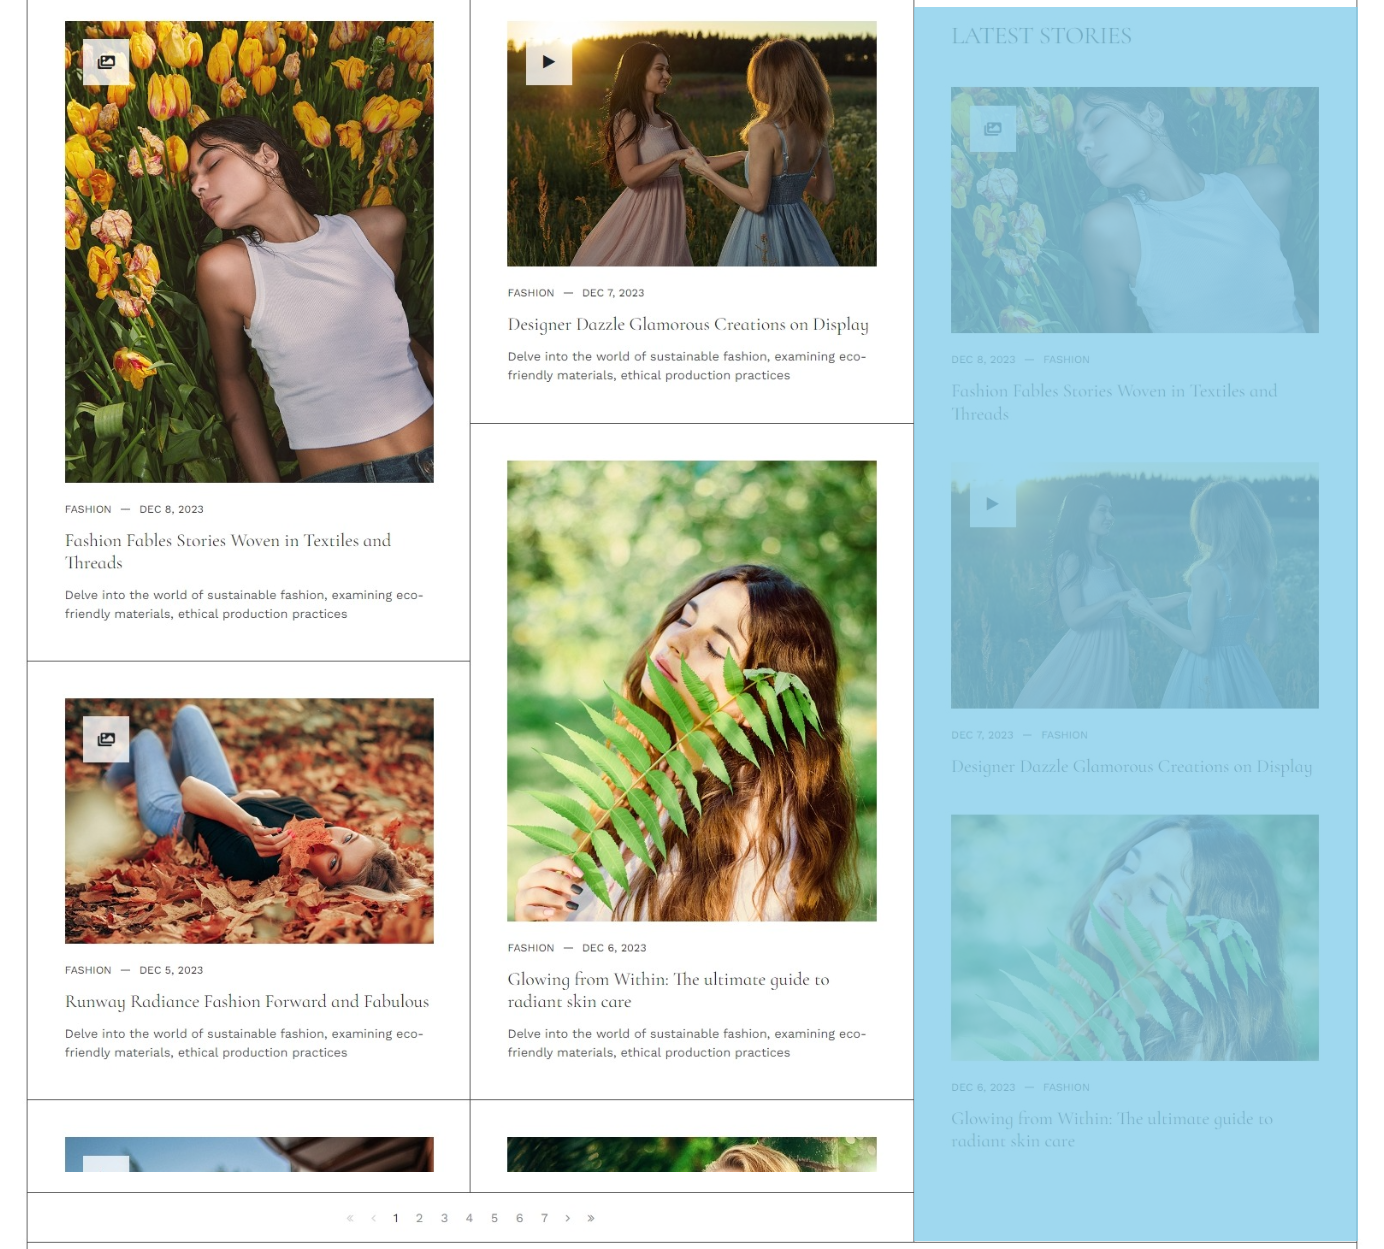
You can configure this section from the Backend » Menu » Home 3 » Blog layout tabs
2. Latest Stories: Articles - Latest module
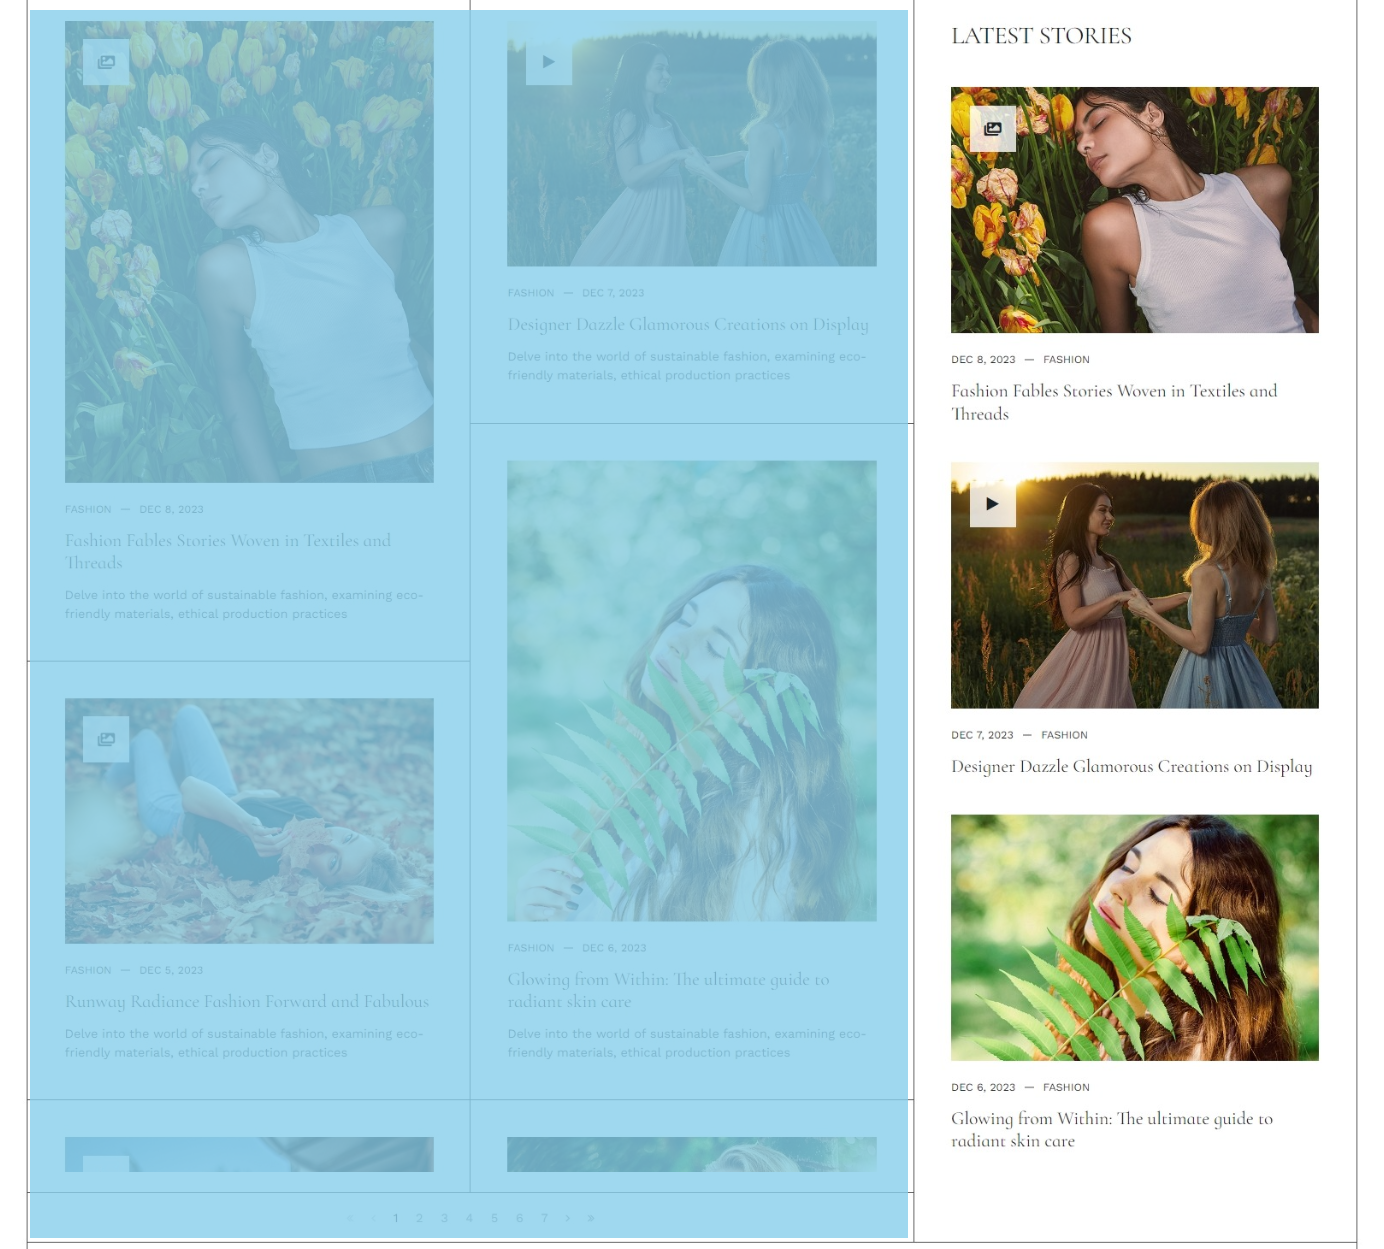
- Module position: sideabr-r
- Module Suffix: NOT USED
- Layout: list
Home page 5 set up
Step 1. Create menu item
Go to Menu » Main menu, add a new menu item, select Articles » Featured news menu type.
Step 2. Assign content to the Home page
The home page includes multiple sections, each section is a module.
This page will have some of the sections/modules as the previous page, you can find some differences on this page here:
1. Feature Article grid: Articles - Category
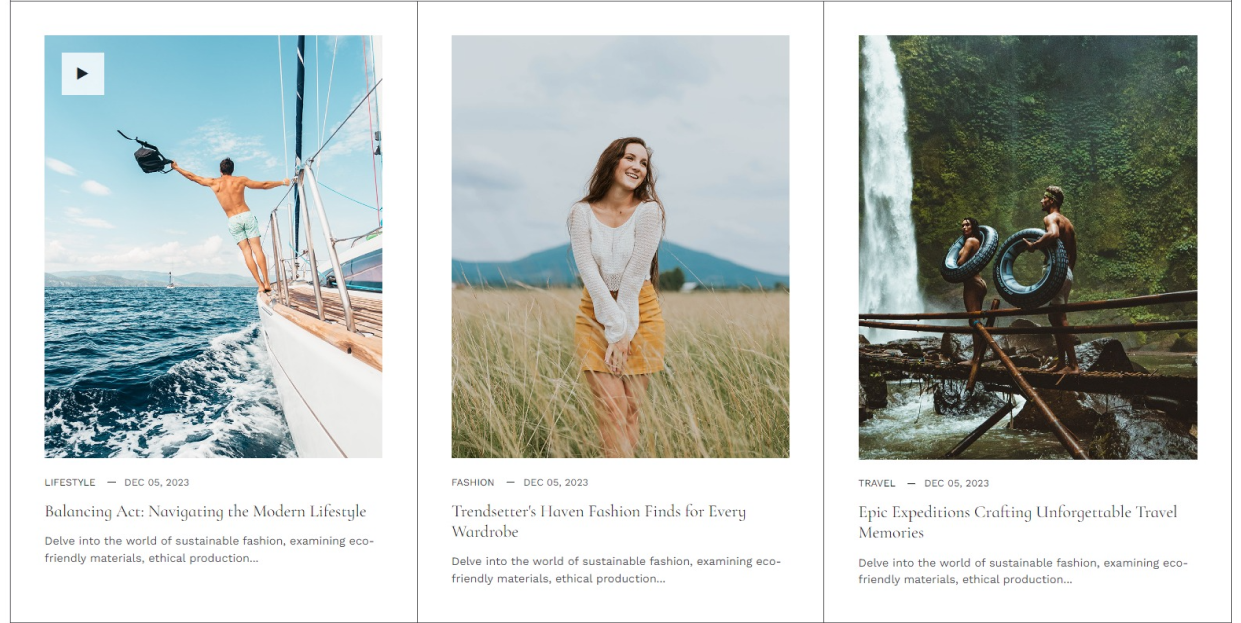
- Module position: section-1
- Module Suffix: NOT USED
- Layout: grid-3
2. Text Slider: JoomlArt Advanced Custom Module

Text Sliders : style-1
- Module position: section-2
- Module Suffix: NOT USED
- Layout: grid-4
3. Most Read: Articles - Category
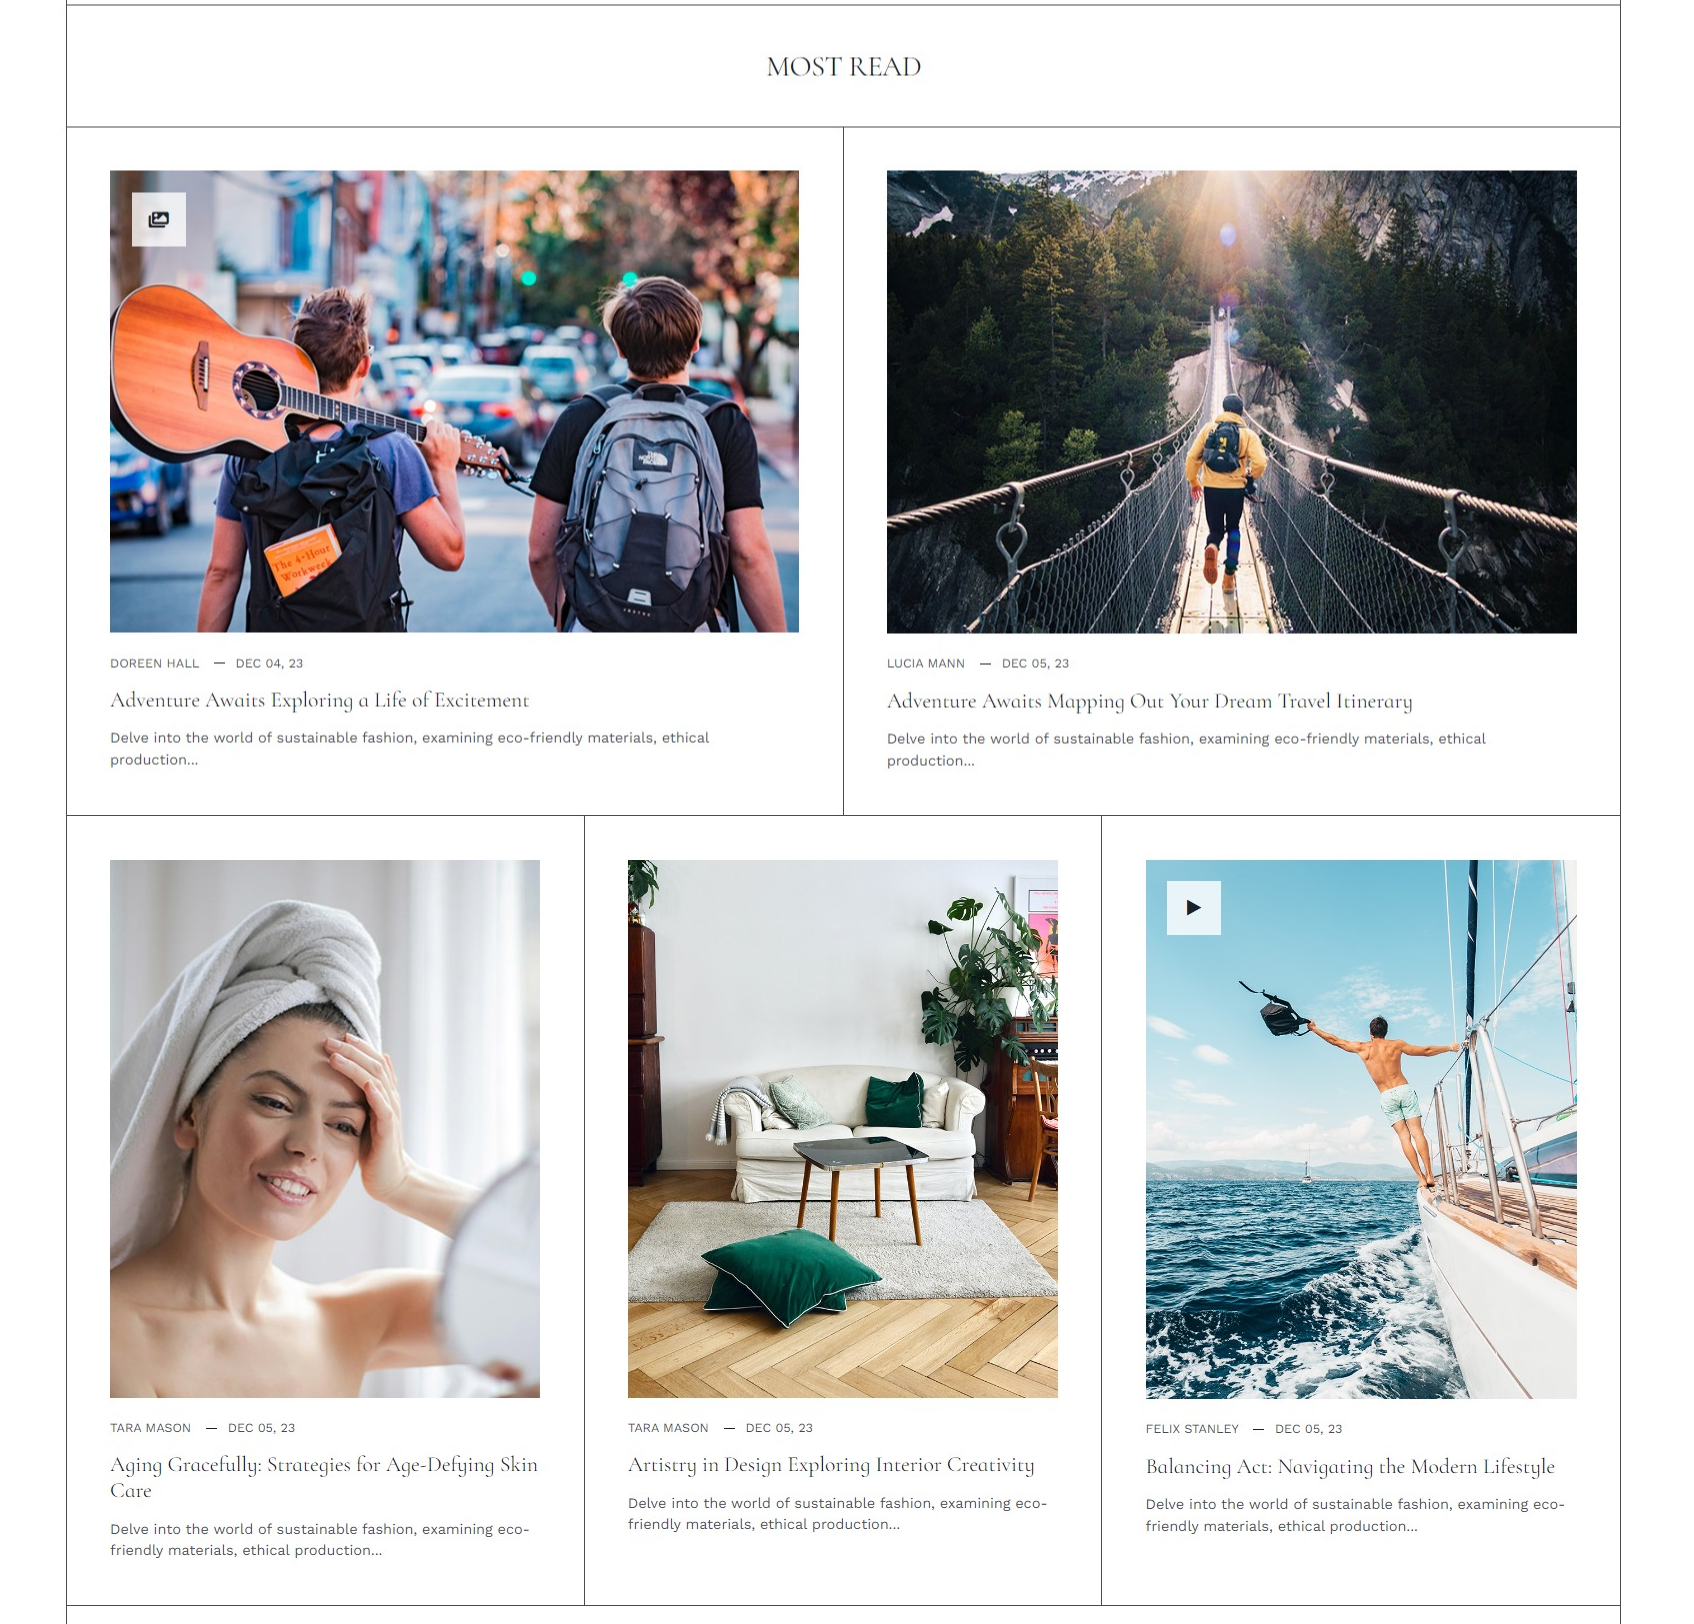
- Module position: section-3
- Module Suffix: NOT USED
- Layout: grid-4
Home page 6 set up
Step 1. Create menu item
Go to Menu » Main menu, add a new menu item, select Articles » Featured news menu type.
Step 2. Assign content to the Home page
The home page includes multiple sections, each section is a module.
1.Home 6 Modules
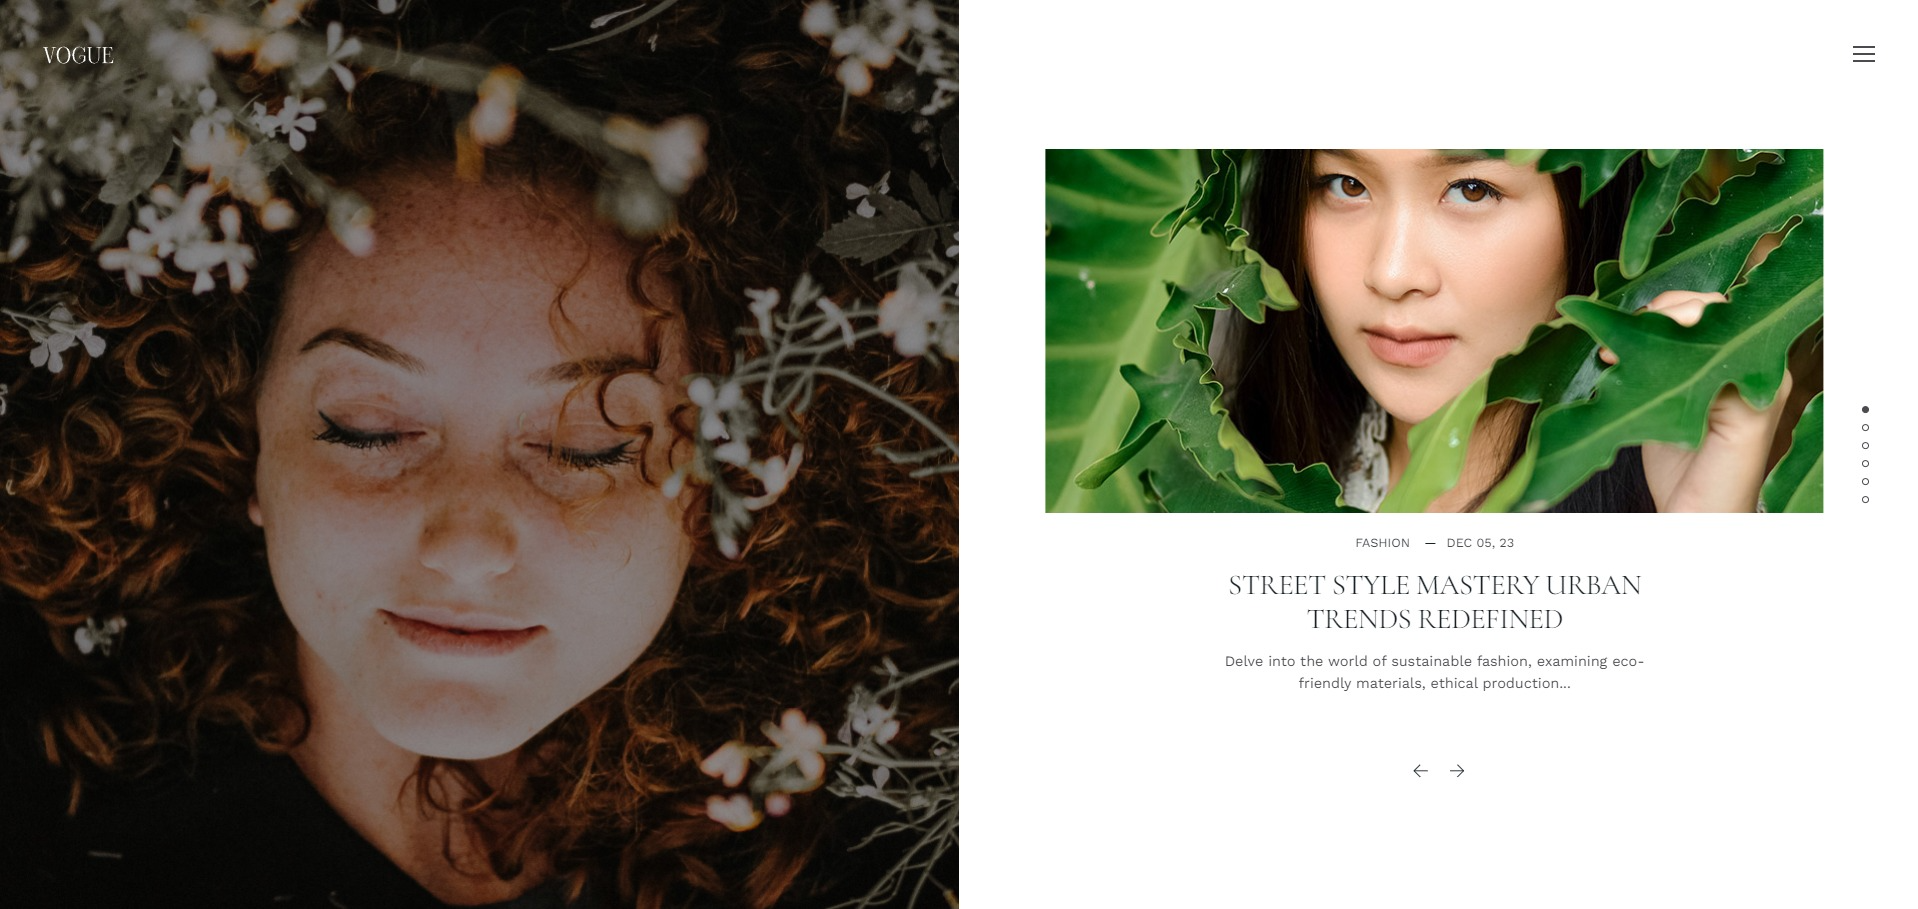
This section include 2 columns
1.Lead Background: Custom Module
- Module position: section-1
- Module Suffix: NOT USED
- Layout: Default
2.Slide: Articles - Category Module
- Module position: section-2
- Module Suffix: NOT USED
- Layout: slide-6
About page set up
Step 1. Create menu item
Go to Menu » Main menu, add a new menu item, select System link » Menu Item Alias type.
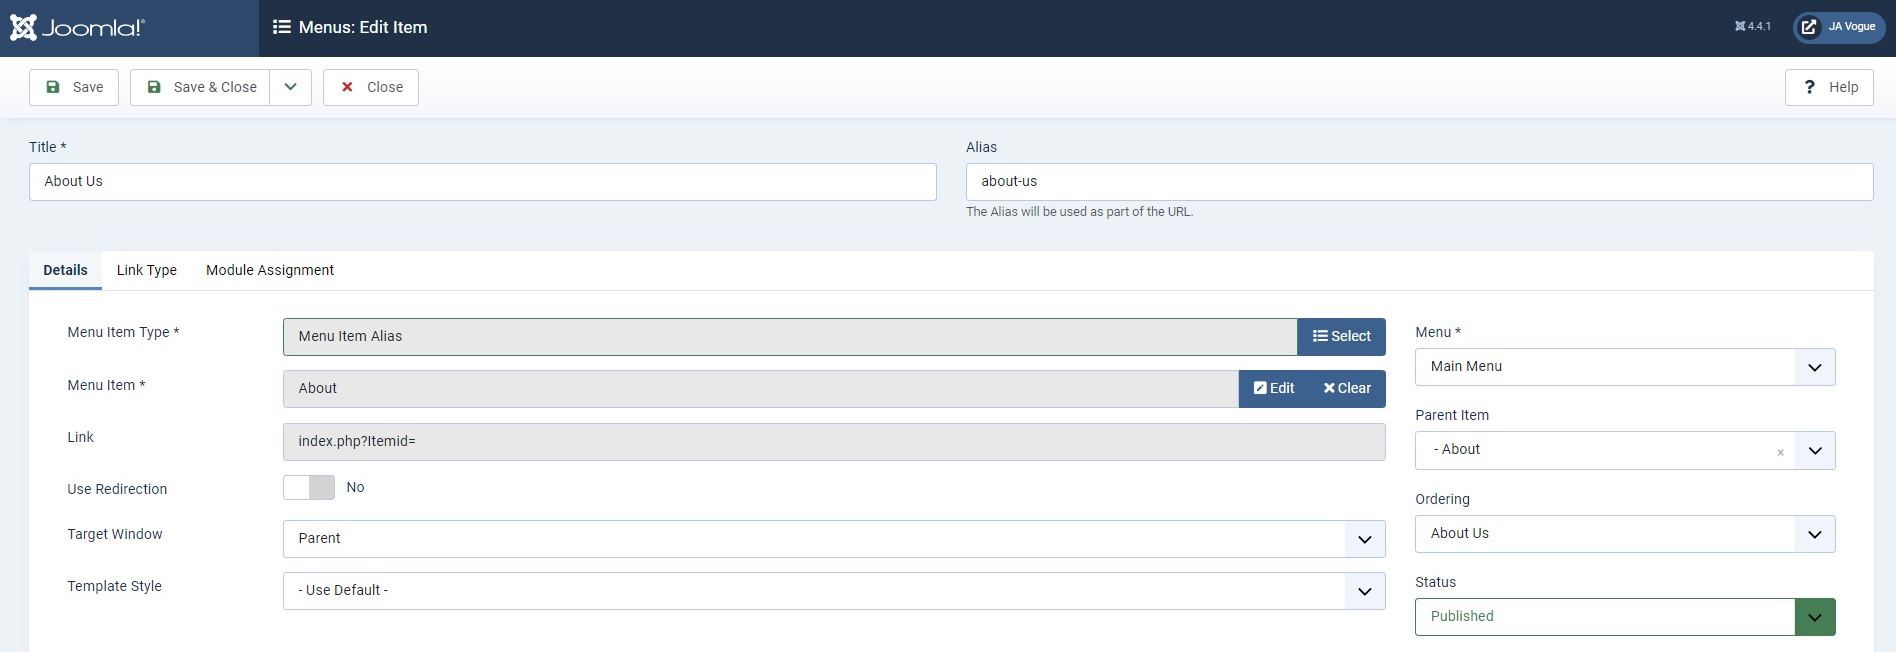
Step 2. Assign content to the About page
The page includes multiple sections, each section is a module.
1. Explore And Expand Your Horizons: JoomlArt Advanced Custom Module
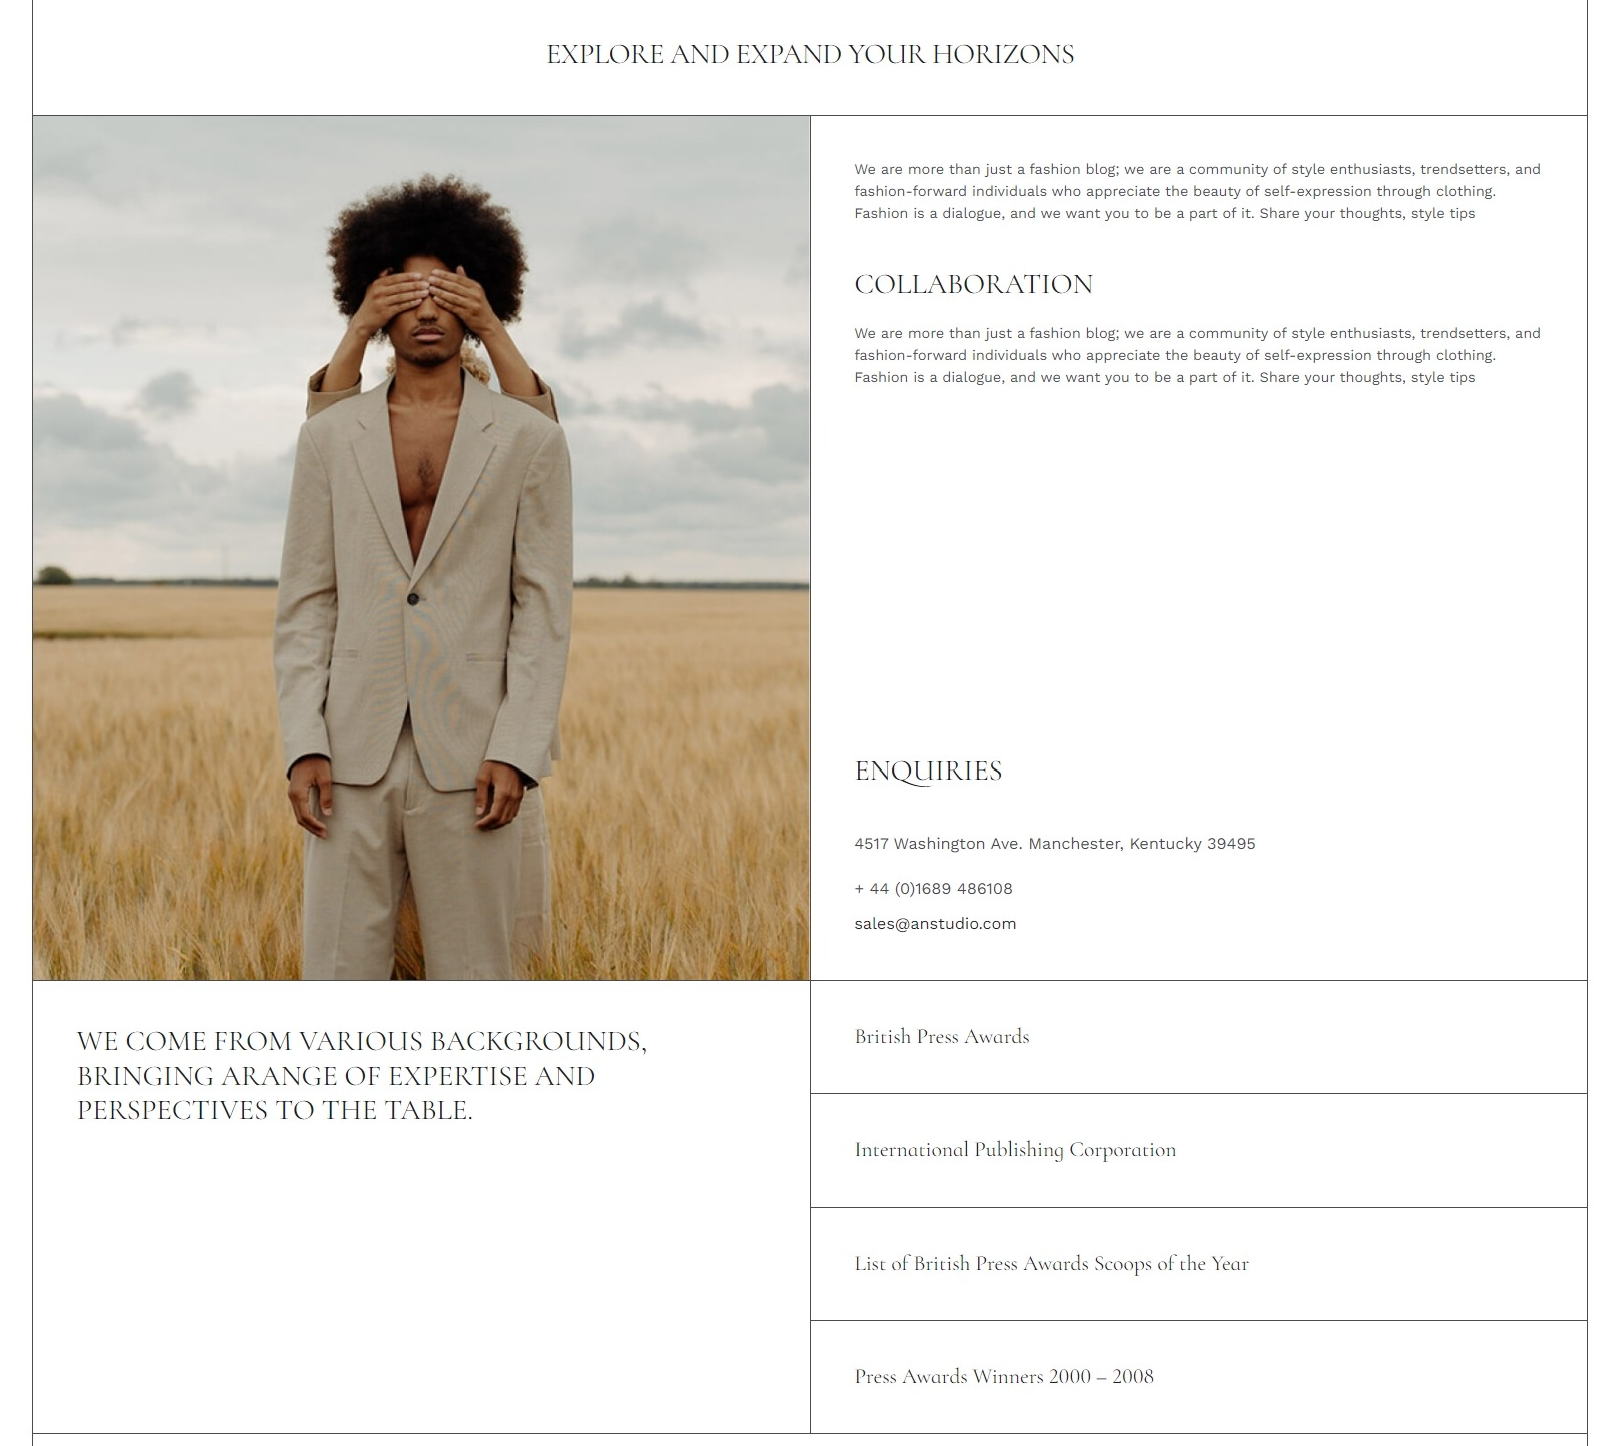
Features Intro : style-1
- Module position: section-1
- Module Suffix: NOT USED
- Layout: Default
Category blog / article
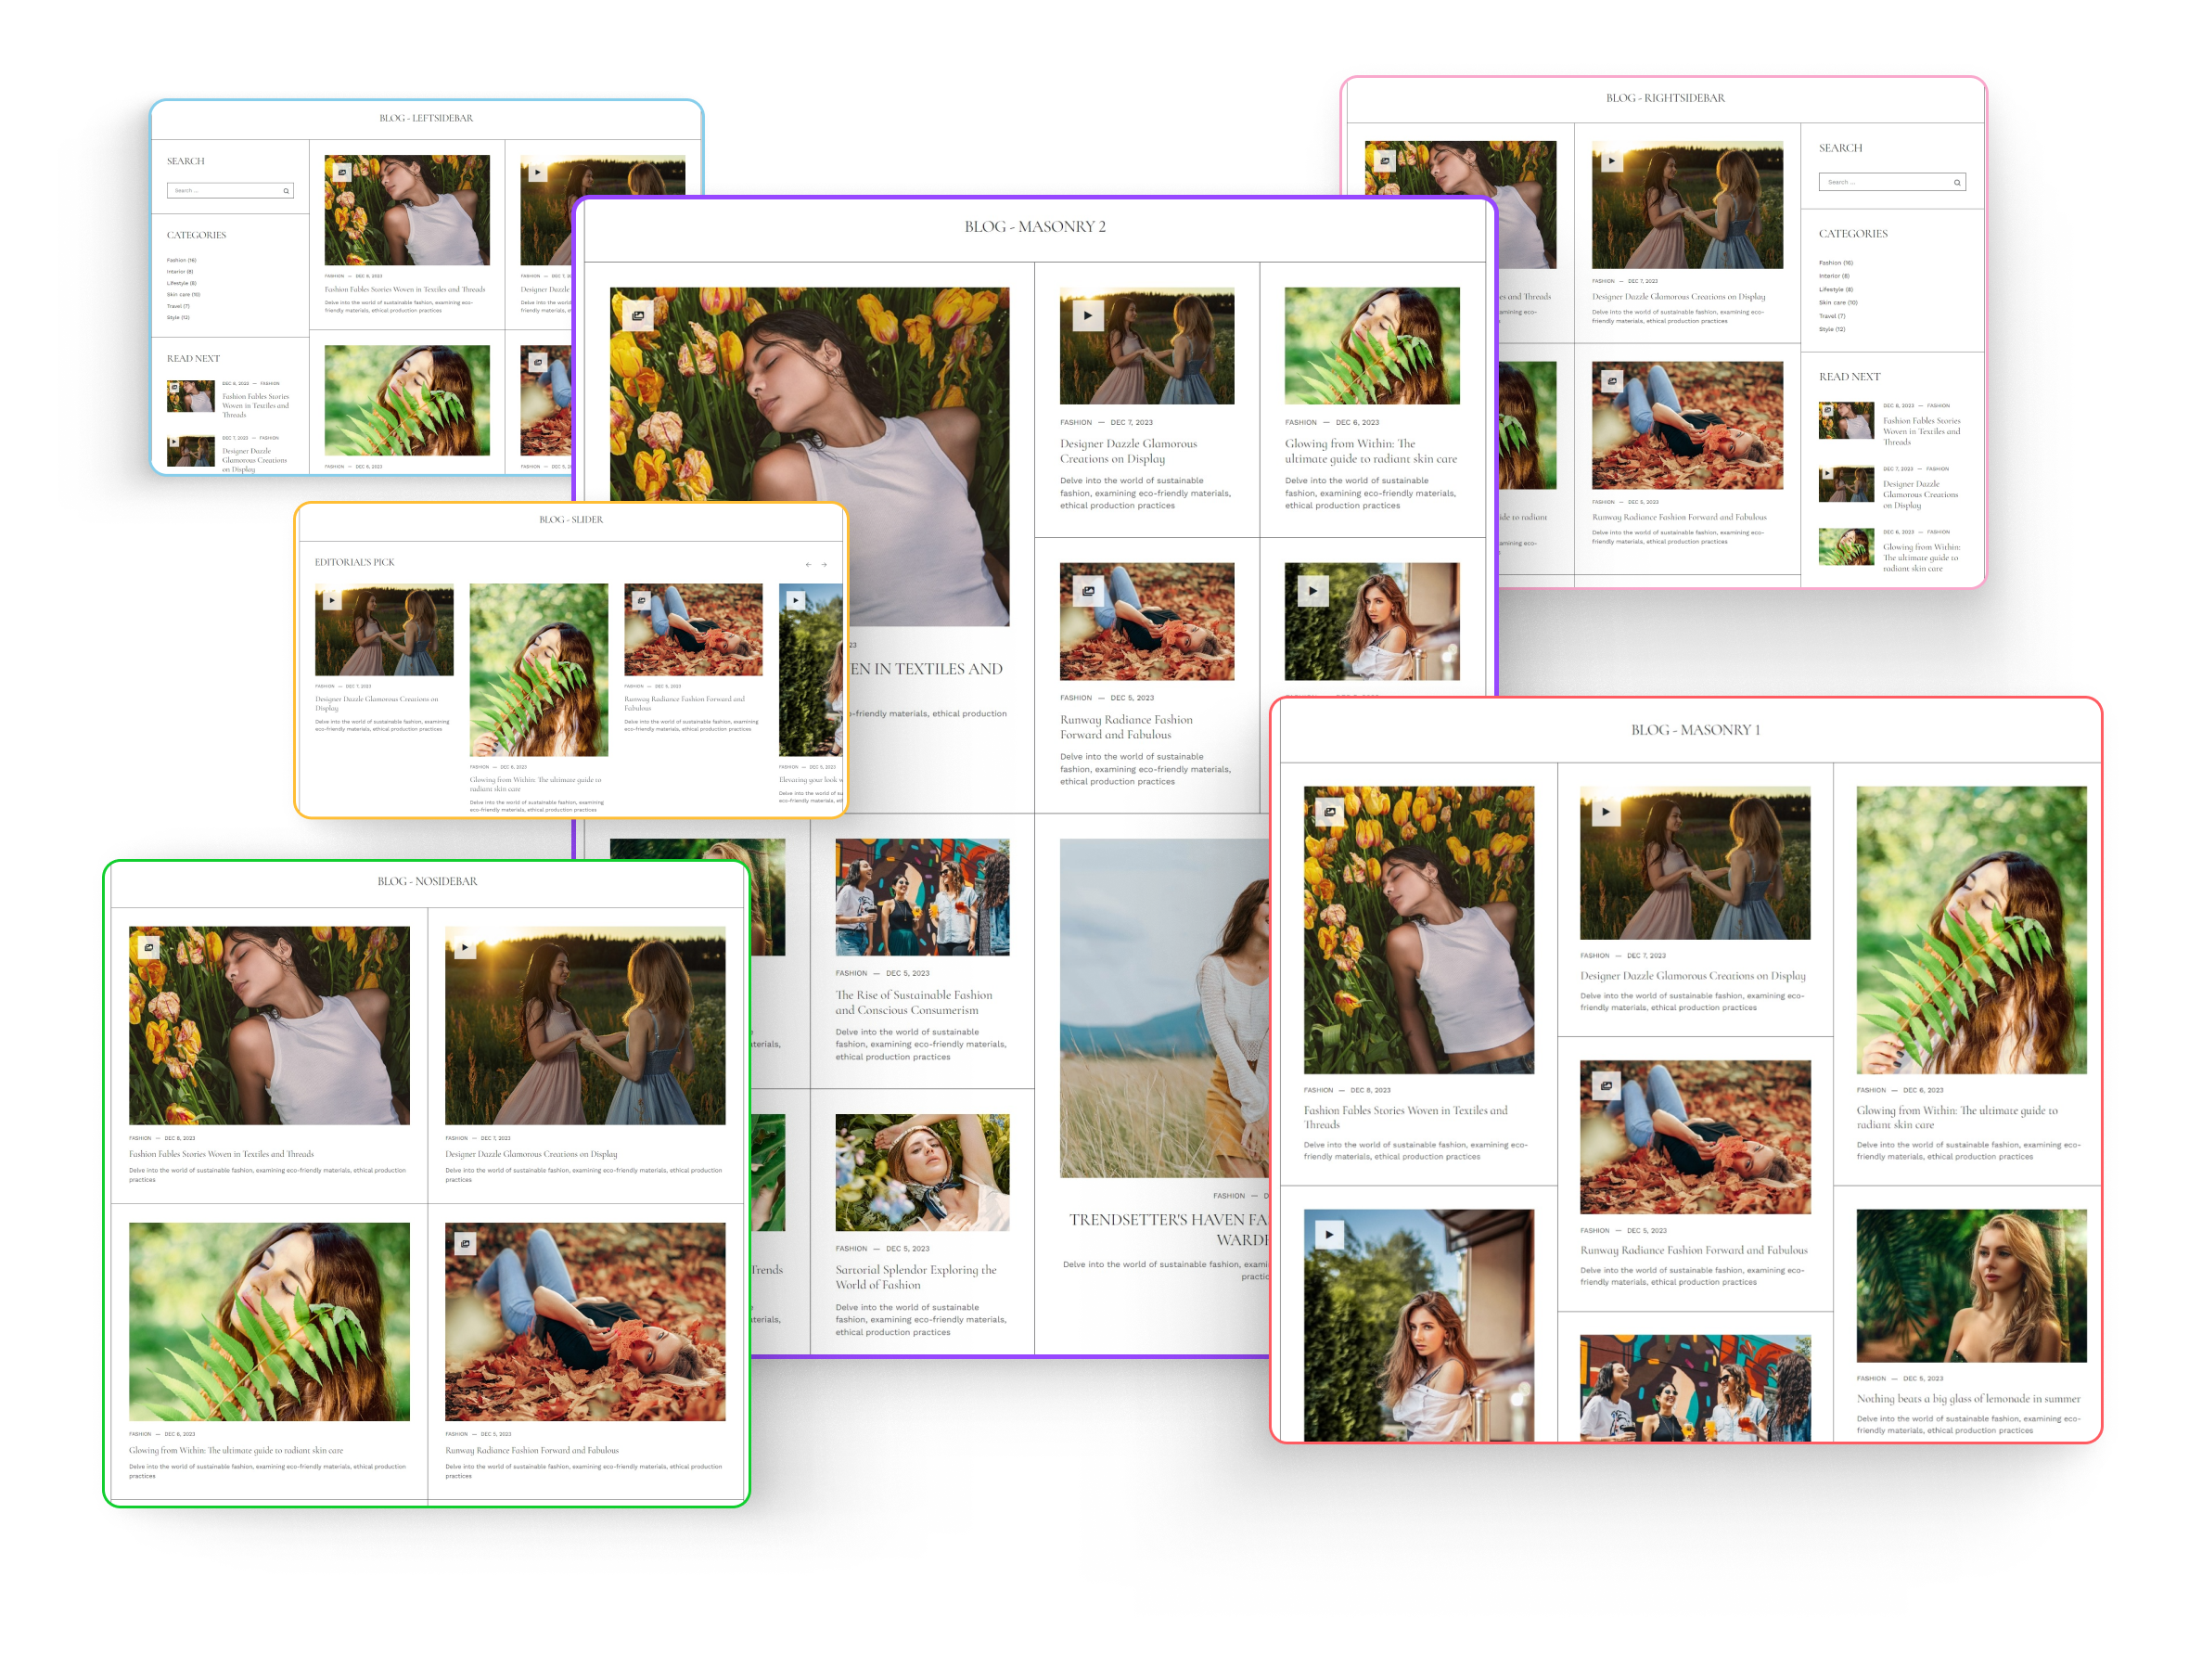
1. Category blog layouts
The template support 6 layouts:
Step 1: Create Category
Go to Content » Categories, add a new category.
Step 2. Assign category blog layout
And Go to Menus » Add new menu item with the Category Blog type then configure the style of the categries in the Blog layout tabs.
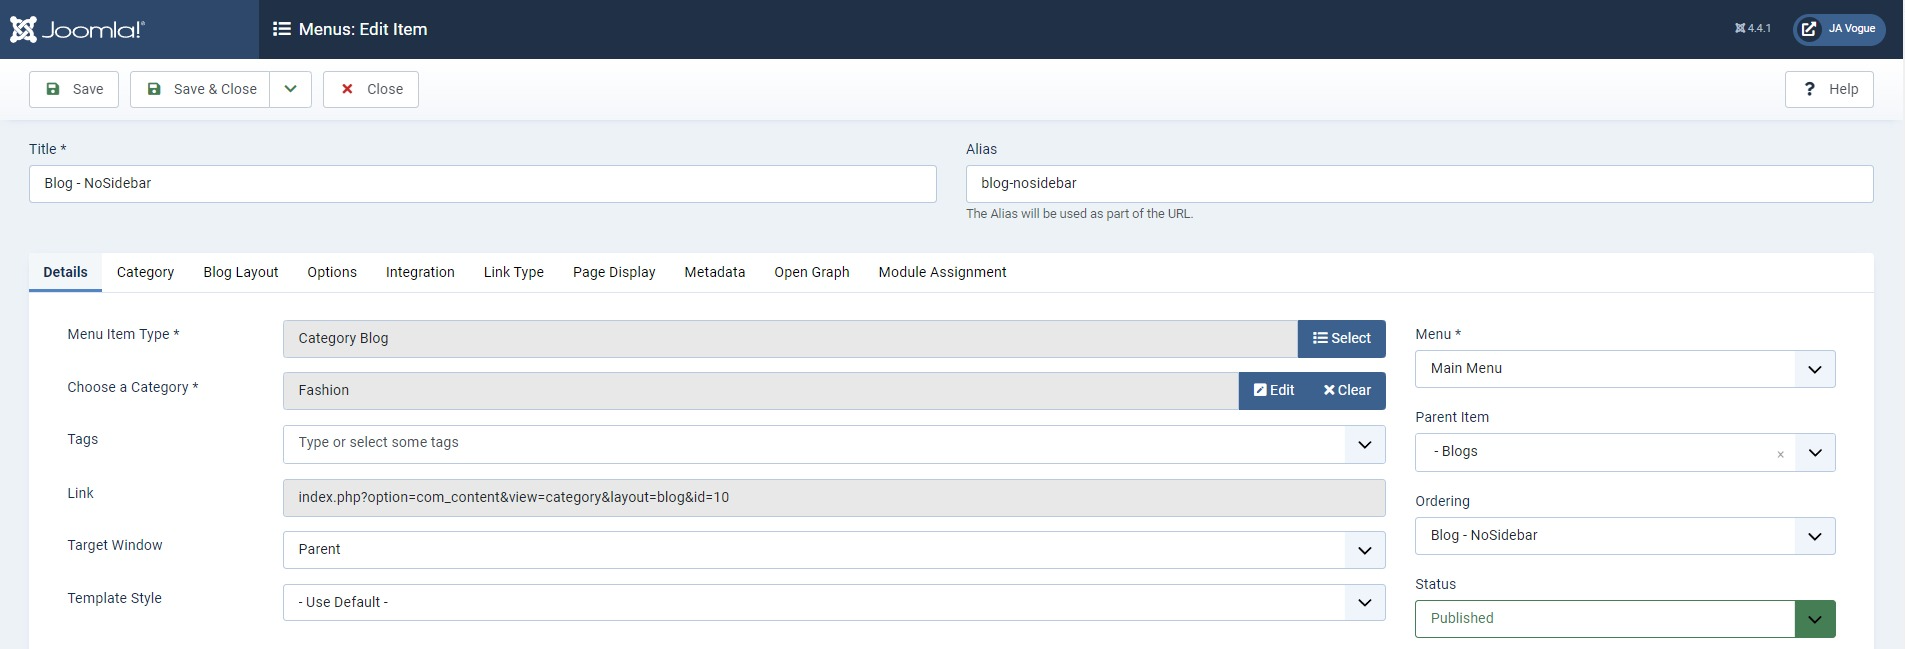
- NoSidebar - Blog Layout settings
- Sidebar Right - Blog Layout settings
- Sidebar Left - Blog Layout settings
- Masonry1 - Blog Layout settings
- Masonry2 - Blog Layout settings
- Slider - Blog Layout settings
- Category serttings
- Options settings
2. Article detail layouts
The template supports 3 layouts and Each layout will support 3 types: Default, Video, and Gallery
Article detail - layout 1
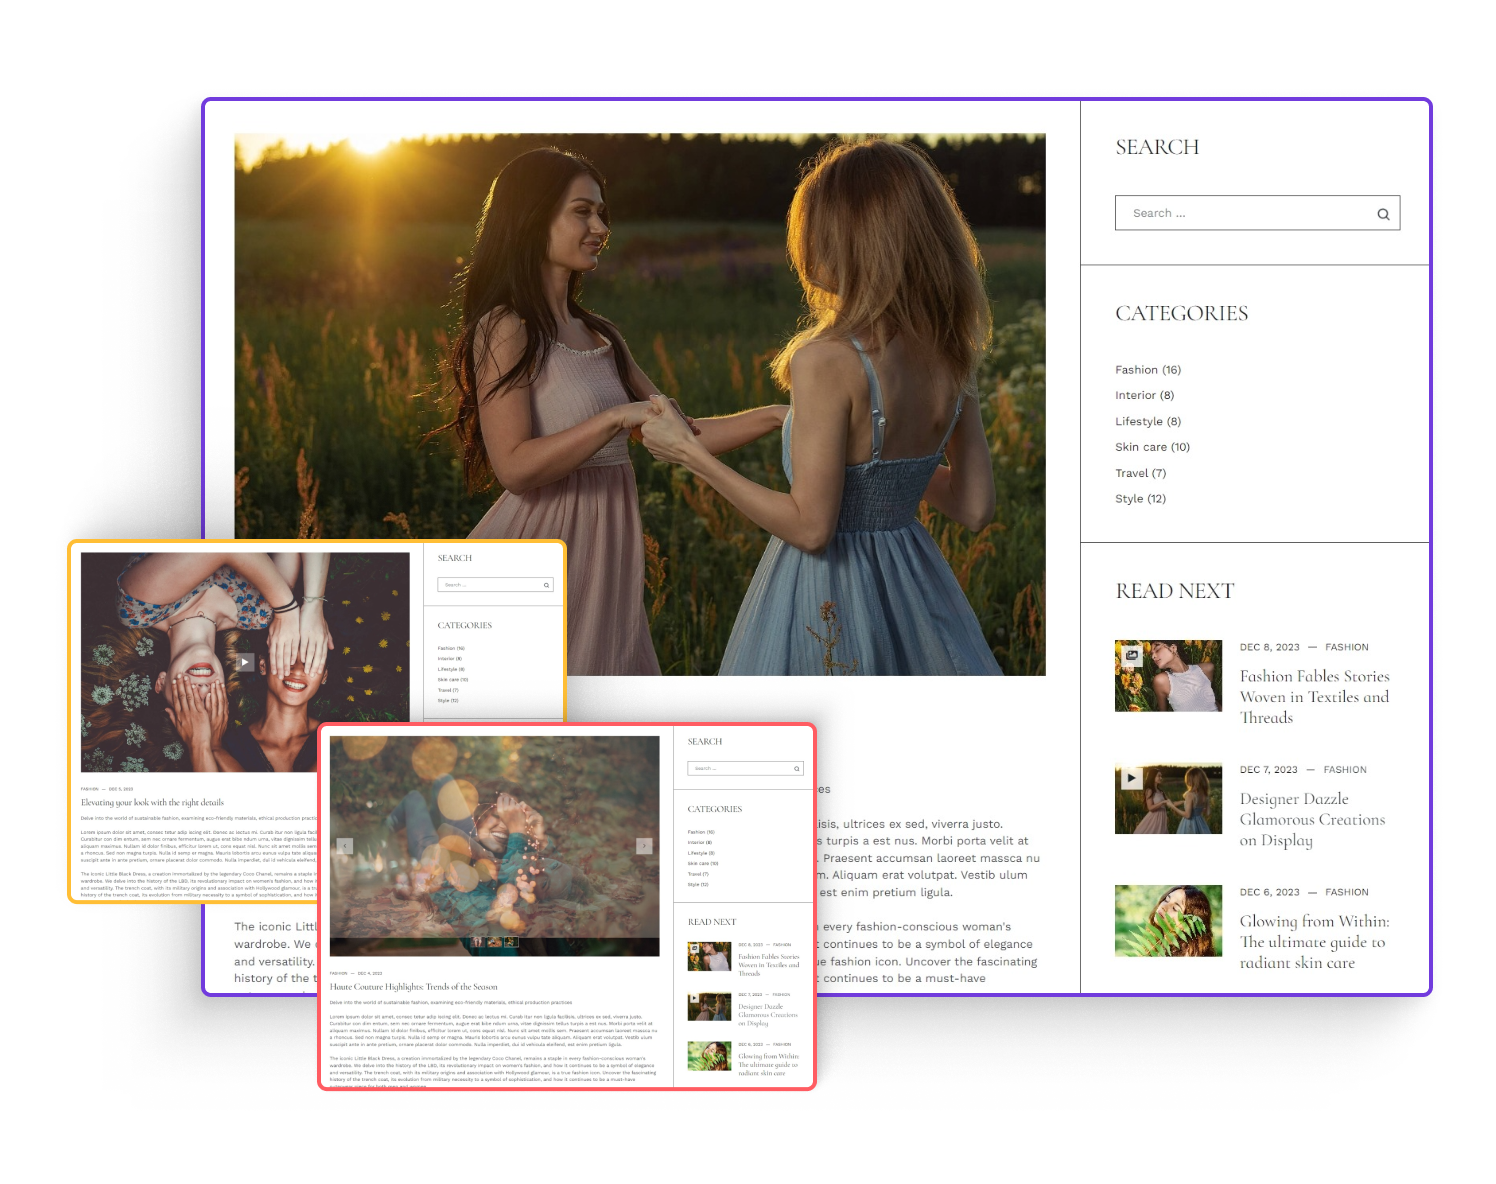
Article detail - layout 2
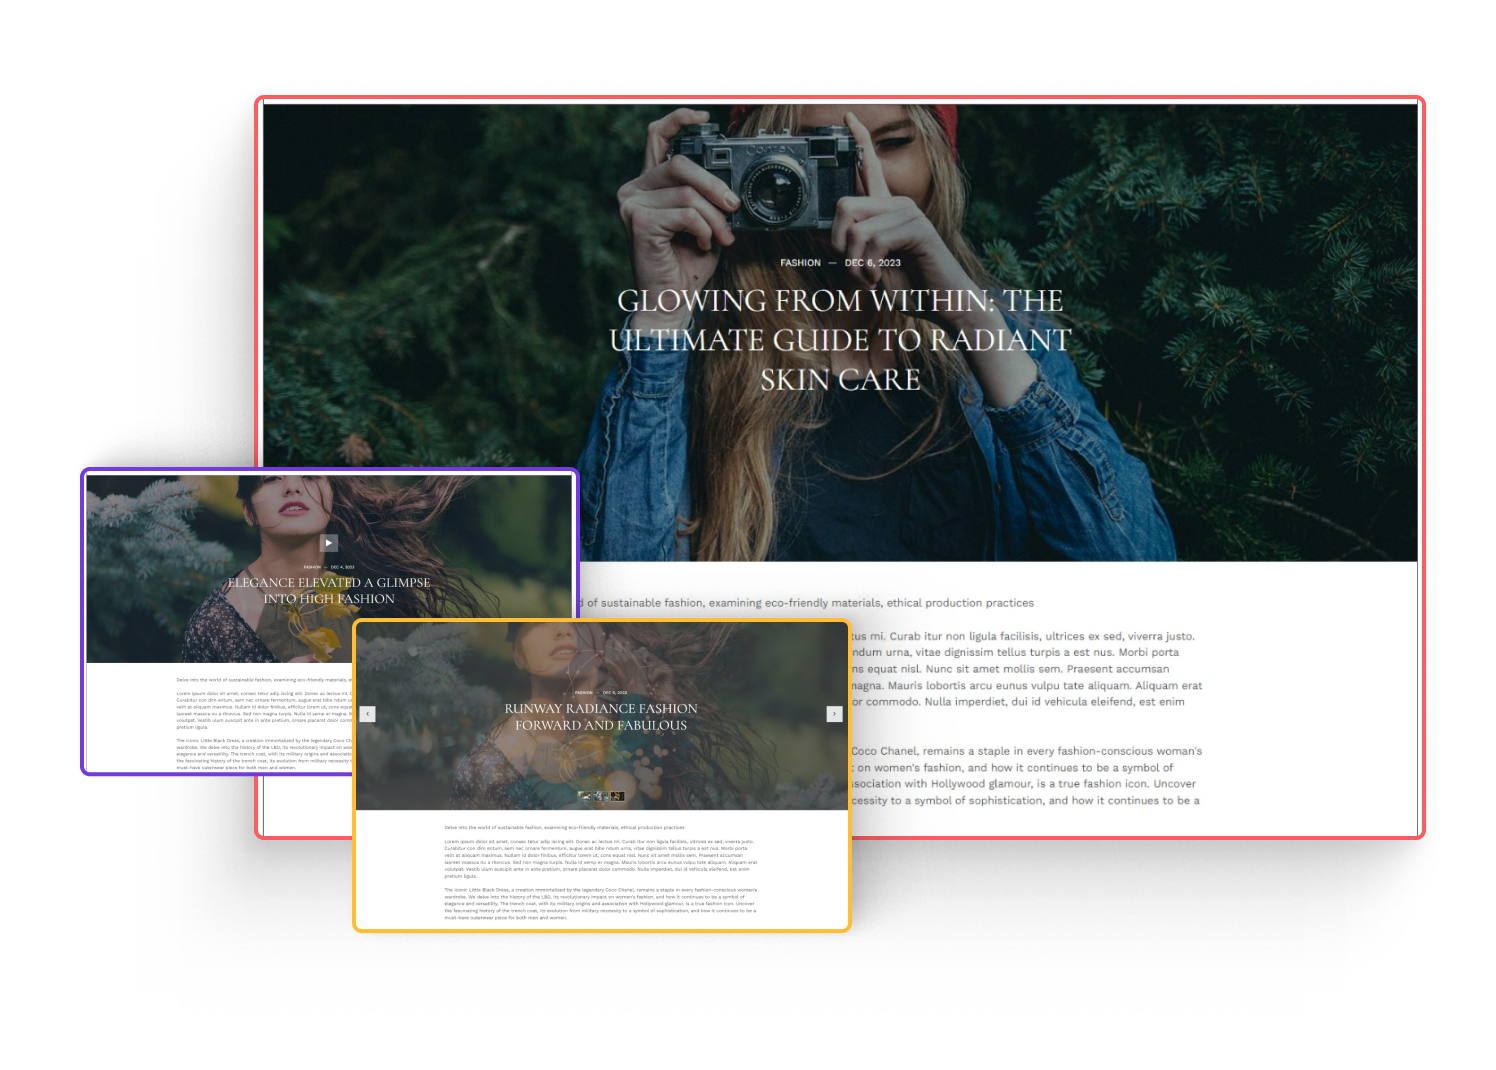
Article detail - layout 3
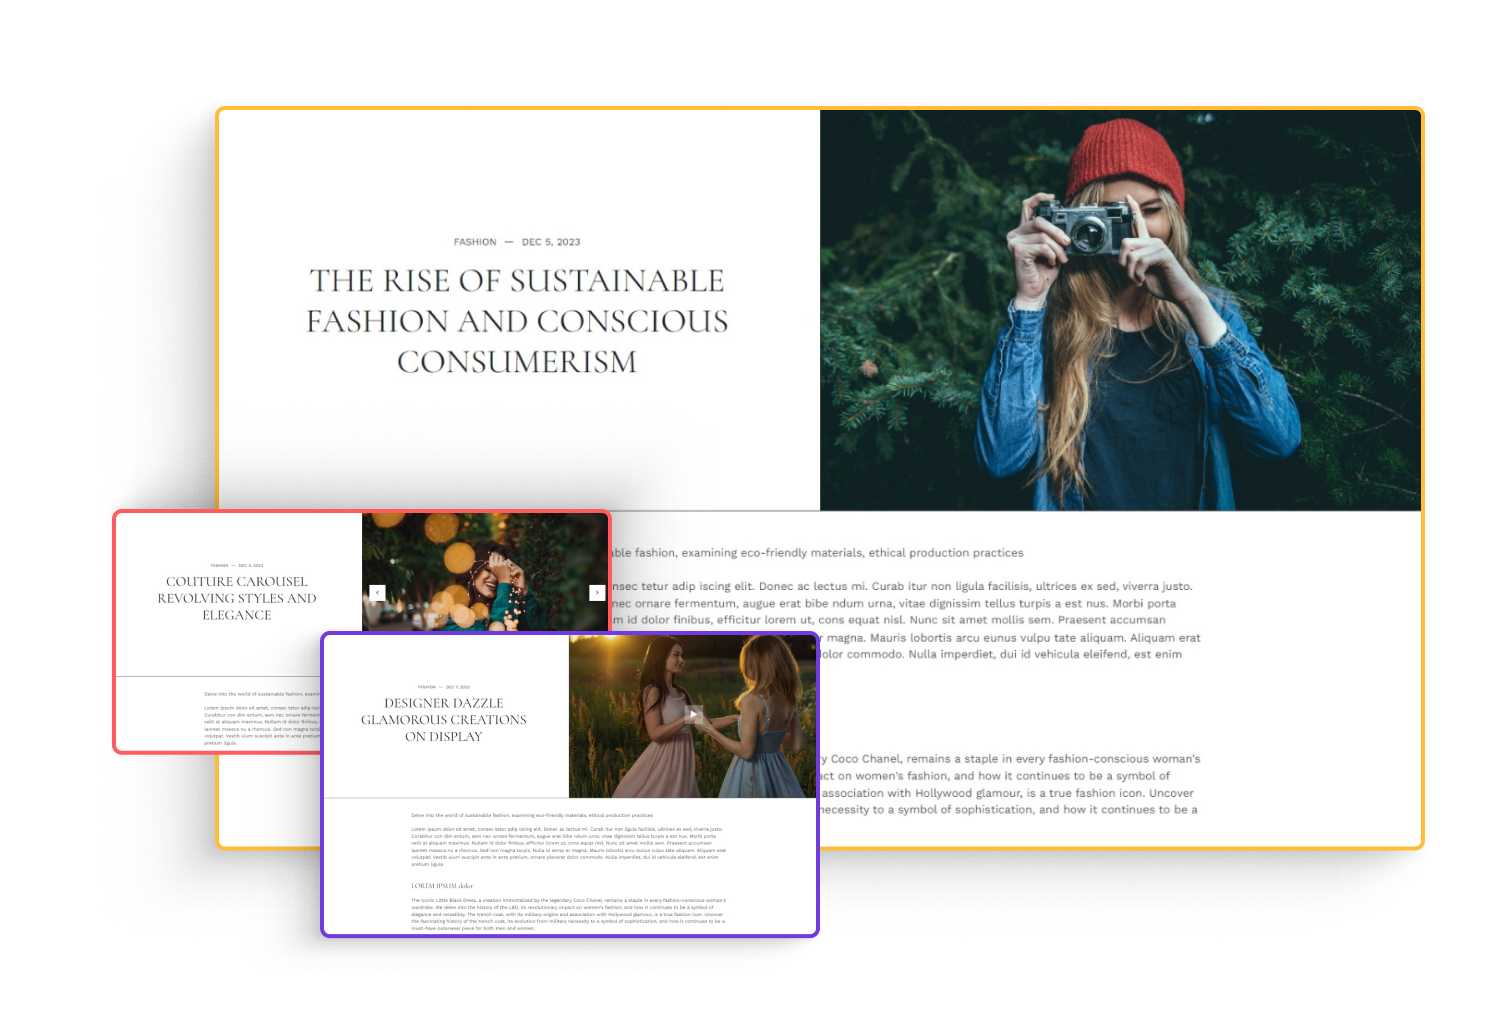
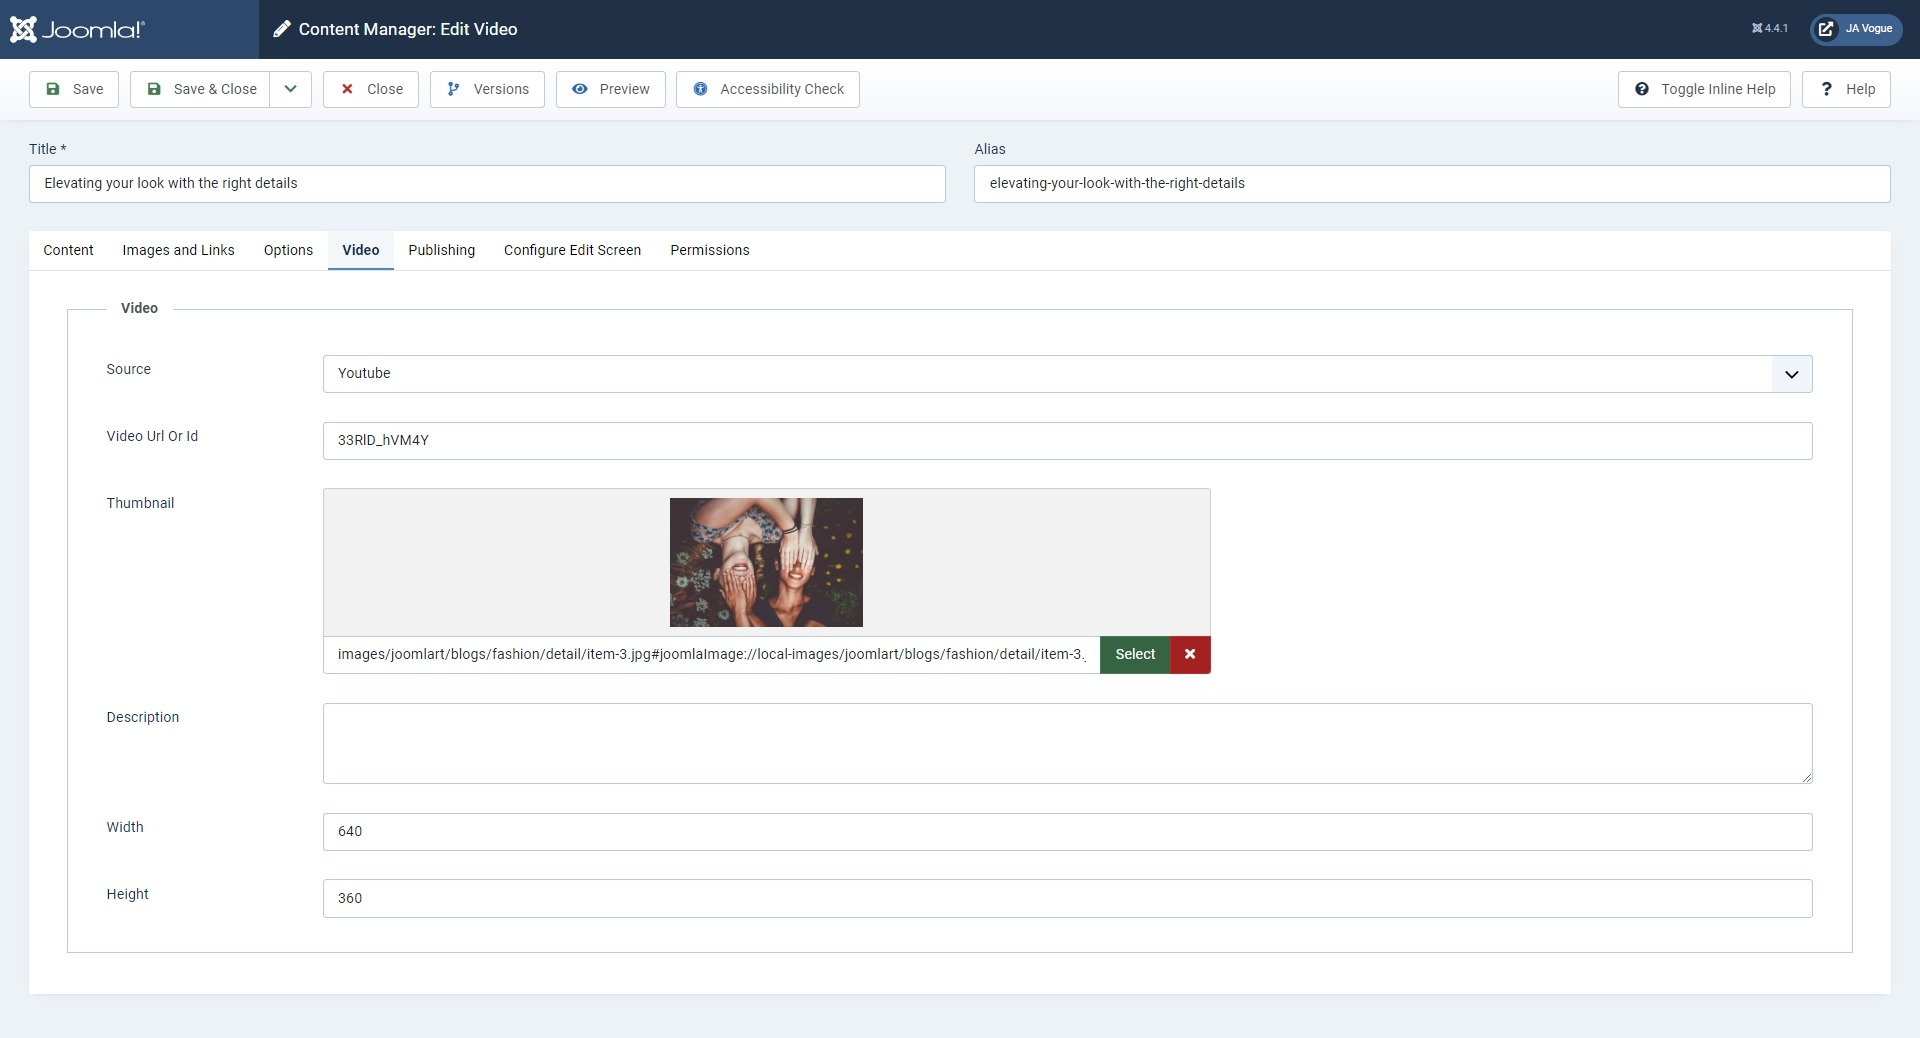
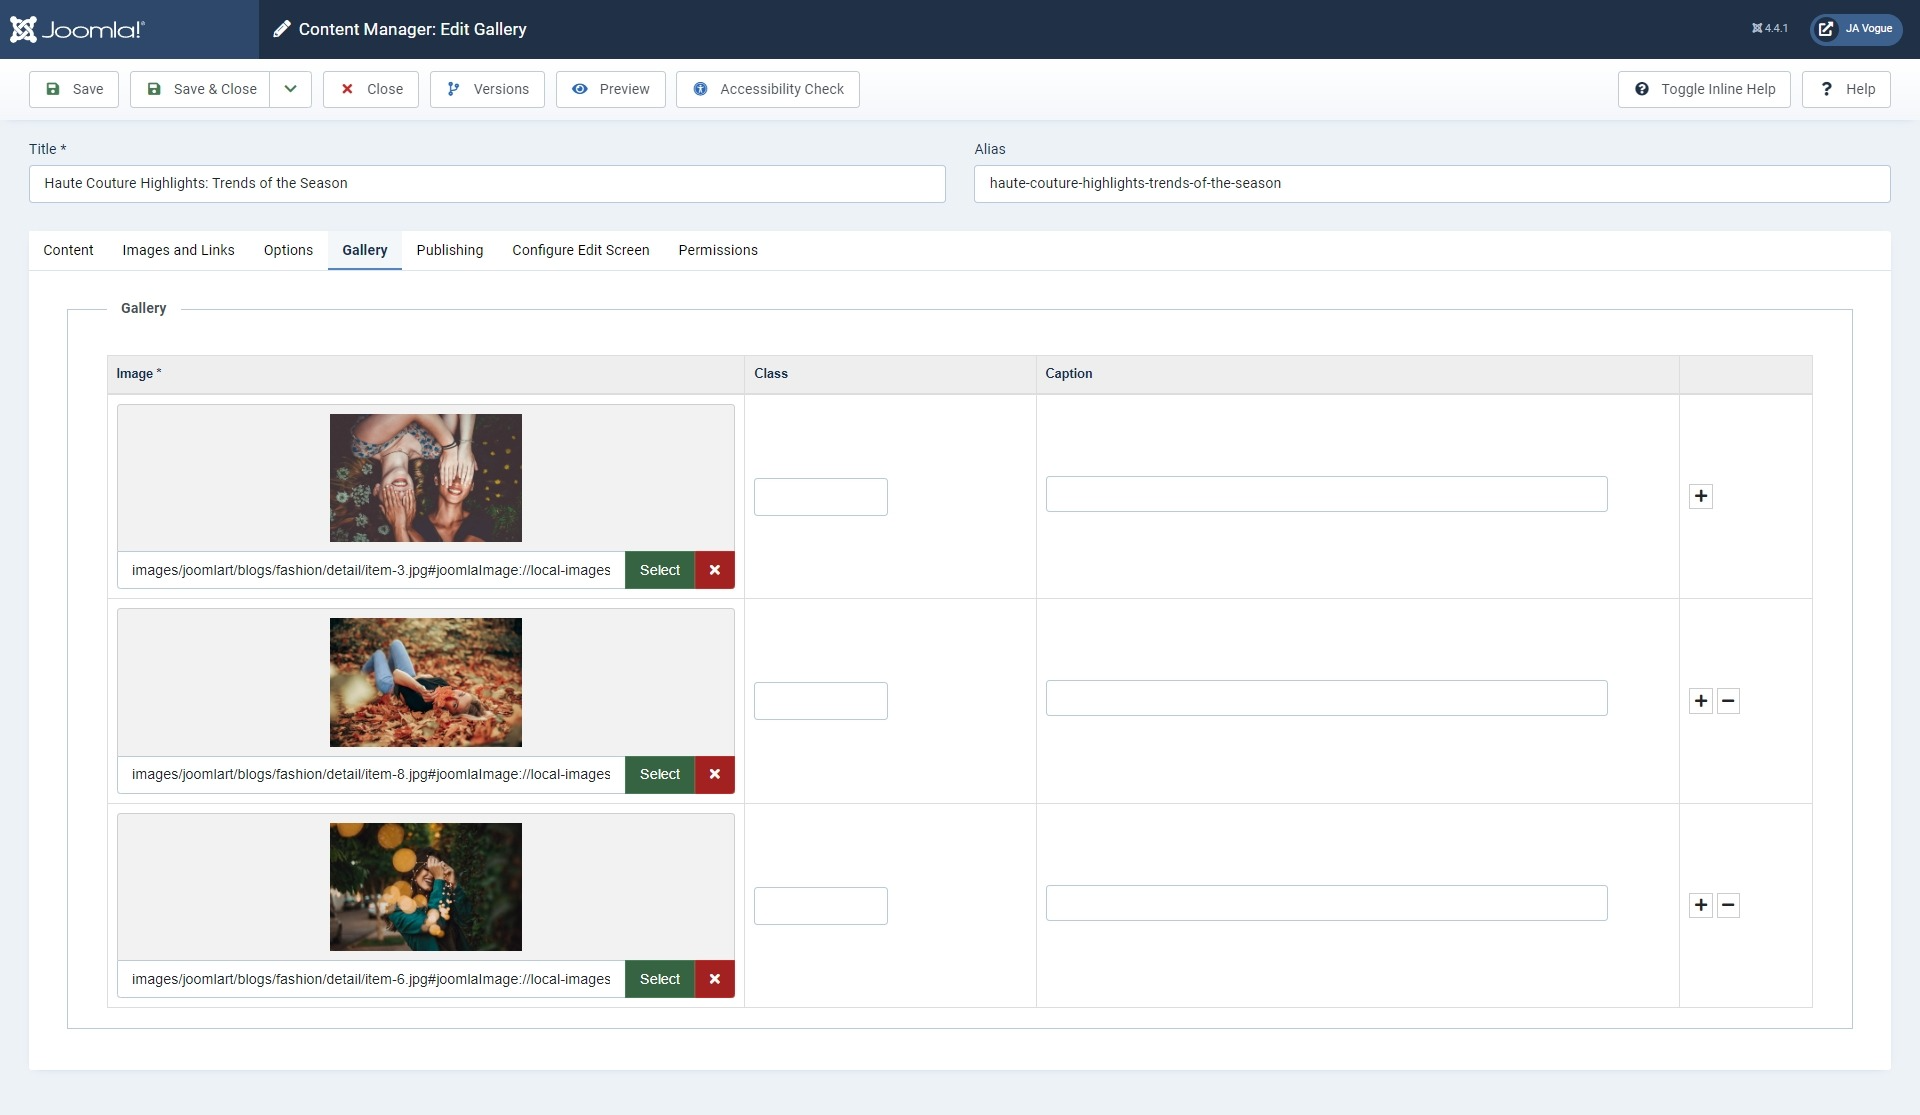
To create the Article video and Gallery type, you can go to the Backend » Content »

Then open the Gallery or Video tab to insert your info here:
Video Tab
Gallery Tab
Configure the article layout for your site.
#1. Global setting: all articles in your site will be using the layout.
Go to System > Global configuration then select Articles. In the Articles setting, select the layout and save.
Footer set up

This section include 5 module position
1. Footer logo: Custom Module
- Module position: footnav-1
- Module Suffix: NOT USED
- Layout: Default
2. Footer Contact: Custom module
- Module position: footnav-2
- Module Suffix: NOT USED
- Layout: Default
3. Explore: Menu Module
- Module position: footnav-3
- Module Suffix: NOT USED
- Layout: Default
4. Connect: JoomlArt Advanced Custom Module
Social : style-1
- Module position: footnav-4
- Module Suffix: NOT USED
- Layout: Default
5. copyright information: Footer Module
Module position: copyright
The JA Vogue template using the footer module and this module shows the Joomla! copyright information. If you want to remove it, you can Go to the Extensions > Module and hide the Copyright item. After hiding the Footer item, you can create a module and replace the Joomla! copyright information with your content you can Create Custom Module and select the footer position.
Upgrade Instruction
Take a full backup
Please always make a backup before proceeding to any of the upgrade processes. In case there is any problem, you can always restore the backup files.
The best method to upgrade JoomlArt products is using JA Extension Manager. The FREE extension brings a new way to manage extensions: upgrade, rollback, remote install, internal repository, compare versions, and more.
1. Set up JA Extension Manager Component
Download this free extension from this link. Install the extension to your website.
Go to Components > JA Extension Manager then selects Service Manager, now set JoomlArt as your default service. Next, hit the "Edit" button then add your account.

2. Upgrade JA Podcast template
Check the new version of the JA Podcast template. Use the filter to find the JA Podcast template then hit the "Check Update" button.
3. Upgrade T4 Framework and other JA extensions
Using the filter to find the extensions you want to upgrade (JoomlArt products only), hit the "Check Update" button to check for a new version then hit Upgrade Now to upgrade the extension to the latest version.
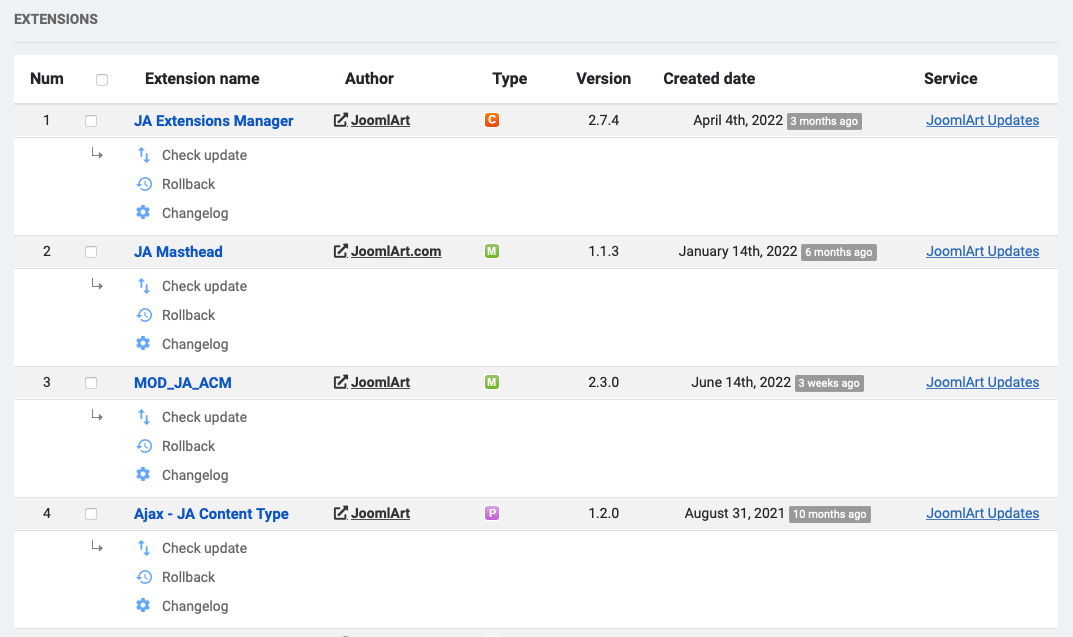
Check out more details about JA Extension manager
